Most Tesla owners reach for a standard floor jack without a second thought — and some of them destroy a $15,000 battery pack in the process. The Model Y’s skateboard architecture puts high-voltage cells directly along the underbody, meaning one wrong placement can cause irreversible damage before you even realize what happened. There’s also a specific vehicle mode most owners have never heard of that changes everything about this process.
Why Tesla’s Underbody Makes Standard Jack Placement Dangerous
Because Tesla places a large, flat battery pack across nearly the entire underbody floor, sliding a standard floor jack under the car and eyeballing a “solid-looking” spot puts you at serious risk of contacting the battery enclosure rather than a reinforced structural point. That’s not a minor inconvenience — it’s a genuine battery vulnerability that can result in pierced or deformed casing.
Here’s the core problem: conventional gas vehicles keep their central underbody relatively clear, so casual jack placement rarely causes catastrophic damage. Tesla’s pack changes that geometry entirely. The center lift risk is real because the battery sits broad, low, and unavoidably in the path of a misaligned jack. It’s also worth noting that Highland suspension geometry changes introduced with the 2024 refresh altered underbody clearance characteristics, meaning lift procedures that felt adequate on earlier builds may not translate safely to newer vehicles.
Standard saddle-style jack heads (the cupped or dished variety) make this worse by spanning the intended contact area and distributing force onto surrounding panels. Precision matters here — genuinely. Tesla designates four jacking checkpoints located near each corner of the car, keeping all safe lift points well clear of the battery’s footprint.
Tesla’s Four Designated Lift Points and Where to Find Them
You’ll find the front points tucked near the front left and right corners (distinct from the battery pack and side rails, which Tesla explicitly prohibits as lifting surfaces), while the rear points mirror that same corner-based geometry near the rear wheels.
To align your floor jack correctly, fit a Tesla-compatible jack stand adapter onto the jack head before contact, then center its locating pin into the small recessed hole at each lift point — a detail that sounds minor until you realize a misaligned pad can transfer load straight into the battery frame. Professional installation records and receipts from any prior suspension or undercarriage work can serve as valuable documentation if a warranty claim dispute arises from lifting-related damage.
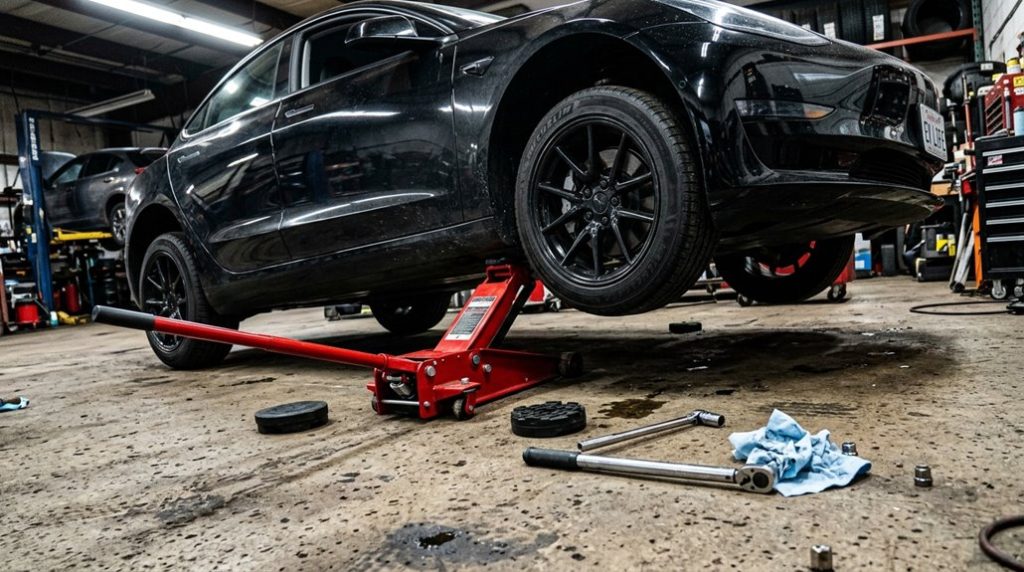
Because Tesla’s low ride height and large battery pack leave minimal clearance beneath the vehicle, a low-profile jack is essential for accessing those designated lift points without contacting the undercarriage.
Most Tesla owners don’t think about floor jack clearance until the moment they try to lift the car and realize their standard jack won’t fit—or worse, sits unstable under the weight of the battery pack. Avoid that risk entirely by using a low-profile hydraulic floor jack designed for EV clearance so you can lift your Tesla safely and without stressing the underbody during tire or brake work.
Locating Tesla Lift Points
Before you slide a jack under any Tesla, you need to know exactly where the vehicle wants to be lifted — because getting this wrong doesn’t just scratch paint, it can crack the battery frame and turn a routine tire rotation into a five-figure repair.
Tesla designates four body lift points arranged at each corner of the vehicle. You’ll find them illustrated in the “Jacking and Lifting” section of your model’s owner’s manual — not guessed, not eyeballed.
Model 3 and Model Y mark these points explicitly, warning against contact with the battery or side rails (critical during battery removal procedures).
Model S and Model X add Jack Mode requirements for air-suspension trims. Although Model S and Model X have ended production, they remain in circulation through the used market, meaning owners of these vehicles still need to follow model-specific lift procedures carefully.
Interior access panels near rocker trim can also reveal physical lift markers on some builds. Always position the vehicle centrally between lift posts before placing pads under any designated lift point to ensure proper alignment and load distribution.
Front Versus Rear Placement
Four designated lift points sit at the corners of every Tesla — two at the front, two at the rear — and knowing which pair you’re using determines everything about how you set up the jack.
Front jackpoints handle wheel service, brake work, and suspension inspection. Rear jackpoints cover tire rotation and rear-end access. Each pair serves a distinct purpose:
- Front points sit near the front corners, away from the battery pack’s forward edge
- Rear points mirror that layout symmetrically, keeping pads clear of the housing
- Neither set is interchangeable — Tesla’s manuals diagram each location model by model
Tesla’s explicit warning against contacting battery side rails makes pad placement non-negotiable. Check your owner’s manual diagrams before touching the underbody with anything.
Vehicles equipped with Smart Air Suspension require you to engage Jack mode before lifting, as the system can self-level even when the vehicle’s power is off.
Using lifting pucks at each designated point protects the battery enclosure and unibody structure by centering vertical force precisely through the factory jack-point recess rather than allowing raw jack saddle contact.
Aligning Jack Pad Correctly
Every Tesla has four designated body lift points — one near each corner of the chassis — and placing your jack pad anywhere else risks cracking the battery enclosure or bending the side rails (damage Tesla explicitly excludes from warranty coverage). Your owner’s manual illustrates exactly where these points sit, so consult it before touching a jack.
Each point features a visible circular hole designed specifically for pad alignment. You’ll thread your jack stand adapter’s locating pins directly into that hole, locking the pad onto the designated point rather than letting it wander onto adjacent battery or sill structure.
Raise the jack slowly, confirm the locating pins stay seated, and verify all four pads remain correctly positioned before lifting further. Skipping that check is how expensive mistakes happen. Tesla’s battery enclosure design(link) is central to protecting the pack that powers the same platform capable of accepting up to 250 kW at a V3 Supercharger, making structural integrity around that enclosure especially critical to preserve.
Lifting a Tesla without proper protection is where most DIY owners make an expensive mistake—one wrong contact point and you risk damaging the battery tray or underbody panels. Before you even place a jack under your Model 3 or Model Y, secure the lift points properly with a Tesla jack pad adapter set so every lift is stable, aligned, and safe from avoidable damage.
Which Jack Type Actually Works for Tesla Chassis Weight
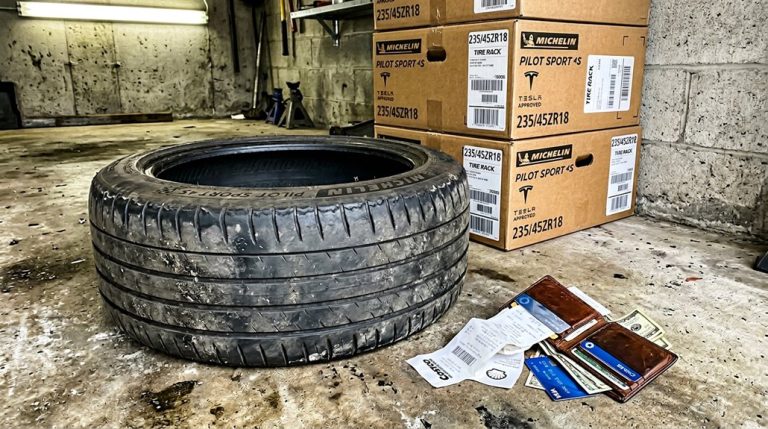
Before you grab just any floor jack off a shelf, you need to appreciate that Tesla’s curb weights (ranging from roughly 3,862 lb for a base Model 3 to 5,498 lb for a Model X Performance) are substantially heavier than the compact cars most consumer-grade jacks are rated for.
You’re not lifting the full vehicle weight at a single point, but axle loads on a Model S can still reach 3,360 lb at the rear alone, which means a jack’s capacity margin matters far more than whether it can technically get the car off the ground.
A low-profile floor jack rated at 3 tons is the practical choice for most Tesla work, since the battery pack reduces ground clearance considerably, and a 2-ton unit—while borderline adequate for a single Model 3 corner—leaves you with uncomfortably little margin when weight shifts during the lift.
The Model S Long Range, for instance, carries a 95 kWh usable pack mounted flat along the floor, concentrating significant mass low in the chassis and making proper jack point placement especially critical to avoid damaging the battery enclosure.
Tesla Chassis Weight Basics
Weight is the first problem you’ll run into when jacking a Tesla, and it’s a bigger one than most people expect.
Unlike conventional cars, Teslas carry dense battery thermal management systems packed beneath the floor, pushing curb weights well beyond typical sedans.
Consider these real numbers:
- Model 3: 3,880–4,065 lb curb weight (4,711–4,893 lb gross)
- Model Y: 4,381–4,416 lb curb weight (5,240–5,712 lb gross)
- Model X: 5,219–5,410 lb curb weight (6,164–6,250 lb gross)
That skateboard battery layout also shifts mass low and centered, which regenerative braking systems depend on for stable energy recovery during deceleration.
Your jack must handle gross weight, not just curb weight — that distinction matters more than most guides acknowledge.
The Model X is an especially demanding case, with its 100-kWh battery pack contributing significantly to a curb weight that tops 5,400 lb in Plaid trim, making it one of the heaviest consumer SUVs you’re likely to encounter in a home garage setting.
Recommended Jack Capacity
Choosing the wrong jack capacity for a Tesla isn’t just an inconvenience — it’s a genuine safety failure waiting to happen.
A 2-ton jack (4,000 lb rated capacity) sounds substantial until you realize a Model Y weighs roughly 4,400 lb, leaving zero capacity margin before you’re operating at the limit. That’s not rated redundancy — that’s wishful thinking.
A 3-ton jack (6,000 lb capacity) is your practical baseline across all mainstream Tesla models.
It clears Model X‘s 5,410 lb maximum comfortably, handles Model S without sweating, and gives Model 3 owners meaningful overhead.
Because Tesla’s mass distributes unevenly between axles (sometimes 48:52 front-to-rear), corner loads shift during lifting.
Your jack needs built-in buffer — choose capacity for your heaviest realistic vehicle, not your lightest trim.
The Model Y’s position as Tesla’s top-selling model — moving over 1.2 million units in 2023 alone — makes proper jack selection especially relevant given how many owners are performing their own tire rotations and maintenance work.
Floor Jack Vs. Alternatives
Once you’ve settled on the right capacity, the jack type itself determines whether the whole lift process is actually workable. Tesla’s corner-by-corner lifting workflow demands precise positioning and stable stand placement — requirements that eliminate most alternatives immediately.
Here’s how the options stack up:
- Emergency scissor jacks offer minimal lift height and a narrow base, making them roadside tools, not shop tools
- Vertical bottle jacks create clearance problems under low Tesla bodywork (their upright form factor simply doesn’t cooperate)
- Low profile floor jacks win outright — their horizontal approach and hydraulic efficiency make rolling into tight underbody positions genuinely practical
Tesla’s procedure expects you to raise the vehicle, then transfer weight onto jack stands. Floor jacks handle that sequence cleanly. The alternatives technically lift — they just don’t lift *well*. It’s also worth noting that Tesla’s instant torque and vehicle weight accelerate tire wear faster than most owners expect, which means more frequent tire rotations and a greater practical need for a reliable jack setup in the first place.
Seating the Jack Pad Adapter on Tesla Lift Points
Slipping a jack pad converter into the wrong position on a Tesla is one of the fastest ways to turn routine maintenance into an expensive mistake—so placement matters from the first moment of contact. Tesla designates specific body lift points for a reason: lifting from battery rails or side sills voids your warranty and risks structural damage.
Jack pad fitment starts with recess cleanliness—clear out debris before seating the adaptor. For Model S and X, place the adaptor in the middle hole of the three-hole lift point. Model 3 and Y each use a single hole per corner. The adaptor must sit flush before you apply any load.
Once seated, center your floor jack saddle fully over the adaptor (not on its edge). A low-profile jack helps here. The surface beneath should be flat, stable, and free from anything that causes unwanted movement. On the Cybertruck, this is especially critical because its structural battery pack doubles as a load-bearing floor element, meaning improper lift points can transfer force directly into a component that is integral to the vehicle’s overall rigidity.
Activate Tesla Jack Mode Before the Wheels Leave the Ground
With your jack pad adaptor seated flush and the floor jack centered underneath, the next step isn’t lifting—it’s telling the Tesla what’s about to happen. Jack Mode exists for one reason: disabling air suspension’s self-leveling reflex before a wheel leaves the ground.
Before you lift, tell the Tesla what’s coming—Jack Mode silences the suspension’s instinct to fight back.
Here’s the activation path:
- Traverse to Controls → Service → Jack Mode on the touchscreen and confirm the diagnostic warnings that appear before proceeding.
- Set suspension height to Very High (Model S) or Medium (Cybertruck) *before* triggering Jack Mode—height adjustment locks afterward.
- Verify Jack Mode shows as active on-screen before applying any upward force with the jack.
Activation timing isn’t optional. If air suspension attempts self-correction mid-lift, the vehicle shifts unpredictably—dangerous for you, catastrophic for the battery frame.
Once confirmed active, place wheel chocks diagonally opposite your lift point. Only then does the floor jack handle actually turn.
Raise, Set Stands, and Lower a Tesla Without Damaging the Battery
Jack Mode is active, the puck is seated, and the chocks are set—now you actually lift the car. Pump the jack slowly, watching puck alignment constantly as load builds; any sideways drift means stopping immediately and recentering. The puck must compress evenly, not tilt toward the battery enclosure.
Once you’ve got enough clearance, slide your jack stand underneath the designated support point. Lower the jack slightly until the stand’s locking pin aligns with its hole, then insert the pin—that mechanical lock is your battery protection, not the jack itself. Settle the vehicle’s weight fully onto the stand before removing the jack.
Lowering reverses this exactly. Reinstall the jack under the support point, take the weight, remove the stand pin, then descend slowly. Rushed descents transfer sudden force to the battery undertray edges (bad physics, worse outcomes).
Finish with the car sitting level, no alternatives left under load.
Pre-Work Safety Checks Every Tesla DIY Lift Requires
Before the car goes up, you’ve got one more layer of groundwork to cover—and getting it wrong at this stage is exactly how a straightforward oil change becomes a very expensive afternoon.
Tesla’s underbody doesn’t forgive improvisation, so lock in these checks before touching the hydraulic release.
- Operator PPE: Safety glasses and gloves are non-negotiable—battery venting during certain fault conditions releases gases you don’t want near your face.
- Equipment inspection: Confirm lift arms, pads, and locking mechanisms are functional and correctly positioned for Tesla-specific chassis contact points.
- Work-area clearance: Check overhead clearance, close any open doors or liftgate, and clear the bay floor completely.
Once those boxes are ticked, perform a test raise of roughly two to three inches.
Verify balance, confirm all four pads are holding correctly, then engage the safety locks before any actual work begins.
Frequently Asked Questions
Can I Use the Same Jack for Both Model 3 and Model S?
One size doesn’t fit all—verify your jack’s weight capacity and jack pad fit each model’s lift points, clearance, and suspension needs before you lift either vehicle.
Does Tesla Warranty Coverage Change if I Self-Perform a Lift?
Self-performing a lift doesn’t automatically void your warranty, but warranty implications vary. If you cause damage, Tesla may deny post-repair claims on affected parts. Maintain service records, as they’re essential during ownership transfer.
How Long Can Jack Mode Remain Active Before Automatically Disengaging?
Like a loyal sentry, Jack Mode won’t abandon its post—it has no timeout duration. You manually disengage it after lowering. Tesla’s manuals specify no automatic cutoff, keeping battery preservation and safety interlocks under your direct control.
Are Aftermarket Jack Pad Adapters Officially Approved by Tesla for Home Use?
Tesla hasn’t officially approved aftermarket jack pad adapters for home use, so you’re assuming aftermarket liability. Always verify compatibility testing results for your specific model and year before lifting, especially with newer Model Y variants.
Can Cold Weather Affect Jack Pad Grip on Tesla’s Composite Underbody Panels?
Even if your pad feels secure, cold contraction from rubber hardening can reduce grip on Tesla’s composite underbody panels, so you’ll want to clean the lift point and check alignment carefully before raising.