Tesla ownership slashes maintenance costs by up to 70% — but calling it “low maintenance” misses the point entirely. Tires wear faster. Brake fluid still degrades. Cabin filters still clog. Skip the wrong service at the wrong time, and that savings evaporates fast. This guide breaks down every cost, every schedule, and every hidden variable that separates Tesla owners who genuinely save money from those who just think they do.
What Tesla Maintenance Actually Costs Compared to Gas Vehicles
When you strip away the marketing noise and look at actual ownership data, Tesla’s maintenance costs run roughly 50%–70% lower than comparable gasoline vehicles—not because Teslas are maintenance-free, but because electric drivetrains eliminate entire categories of service that gas engines demand. You’re skipping oil changes, transmission fluid, spark plugs, and exhaust repairs entirely.
Annually, Model 3/Y owners typically spend $257–$643, versus $1,200–$1,500 for comparable gas vehicles. Over five years, that gap widens to roughly $3,500–$4,500 in maintenance savings alone—before counting fuel.
Hidden costs like tire wear (accelerated by Tesla’s torque-heavy launches) and occasional out-of-warranty repairs still exist, so budget realistically. Those hidden costs also carry resale impact; a well-documented maintenance history commands stronger resale value than a neglected one. Serious failures such as battery or drive-unit issues are covered by an 8-year warranty spanning 100,000–150,000 miles on most modern Teslas.
How Tesla Maintenance Differs From Traditional Car Ownership
When you own a Tesla, you skip the entire ritual of engine oil changes (no combustion engine means no oil to degrade from heat and fuel dilution), spark plug replacements, and traditional tune-ups — maintenance items that typically cost gas-car owners hundreds of dollars annually.
Software updates handle what tune-ups once did mechanically, pushing calibration changes, battery management adjustments, and performance enhancements directly to your car overnight while you sleep. Tesla’s internal display also puts useful vehicle data at your fingertips, including the ability to check tyre pressure directly from the screen without needing any external tools.
With roughly 20 moving parts in a Tesla drivetrain versus around 2,000 in a comparable internal combustion engine, you’re simply dealing with a machine that has far fewer components capable of wearing out, breaking down, or demanding your wallet’s attention. Brake pads also last significantly longer on Teslas, with replacement intervals reaching around 100,000 miles compared to the traditional 50,000-mile threshold on gas-powered vehicles.
No Engine Oil Changes
One of the most immediately practical differences you’ll notice switching from a gasoline car to a Tesla is the complete absence of engine oil changes from your maintenance calendar. There’s no combustion process, so there’s no oil degrading under heat and pressure. That eliminates an entire service category.
Here’s what you won’t be scheduling anymore:
- Engine oil draining and refilling (typically every 3,000–7,500 miles in gas vehicles)
- Oil filter replacements
- Oil pan or drain plug inspections
- Traditional motor servicing tied to lubrication breakdown
Tesla’s drivetrain uses internal battery lubrication and sealed drive unit fluid — neither requires routine consumer attention. The drive unit fluid is effectively fill-for-life under normal conditions.
You’re not avoiding maintenance entirely; you’re redirecting it toward tires, brakes, and cabin filters instead. Skipping oil changes also means no messy oil disposal required, which carries a real environmental benefit alongside the convenience.
Software Replaces Tune-Ups
If you’ve spent years owning a gas car, you already know the tune-up rhythm: spark plugs, ignition timing, throttle body cleaning, maybe a distributor cap if the car’s old enough. Tesla eliminates that entirely. Remote updates deliver performance enhancements, safety patches, and even 0–100 km/h improvements directly to your parked vehicle overnight via Wi-Fi. No dealership. No appointment.
Tesla replaces mechanical calibration with software calibration. Acceleration response, Autopilot logic, and charging strategy all evolve through updates rather than wrench time. Set your preference to Advanced under Controls > Software for earlier access to new builds.
One caveat worth noting: feature rollback occasionally happens when Tesla quietly reverses a behavior mid-cycle. Pay attention after updates. Your car genuinely might drive differently by morning. The Advanced setting prioritizes early rollout of new features and bug fixes for eligible vehicles, rather than waiting for the more stable Standard release cycle.
Fewer Moving Parts
Software updates handling what tune-ups once did is a symptom of something deeper: Tesla’s powertrain design is fundamentally different from anything internal combustion has produced.
Traditional engines contain 2,000+ moving parts—pistons, camshafts, valves, timing belts. Tesla’s electric drivetrain uses roughly 17–20. That gap explains everything about simplified servicing.
Those compact drivetrains eliminate entire maintenance categories:
- No engine oil changes (no combustion engine exists)
- No spark plugs, timing belts, or valve adjustments
- No exhaust system requiring periodic inspection
- Fewer friction points mean less wear accumulating over time
You’re not skipping maintenance—you’re skipping maintenance that was only necessary because internal combustion is mechanically expensive by nature.
What remains concentrates on tires, filters, and chassis components. That’s a fundamentally different ownership experience. Regenerative braking returns energy back to the battery, which means brake pad replacements are rare compared to traditional vehicles.
The Tesla Maintenance Summary Screen Explained
Tesla builds a digital paper trail for you through the Maintenance Summary screen (found under Controls > Service > Maintenance), tracking each routine item’s last-performed date, recommended interval, and odometer reading at service time — effectively turning your touchscreen into a maintenance logbook that persists with the vehicle through ownership transfers.
When you or an independent shop completes a task like a tire rotation or cabin air filter swap, you can mark it as performed directly on the screen, which automatically recalculates the next service reminder without any dealership involvement.
These records survive factory resets and attach permanently to the vehicle’s service history, so resetting a reminder after a DIY brake job isn’t just about silencing a notification — it’s logging documented proof that the work happened. For owners who want to go deeper, a more robust Service History is accessible through Service Mode and includes correction codes along with identification of whether a record was added by the user or Tesla.
Tracking Maintenance Status
Buried inside your touchscreen — not the app, the car itself — is a dedicated maintenance tracking screen that most owners walk right past: Controls > Service > Maintenance.
It’s a checklist-style summary that logs service timestamps and generates owner notifications based on your vehicle’s specific configuration and software version.
Here’s what it actually tracks:
- Last service dates with mileage captured automatically at the time of recording
- Upcoming intervals for items like wiper blades and cabin filters
- Persistent history that survives factory resets and transfers to future owners
- Model-specific content that varies depending on vehicle trim and software build
You’re still responsible for accuracy — DIY work won’t log itself — but this screen functions as a legitimate digital service record. Once an entry is recorded, it cannot be modified or deleted and will persist permanently in the vehicle.
Resetting Service Reminders
Knowing where your records live is only half the job — the other half is keeping them accurate after you’ve done the work.
Once you complete a maintenance item, navigate to Controls > Service and select the relevant task to trigger a touchscreen reset. The vehicle captures a timestamp and current mileage, then resets the interval so the next reminder fires on schedule. That’s it — no dealer handshake required.
Service persistence means your history stays embedded in the vehicle itself, surviving factory resets and transferring to future owners automatically.
For tire or wheel work specifically, a separate path applies: Controls > Service > Wheel & Tire, then select Tires or Wheels. Skipping this step after a tire swap can leave your driving experience slightly degraded, which nobody wants. This reset is especially useful when work is done at a non-Tesla service center, where the technician may not perform the in-vehicle reset on your behalf.
Tesla First-Week Inspection Checklist: Tires, Alerts, and Charging Setup
The first week with a new Tesla isn’t the time to relax—it’s the time to audit. Every system needs verification before your return window closes.
Start with these four priorities:
- Tire inspection: Check pressure against the driver-side door pillar label (not the sidewall), and scan for cuts, bulges, or embedded screws.
- Alerts: Review the touchscreen after every drive for unexpected warnings or persistent indicator lights.
- Charging verification: Plug in, confirm the session starts cleanly, and watch for error messages on the app or touchscreen.
- TPMS behavior: A flashing light that holds steady signals a malfunction—not just low pressure.
Document everything in the Tesla app immediately. Multiple service requests can run simultaneously, so don’t batch problems hoping they’ll resolve themselves. Make sure to test Supercharger compatibility and performance within your first week of ownership.
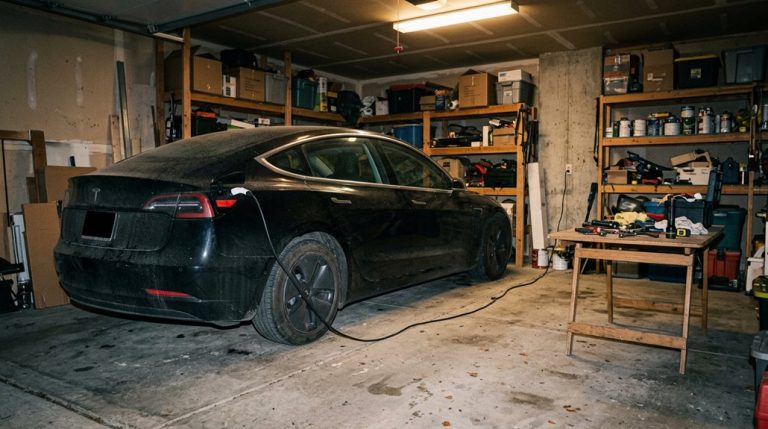
How to Set Up Home Charging the Right Way
Getting home charging right from day one saves you from the frustrating ritual of waking up to a half-charged car, and it starts with one honest question: Wall Connector or Mobile Connector?
The Wall Connector is the clear winner for daily drivers, providing up to 44 miles of range per hour on a dedicated 60-amp circuit with 6-gauge wiring, while the Mobile Connector earns its keep as a flexible backup on a standard 240-volt outlet.
Once your hardware is sorted and a licensed electrician has signed off on the panel capacity, you’ll lock in the real efficiency gains by scheduling charges during off-peak hours through the Tesla app. Installing a new 240-volt outlet typically runs between 750 and 1,500 dollars, making it a manageable upfront cost for most homeowners.
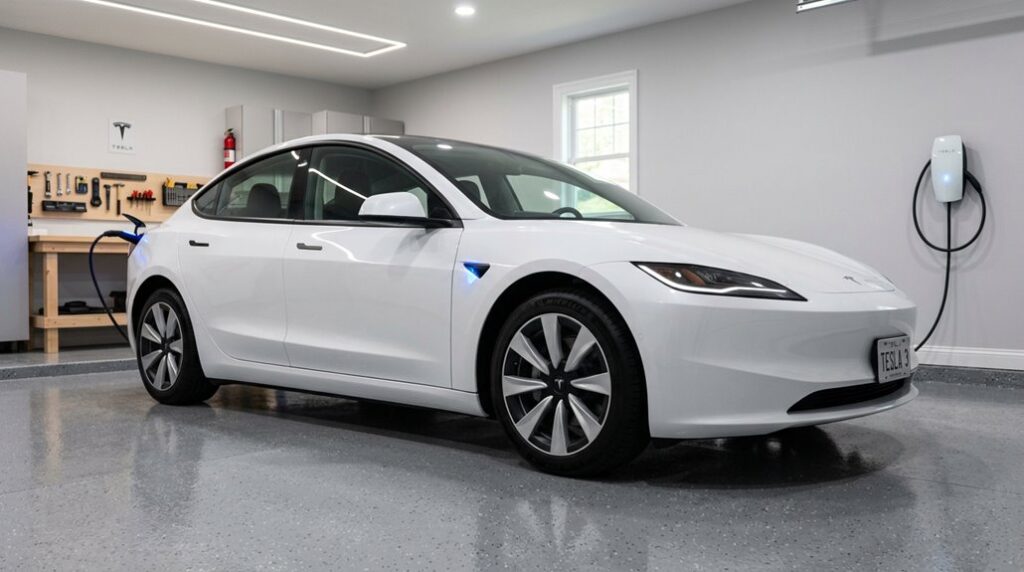
Choosing Your Home Charger
Home charging is where daily Tesla ownership either clicks into place or quietly frustrates you—so picking the right setup from the start matters more than most new owners expect. Tesla offers three hardware tiers, each solving a different problem.
- Mobile Connector: Portable, works on standard outlets, tops out at 30 miles/hour on 240V
- Wall Connector: 48 amps, 11.5 kW, Wi-Fi enabled with smart scheduling to dodge demand charges
- Universal Wall Connector: Same specs, adds J1772 compatibility for NACS adoption households with mixed EVs
- Adapter options: Universal Wall Connector handles non-Tesla vehicles without separate hardware purchases
For a Tesla-only household, the Wall Connector wins on simplicity and cost. Mixed-EV households should seriously consider the Universal Wall Connector’s built-in flexibility. New Tesla purchases no longer include charging hardware by default, meaning a dedicated home charging station is something buyers need to plan and budget for after April 17, 2022.
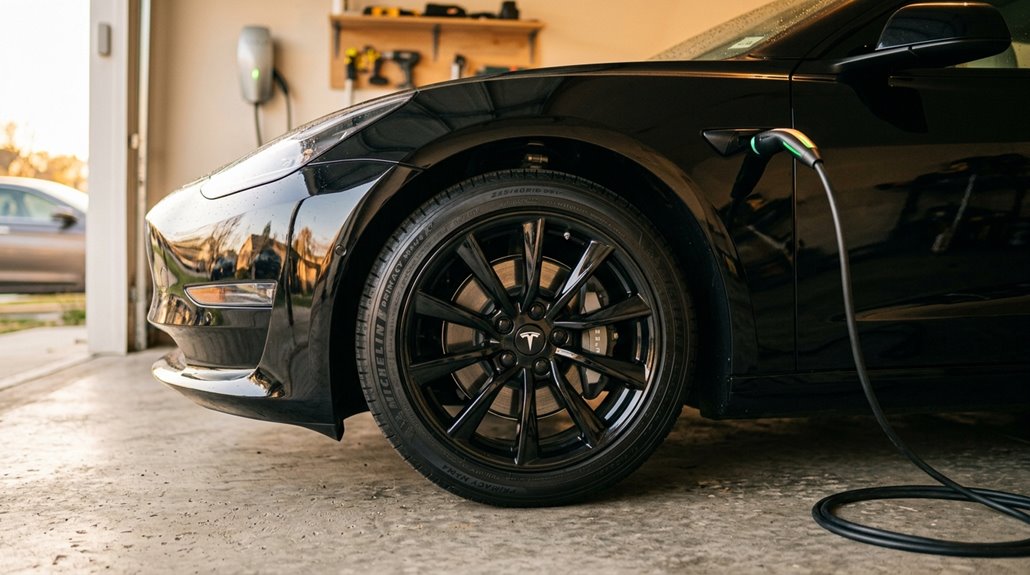
Installation Tips and Safety
Picking the right charger only gets you halfway there—the installation decides whether that hardware actually performs. You’ll need a dedicated 60-amp circuit, proper grounding checks, and clean cable management before commissioning begins.
| Factor | Requirement | Why It Matters |
|---|---|---|
| Circuit Size | 60-amp dedicated | Prevents breaker trips |
| Mounting Height | 18 inches minimum | Avoids ground moisture |
| Cable Reach | Within 15 feet | Reduces port strain |
Shut off power completely, then confirm dead circuits with a voltage tester—don’t guess. Mount your Wall Connector level, anchor it securely, and connect it to Wi-Fi during commissioning. Pull permits. Inspectors catch what installers miss. The same principle applies in high-heat climates like Las Vegas, where increased demand on cooling systems puts additional pressure on your home’s electrical infrastructure during summer months.
Optimizing Daily Charging Habits
- Keep daily limits at 80% (non-LFP models especially)
- Practice peak avoidance by never sitting at 100% overnight
- Use scheduled top-ups so charging finishes near departure time
- Avoid dropping below 20% regularly—deep cycles strain chemistry
Slower Level 2 home charging generates less heat than Supercharging, which compounds benefits over thousands of cycles.
LFP batteries are an exception to the 80% rule and should be charged to 100% at least once per week to keep the battery management system properly calibrated.
Small, consistent habits protect your investment longer than any single dramatic intervention.
Level 1 vs. Level 2 vs. Supercharger: When to Use Each
Choosing the right charging method isn’t complicated once you grasp what each tier actually supplies. Level 1 (120V) adds just 2–6 miles per hour—fine for light commuters, genuinely painful for anyone driving 40+ daily miles.
Level 2 (240V) changes everything, providing 12–32 miles per hour and handling overnight charging without drama. Most owners run a 48A home unit producing roughly 11.5 kW, which refills a Model Y Long Range before breakfast.
Superchargers are purpose-built for roadside supercharging during highway trips, not your Tuesday grocery run—V3 units push 250 kW, adding ~200 miles in 15 minutes. Cold weather slows all three tiers noticeably. Home electricity consistently costs less than public fast-charging, making Level 2 the sensible default for everyday ownership. Most Teslas use the North American Charging Standard connector, but a J1772 adapter is included with every vehicle to access the broader network of public Level 1 and Level 2 stations.
Tire Pressure, Preconditioning, and Routing Tricks That Extend Range
Keeping your tires inflated to Tesla’s recommended cold pressure (typically 42–45 PSI for Model 3 and Model Y, 40–42 PSI for Model S and Model X) directly reduces rolling resistance, which is the friction force your motor fights with every rotation, and even a 5 PSI drop can measurably cut your range. Before you head out on any significant drive, precondition your battery and cabin while still plugged in, because pulling that thermal energy from the grid instead of the pack preserves usable charge from the first mile. Route through the Tesla guidance system rather than a third-party app, since the onboard routing actively prepares battery temperature for efficient discharge and positions Supercharger stops at intervals that prevent you from arriving with an anxiously low state of charge. Because Tesla battery packs add 800–1,200 lb compared to similar-sized combustion vehicles, tires must meet higher load ratings to safely support that weight while maintaining the efficiency gains you’re working to protect.
Optimal Tire Pressure Benefits
Tire pressure is one of those maintenance items Tesla owners routinely overlook until the TPMS warning light ruins their morning commute.
Your pressure sensors exist for good reason — running outside the recommended 42–45 psi cold range costs you real efficiency and real money.
Here’s what proper inflation actually delivers:
- Better range — lower rolling resistance means less motor draw per mile
- Extended tread life — even contact pressure across the tire surface reduces uneven wear
- Reduced heat buildup — underinflated tires flex excessively, generating dangerous internal heat
- Improved ride comfort — correct pressure absorbs road imperfections without the bouncy harshness of overinflation
Always measure cold, before driving raises the reading artificially.
Your door placard beats any internet recommendation every time. If your vehicle’s site encounters a DNS resolution conflict, the owner must log in and update the DNS A records to restore proper access.
Battery Preconditioning Strategies
Most Tesla owners treat battery preconditioning as an optional feature rather than the essential tool it actually is — and that decision quietly costs them range, charging time, and regenerative braking strength every cold morning.
Cold batteries slow chemistry, suppress regen until roughly 10°C (50°F), and limit peak charging power.
Your fix is straightforward: use charger targeting by directing navigation directly to a Supercharger, which triggers automatic preconditioning and can raise battery temperature to approximately 46°C (115°F) near arrival.
For daily routines, Scheduled Departure handles precondition timing automatically, calculating when warming must begin so you’re ready at your chosen hour.
Keep the car plugged in during the process — otherwise you’re pulling warmth from the pack itself, which defeats the purpose entirely. Preconditioning also directly improves regenerative braking performance, allowing the system to recapture more energy once the battery reaches its optimal operating temperature.
Smart Routing Range Tricks
Although range anxiety gets most of the headlines, the real killers are the small inefficiencies you can actually control — tire pressure, routing decisions, and preconditioning timing. Tesla’s eco routing system evaluates live traffic, elevation changes, and your recent Wh/km history to build smarter routes automatically.
Fine-tune your approach with these habits:
- Check tire pressure cold — heat artificially inflates readings, masking underinflation
- Enable Online Routing to dodge stop-and-go congestion that bleeds energy fast
- Practice speed harmonization — maintaining steady cruising speed beats constant acceleration cycles
- Let multi-stop route guidance place Supercharger stops automatically, eliminating unnecessary detours
Overinflation won’t save you either — traction and comfort suffer beyond spec. Stay at placard pressure, route intelligently, and let the system do its job. To avoid being constantly redirected mid-drive, set your rerouting time threshold to five minutes so the system only recalculates when a meaningful time saving is available.
Regenerative Braking and What It Does to Your Brake Pads
Regenerative braking quietly does most of the heavy lifting every time you lift your foot off the accelerator — the drive motor reverses its role, acting as a generator that converts kinetic energy back into usable electricity while simultaneously slowing the car.
Your friction brakes sit largely idle during normal driving, which dramatically extends pad lifespan well beyond 100,000 miles in many cases. That sounds like a free lunch, and mostly it is — except inactivity creates its own problems. Rotors exposed to humidity and road salt develop rotor corrosion surprisingly fast when pads rarely contact them. Glazing can also occur, reducing stopping effectiveness exactly when you need it most. Periodically applying firm brake pressure keeps surfaces clean and hardware functional. Choosing ceramic or rust-resistant pads designed specifically for EVs can further reduce the risk of glazing and corrosion between service intervals.
Tesla Tire Rotation: The Exact Process Using Lifting Pucks
Rotating your Tesla’s tires isn’t complicated, but it does require one piece of equipment most drivers overlook: lifting pucks, the hard-rubber adapters that insert into your chassis’s four designated lift-point holes (those small openings along the pinch weld area) to prevent the jack from crushing the battery enclosure or unibody structure during a raise.
Without them, a standard floor jack contacting bare metal can cause expensive hidden damage that no roadside tire shop will cover.
Once you’ve got a low-profile floor jack (minimum 2.5-ton capacity, though 3-ton is the smarter margin) and the correct pucks seated, the rotation process itself follows a front-to-back pattern on non-staggered Model 3 and Model Y setups, with lug nuts torqued to exactly 129 lb-ft (175 Nm) using a calibrated wrench—not an impact gun. After completing the rotation, navigate to the Tesla Service menu and reset the tire rotation odometer so the system can alert you again at the next 5,000-mile interval.
Why Lifting Pucks Matter
When you slide a lifting puck into Tesla’s factory jack-point recess before raising the car, you’re doing something deceptively simple that carries real engineering logic behind it. Tesla’s lift points aren’t designed for raw jack saddle contact — they need an adapter interface. Jack pucks solve that immediately. A zippered storage case is included, keeping your lifting pucks organized and protected when not in use.
Here’s what proper lift alignment actually does for you:
- Centers vertical force directly through the lift point, preventing lateral slipping
- Distributes load across a broader contact surface instead of a concentrated edge
- Protects the plastic lift pad and nearby underbody components from crushing
- Makes repositioning faster because the recess indexes the puck automatically
Skip the puck, and you’re gambling with pinch weld deformation. That’s an expensive lesson most owners only need once.
Locating Tesla Jack Points
Model S and Model X differ slightly, using three-hole lift pads where the center hole does the actual work.
As for puck alternatives, some owners swear by hockey pucks (genuinely), though purpose-built Tesla pads provide better fitment.
Either way, confirm placement visually before applying any load. Your vehicle has four designated jack points, and placing the jack anywhere outside these locations risks damage to the body or high-voltage battery.
Step-By-Step Rotation Process
Doing a tire rotation on a Tesla isn’t particularly mysterious, but the low underbody clearance and battery pack placement mean one wrong jack placement can crack a cooling line or deform the battery enclosure — outcomes that turn a $50 DIY job into a four-figure repair.
Proper jacking technique starts before the car leaves the ground:
- Engage the parking brake and loosen lug nuts (21mm socket) while tires still contact pavement
- Insert lifting pucks into designated chassis slots before positioning your low-profile floor jack
- Verify puck placement is centered under the jack saddle before raising
- Raise until the wheel clears the ground, then rotate front-to-back on non-staggered fitments
Reinstall using a star-pattern torque sequence, finishing at 129 lb-ft (175 N·m). Once the wheels are hand-snugged with an impact wrench, switch to a torque wrench for final tightening to avoid cross-threading lug nuts.
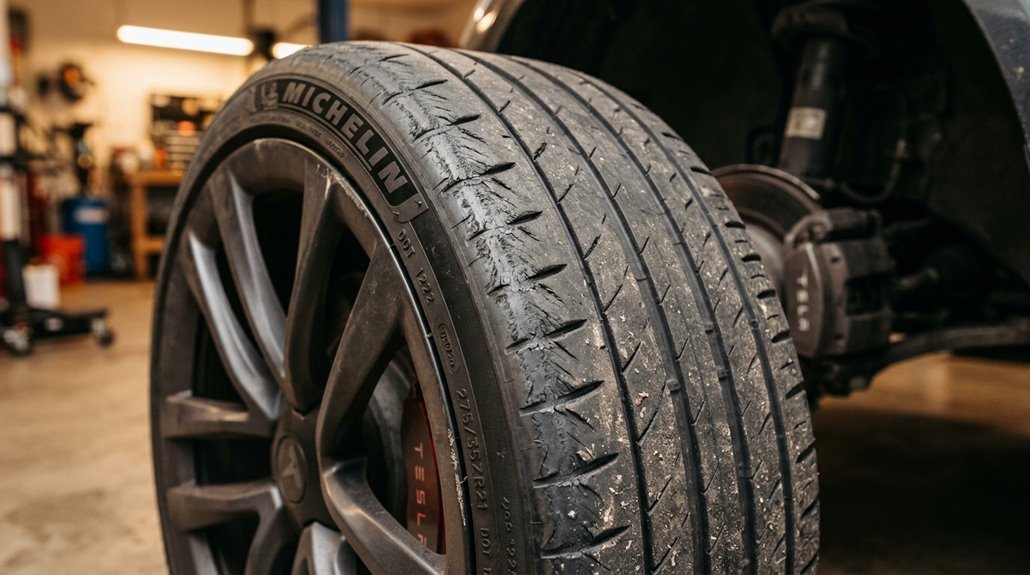
Why Tesla Tires Wear Faster Than Most Drivers Expect
Tires on a Tesla wear out faster than most owners anticipate, and the physics behind it aren’t subtle. You’re managing a vehicle that can weigh upward of 4,800 pounds depending on the model, and that mass sits directly on four contact patches roughly the size of a human hand each.
Add instant torque delivery that loads those patches hard at every launch, and you’ve already stacked two major wear accelerators before touching the highway. Most Tesla tire compounds prioritize low rolling resistance or grip over raw longevity, which compounds the problem literally.
Regenerative braking adds uneven deceleration stress, alignment tolerances tighten under heavy curb weight, and missed rotations accelerate the damage quietly. Owners expecting 50,000-mile tire life often find themselves replacing rubber closer to 20,000 miles. Rear tire wear is particularly pronounced on high-performance models like the Model S and Model X, where instant torque delivery concentrates the heaviest load on the back axle at every acceleration event.
What Uneven Wear From Instant Torque Actually Looks Like
Uneven wear from instant torque doesn’t announce itself with a blowout or a sudden handling change—it sneaks up on you in a pattern that’s easy to miss until you’re already past the point of rotation. The inner edge takes the first hit, and standing beside the car won’t show you that.
Here’s what to actually look for:
- Inner shoulder depth noticeably lower than center or outer tread
- A diagonal, sloped loss pattern caused by negative camber amplifying torque scrubbing
- Increased rear tire noise before any handling change appears
- One rear tire wearing faster than the other
The outer tread looks fine. The inner edge disagrees. That mismatch is exactly how Tesla owners get surprised at the shop. Worn suspension components like bushings, control arms, and ball joints quietly shift alignment angles over time, turning a manageable wear pattern into an accelerated one.
Tire Pressure Basics: Numbers, Frequency, and Why It Matters
Your Tesla’s recommended tire pressure isn’t printed on the tire sidewall (that’s the tire’s maximum, not your car’s target) — it’s on the driver’s door jamb placard, typically 42–45 PSI cold for most Model 3 and Model Y configurations.
Check pressure monthly and before any long trip, ideally before driving when the tires are still cold, since even a 20°F temperature swing can shift readings by roughly 2 PSI and make a warm reading misleadingly optimistic.
Proper inflation isn’t just about tire longevity — it directly affects braking distance, handling response, and range efficiency, meaning a few PSI low costs you real performance and real miles. Underinflated tires also build up more heat through increased road contact, raising the risk of a blowout if the problem goes unaddressed.
Finding Your Pressure Numbers
On the driver-side door pillar—that vertical strip of metal exposed when you open the door—you’ll find a small label that carries more weight than most Tesla owners ever give it credit for. That’s your tire placard, and it’s the only pressure number that actually matters for your specific configuration.
Generic model averages exist, but your placard accounts for your exact wheel size, tire size, and load rating.
Common targets include:
- Model 3 / Model Y: 42–45 PSI depending on trim
- Model S / Model X: 40–42 PSI across most configurations
- Some Continental setups (Model X): 45 PSI specifically
- PSI conversion note: 1 bar equals roughly 14.5 PSI if your gauge reads metric
Trust the placard. Everything else is an approximation. Always measure cold—check pressure before driving or after the vehicle has been stationary for at least 3 hours—to avoid readings inflated by heat buildup.
How Often To Check
Now that you’ve got the right number locked in from your door placard, the next question is how often you should actually be checking it. Aim for monthly checks at minimum — more frequently if seasons are changing or a long highway run is coming up.
Temperature swings hit hard; every 10°F drop can pull roughly 1 PSI out of your tires overnight, and your Tesla’s TPMS won’t alert you until pressure drops markedly below spec. Always take cold readings — meaning before you’ve driven even a mile — because rolling generates heat that artificially inflates the numbers. Morning checks before your first drive are ideal. Keep a quality gauge in the car. Consistent habits catch slow leaks before they become a roadside inconvenience.
Properly inflated tires can improve your fuel economy by up to 3.3%, according to the U.S. Department of Energy.
Why Pressure Matters
Tire pressure is one of those maintenance items that sounds trivial until it isn’t — and by “isn’t,” we mean you’re adding stopping distance, scrubbing tread, or fighting understeer on a highway ramp without realizing pressure is the culprit.
Cold pressure (measured before driving) is your baseline truth — heat inflates readings artificially. Run flat effects compound quietly: underinflation increases rolling resistance, reducing efficiency before you notice handling degradation.
Wrong pressure creates cascading problems:
- Underinflation extends braking distances and accelerates shoulder wear
- Overinflation reduces road contact and causes center-tread wear
- Temperature swings shift pressure roughly 1 PSI per 10°F
- Incorrect readings happen when you check hot tires instead of cold
Your door jamb lists the target. Use it. Maintaining correct pressure can extend tire life by up to 4,500 miles, reducing the cost and frequency of premature replacements.
How Tire Pressure Changes Affect Driving Range and Safety
Among the many variables that quietly drain your Tesla’s range between charges, tire pressure ranks as one of the most controllable — and most commonly ignored. Tire underinflation increases rolling resistance, meaning your battery works harder just to maintain speed. Drop 5 PSI across all four tires, and you’re looking at roughly 4–5 miles of lost range on a Model 3.
The range impact compounds over time, especially when seasonal pressure drops go unchecked — cold weather routinely pulls several PSI without any puncture involved. Cold weather causes contraction, reducing tire pressure and making more frequent checks during fall and winter essential to maintaining optimal range.
Safety risks are equally real. Underinflated tires overheat, increasing blowout probability. Overinflation shrinks your contact patch, reducing grip during cornering.
| Pressure Level | Range Impact | Safety Risk |
|---|---|---|
| Recommended (42 PSI) | Ideal | Minimal |
| Low (37 PSI) | ~1% loss/PSI | Overheating risk |
| High (47 PSI) | Slight gain | Reduced grip |
| Very Low (32 PSI) | Significant loss | Blowout danger |
| Very High (52 PSI) | Marginal gain | Handling compromise |
When to Schedule a Wheel Alignment on Your Tesla
Keeping your tires inflated properly handles one piece of the efficiency puzzle, but pressure alone can’t compensate for wheels that aren’t pointing in the right direction. A misaligned Tesla quietly destroys tire life and handling precision before you notice anything obvious.
Watch for these wheel indicators that demand immediate attention:
- Steering wheel sits crooked while you’re driving straight
- Vehicle pulls left or right without steering input
- Uneven tread wear appearing on one tire edge
- Handling feels vague or unexpectedly drifty
Your alignment schedule should target every 10,000–12,000 miles annually under normal conditions, tightening to every 6,000 miles on rough roads. Always verify alignment after new tire installation or any suspension repair. Tesla’s own guidance treats alignment as condition-based, not purely mileage-driven.
How to Read Tire Condition Before It Becomes a Problem
Most drivers only notice their tires when something goes wrong—a flat, a blowout, or a suddenly vague steering feel that sends them to the shop. Don’t wait for drama. Regular tread inspection and sidewall assessment catch problems before they escalate.
| Condition | What You’re Seeing | Action Required |
|---|---|---|
| Tread at wear bars (2/32″) | Flush rubber across grooves | Replace immediately |
| Center wear | Overinflation present | Adjust to spec pressure |
| Edge/shoulder wear | Underinflation or misalignment | Check pressure, inspect alignment |
| Sidewall bulge or crack | Internal cord damage or dry rot | Professional evaluation now |
| Embedded nail or screw | Potential slow leak | Inspect and patch promptly |
Check your DOT date code—tires exceeding six years deserve scrutiny regardless of remaining tread.
Brake Fluid Health Checks: The 4-Year Rule Explained
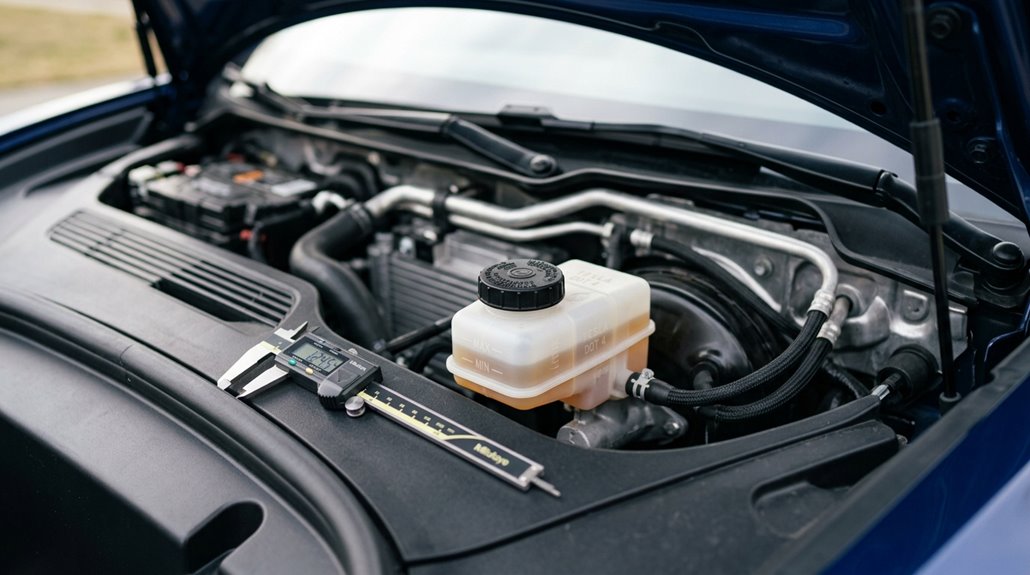
Tires tell the story of what’s happened to your car; brake fluid tells you what’s coming. Tesla recommends replacement every 2 years or 25,000 miles—not merely inspection. That distinction matters.
Glycol-based fluid (DOT 3, 4, 5.1) absorbs moisture continuously, lowering its boiling point and inviting corrosion inside your hydraulic system. Watch for these warning signs:
- Dark, particulate-laden fluid indicating oxidation breakdown
- Milky appearance suggesting active moisture contamination
- Spongy pedal feel revealing compromised hydraulic pressure
- ABS warning lights or visible primary cylinder corrosion
Moisture testing strips give you an objective read when timing feels uncertain. Humid climates, mountain driving, or towing accelerate degradation faster than any calendar schedule accounts for. A 24-month flush remains the conservative, defensible choice regardless of what the interval technically allows.
Brake Caliper Cleaning and Lubrication for Salt-Belt Owners
Regenerative braking is quietly working against your calipers. Because regen handles most deceleration, your friction brakes sit idle—perfect conditions for caliper corrosion to develop.
Salt, slush, and road grime accumulate on abutment flats, retaining pins, and pad contact points without warning. Tesla recommends annual cleaning and lubrication every 12 months or 12,500 miles for salt-belt drivers specifically.
The procedure covers every wheel corner: clean caliper surfaces with Tesla-approved brake cleaner, then apply a thin layer of Tesla-approved lubricant to pad edges only (never the friction material or piston seals).
Winter greasing prevents seized hardware, uneven pad wear, and braking noise. After reassembly, pump the brake pedal until firm, then perform several cautious brake applications during a short drive.
Tesla Brake Inspections That Still Matter With Regenerative Braking
Regenerative braking handles the heavy lifting on everyday stops, but that doesn’t mean your friction brakes get to retire early — they’re still hydraulic mechanical components that corrode, seize, and degrade whether you use them or not.
Brake fluid absorbs moisture over time (Tesla recommends a fluid condition check every two years), and that moisture lowers the fluid’s boiling point, which becomes a real problem the moment regen cuts out on a cold battery and your calipers suddenly need to earn their keep.
Run a proper inspection that covers fluid condition, rotor surface rust (especially if you’re in a salt-belt region where pitting progresses faster than you’d expect), and caliper function — because a brake system that’s been coasting on regen can develop hidden faults that only reveal themselves at the worst possible moment.
Why Brake Inspections Matter
Brake inspections don’t become optional just because your Tesla rarely touches its friction brakes. Regenerative braking reduces pad wear considerably, but it doesn’t protect you from brake corrosion, rotor pitting, or caliper problems that develop quietly over time.
Your pedal feel can stay completely normal while real deterioration happens underneath. Blended braking masks those issues until conditions force heavier friction-brake use.
Watch for these four developing concerns:
- Surface rust accumulating on rotors during low-use periods
- Brake corrosion deepening into scoring in salted road environments
- Sticking calipers going undetected because regen handles most stops
- Pedal feel shifting when cold batteries limit regenerative braking
Inspection catches what daily driving won’t tell you. Your brakes still stop the car during hard stops and low-traction events—they’d better be ready.
Fluid and Corrosion Checks
Hydraulic brake fluid quietly degrades whether your Tesla’s friction brakes activate frequently or not—hygroscopic fluid absorbs ambient moisture through microscopic permeation in hose walls and reservoir seals over time, regardless of pedal use. That’s brake hygroscopy at work, and it’s unrelenting. Absorbed water lowers the fluid’s boiling point, increasing fade risk during hard stops. Tesla recommends a brake fluid health check every two years regardless of mileage—a sensible baseline worth honoring. Visually contaminated fluid appears dark or cloudy before symptoms surface.
Meanwhile, infrequent caliper activation invites caliper seizure, where sliding hardware freezes from disuse and corrosion, causing uneven pad wear and drag. Salted winter roads accelerate this process. Test fluid moisture content proactively using an inexpensive electronic tester—don’t wait for the brakes to tell you something’s wrong.
How to Replace Tesla Wiper Blades Yourself
Swapping out your Tesla’s wiper blades ranks among the simplest maintenance tasks you’ll ever perform, requiring no special tools, no service appointment, and about five minutes of your time. Tesla recommends annual replacement for peak performance—seasonal care matters more than most owners realize, since UV exposure and temperature swings degrade rubber quickly.
Before starting, activate service mode through your touchscreen to position the arms correctly. Model 3 uses a 26-inch driver blade and 19-inch passenger blade specifically.
Key steps to nail the installation:
- Place a towel between the arm and windshield
- Press the locking tab firmly to release the old blade
- Slide the new blade until you hear a distinct click
- Perform a push-pull test confirming secure attachment
Noise troubleshooting afterward? Rotate the replacement blade 180 degrees—orientation fixes most chattering issues immediately.
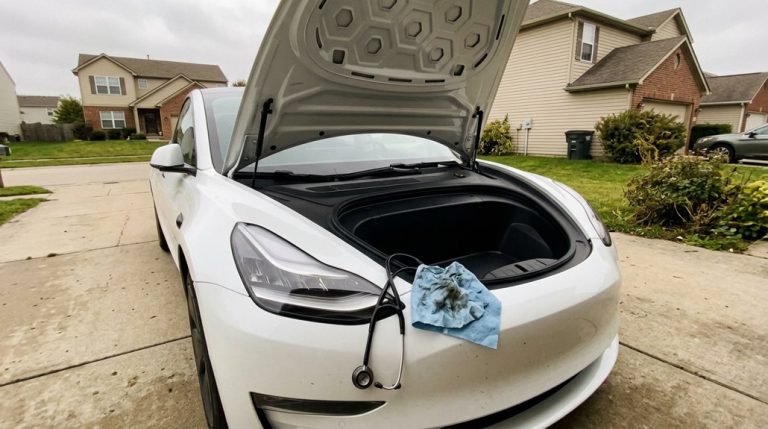
How to Refill Tesla Windshield Washer Fluid Correctly
Topping off your Tesla’s windshield washer fluid takes maybe three minutes, but getting it wrong—wrong fluid, wrong location, wrong season—creates problems that range from annoying streaks to warranty-voiding bacterial growth inside your climate control system.
Three minutes to refill washer fluid. A lifetime of problems if you choose the wrong fluid, location, or season.
Your reservoir lives behind the front trunk on Model 3 and Model Y, or behind the powered frunk liner on Cybertruck. Capacities differ: 3.2L, 4.5L, and 4.2L respectively.
For refill safety, clean around the filler cap first, then fill slowly until fluid appears just below the filler neck. Use only automotive windshield washer fluid—untreated water encourages bacterial growth, while bug-wash additives cause squeaking and smearing.
Skip fragrance free fluids lacking antifreeze when temperatures drop below 40°F (4°C); impaired visibility in freezing conditions is an entirely preventable problem.
Cabin Air Filter Replacement by Model and Timeline
Key replacement details worth knowing:
- Model 3 uses a T20 screw (some use a T20/6 mm hybrid fastener)
- Model Y (pre-February 2025) typically uses a 6 mm screw; newer versions use tabs
- Replacement tools needed: T20 Torx driver or 6 mm socket, plus a trim pry tool
- Time required: roughly 20 minutes
HEPA Filter Replacement: Timelines and Early-Change Triggers
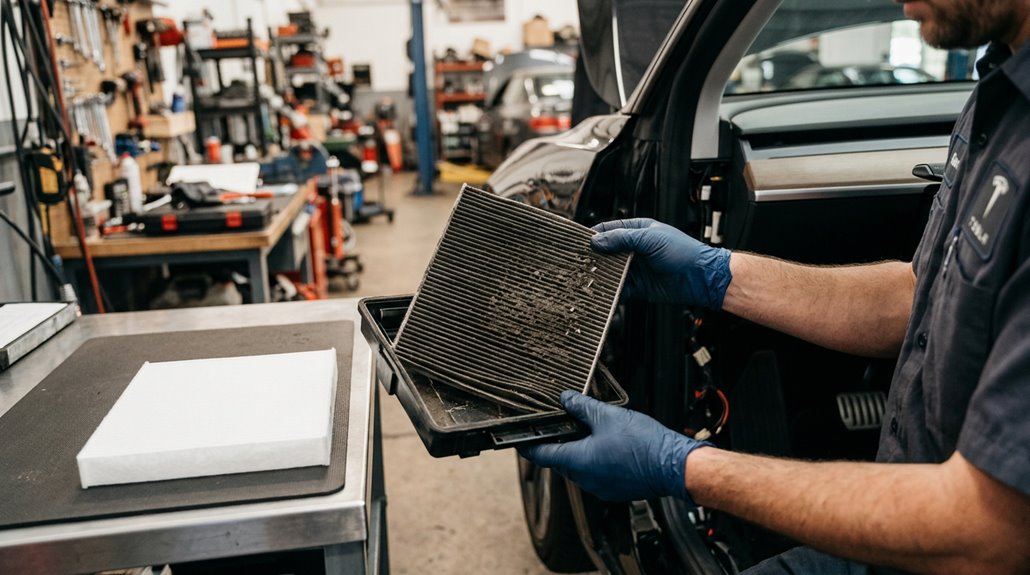
Replacing the cabin air filter every two years keeps particulates out of the cabin, but if your Tesla’s equipped with a HEPA filter—standard on Model X, Model S refresh, and certain Model Y configurations—you’re working with a different system, a different schedule, and a different set of failure signals worth knowing.
| Vehicle / Condition | Filter Lifespan |
|---|---|
| Most HEPA-equipped Teslas | Every 3 years |
| China-market vehicles | Every 1 year |
| Cybertruck (standard) | Every 2 years |
| Cybertruck (off-road/dirt roads) | Every 1 year |
| High-pollution environments | Earlier per inspection indicators |
Watch for reduced vent airflow, persistent cabin odors, or visible debris loading—those inspection indicators override any calendar. Check Controls > Service > Maintenance for your model-specific recommendation.
A Tesla’s cabin feels clean and sealed from the outside world until airflow slows down, faint odors start building, and the ventilation system has to work harder than it should. Tesla Cabin Air Filter Replacement Kit restores proper airflow and keeps dust, pollen, and road debris from circulating inside the cabin, especially in high-mileage or city-driven vehicles.
AC Desiccant Bag Replacement Schedules by Tesla Model
While the cabin air filter gets most of the attention, your Tesla’s A/C desiccant bag is quietly doing important work inside the refrigerant loop—absorbing moisture that would otherwise corrode components, degrade refrigerant performance, and eventually cost you a full system repair.
Desiccant lifespan varies markedly by model and production year:
- Model S (2012–2020): Replace every 2 years
- Model X (2015–2020): Replace every 4 years
- Model 3 (2017–2023, no heat pump): Replace every 6 years
- Newer vehicles: No fixed scheduled interval currently required
Beyond scheduled intervals, replacement triggers include any A/C leak repair, prolonged system exposure to ambient air, or refrigerant recovery procedures.
Moisture exposure—not mileage—drives urgency here. Always confirm your VIN-specific interval through Tesla’s support page, since guidance has evolved markedly over time.
The 12V and 16V Low-Voltage Battery: What Owners Need to Know
The A/C desiccant bag works inside a sealed refrigerant loop, but the low-voltage battery operates across every system in your Tesla simultaneously—and when it fails, nothing works, not the locks, not the screen, not even the ability to wake up the high-voltage pack.
Early models used 12V lead-acid units; refreshed 2021+ Model S/X vehicles shifted to 15.5V–16V lithium-ion packs.
Some 2024–2026 Model 3/Y builds use 12.8V LFP chemistry instead.
Each chemistry demands a specific charging profile from the DC-DC converter—swap the wrong type and you’ll trigger faults immediately.
Lithium compatibility isn’t optional; it’s the difference between a functioning car and an expensive paperweight.
During replacement, perform proper terminal refurbishment (cleaning oxidation, applying dielectric grease) to maintain reliable contact and prevent premature failure.
Warning Signs Your Low-Voltage Battery Is Failing
Your Tesla’s low-voltage battery rarely fails without warning — it telegraphs its decline through a predictable sequence of symptoms that start subtle and escalate fast.
Watch for dashboard alerts like “12V battery low” or “Schedule service to replace low voltage battery,” which can precede complete failure by as little as 30 days, alongside dimming lights, infotainment freezes, sluggish wake-up cycles, and erratic behavior from locks, windows, or electronic latches.
Treat any combination of these symptoms as urgent, because a fully depleted low-voltage battery doesn’t just inconvenience you — it renders the entire vehicle inoperable, including charging port access and high-voltage system functions.
Common Failure Symptoms
Catching a failing low-voltage battery early is largely about recognizing that Tesla’s 12V system (or 16V on newer builds) is the nervous system behind nearly every convenience and safety function in the car—and when it starts degrading, it rarely fails cleanly. Module alerts often look unrelated until you trace them to one unstable voltage source. Run 12V diagnostics before chasing phantom faults across unrelated systems.
Watch for these classic warning patterns:
- Slow or unresponsive door handles, especially on Model S and X
- Touchscreen reboots or extended black-screen recovery periods
- Key fob or phone-key lag during wake-up cycles
- Frunk and trunk actuators failing to respond via app or button
These symptoms share one root cause—insufficient, unstable low-voltage power under load.
When To Seek Service
When a low-voltage battery starts failing, it rarely announces itself with a single, obvious event—it degrades incrementally, scattering symptoms across unrelated systems until you’re chasing touchscreen glitches, sluggish door handles, and phantom charging errors without connecting the dots. A yellow warning is your cue for urgent diagnostics; red means act within 30 days, not eventually. Check your warranty timelines first—some early replacements qualify for coverage. If voltage dips below 10.1V under active load, that’s hardware failure, not a software quirk. Alerts persisting after resets confirm the same outcome.
Vehicles aged 4–7 years with 50,000–70,000+ miles and no prior replacement are statistically overdue. Schedule mobile service rather than waiting for a full breakdown, and consider preemptive replacement before symptoms cascade into something genuinely inconvenient.
A few PSI low might not feel like much in a Tesla, but it quietly affects range, tire wear, and long-distance stability before most drivers notice anything is wrong. Portable Tire Inflator & Emergency Compressor Kit keeps pressure checks and quick top-ups within reach, especially useful before highway trips or when a warning appears far from a service station.
The Tesla Maintenance Summary Screen: Tracking Your Service History
Tesla builds the Maintenance Summary screen directly into your car’s touchscreen—no app, no spreadsheet, no sticky note on the dashboard required.
Find it under Controls > Service > Maintenance. It’s your maintenance timeline, kept with the vehicle itself, which matters for service provenance when you’re selling or buying used.
The screen tracks four essential items:
- Tire rotations – logged by date and odometer reading
- Cabin air or HEPA filter replacements – with interval guidance included
- Brake fluid health checks – flagged as overdue, due soon, or current
- Brake caliper cleaning and lubrication – particularly relevant in salt-use regions
You can log DIY work yourself, which resets each interval. Tesla service updates it automatically.
Simple, honest record-keeping—exactly what maintenance tracking should be.
How Factory Resets Affect Your Maintenance Records
A factory reset feels like a hard wipe—personal data gone, profiles cleared, the car returned to something close to its showroom state—so it’s reasonable to assume your maintenance records went with everything else. They didn’t. Tesla’s system separates user data from vehicle operational data. Profiles, paired devices, route history, and app credentials get cleared. Maintenance logs don’t.
Your Maintenance Summary survives the reset intact, keeping status indicators—overdue, due soon, due later—exactly where they were. Record preservation is built into the vehicle’s design, not your account. Still, reset verification matters: confirm your service entries remain visible once you’re logged back in. The vehicle holds the history, but your independent documentation (receipts, photos, mileage logs) remains the only truly bulletproof backup.
Transferring Maintenance Records to a New Tesla Owner
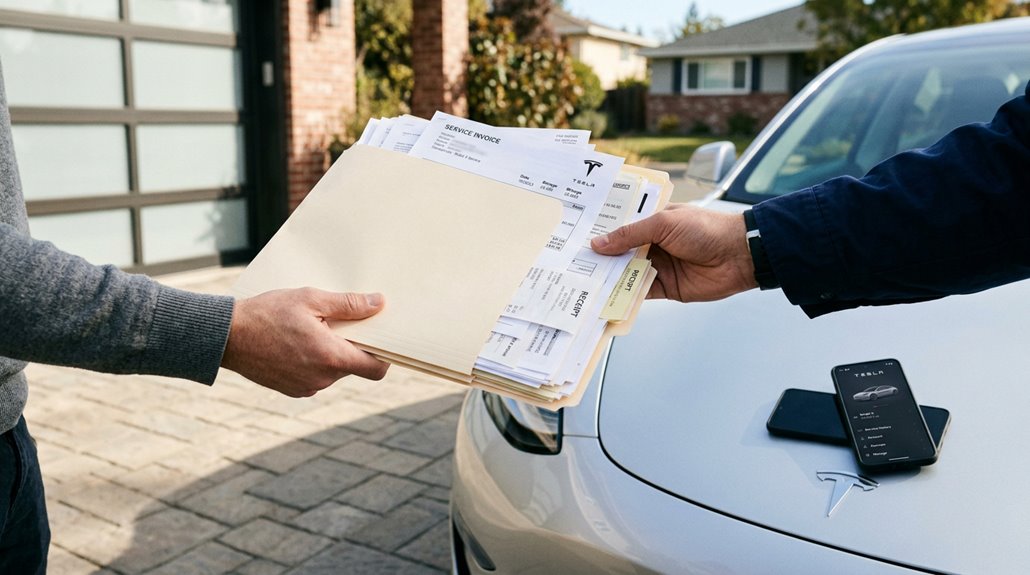
When you sell your Tesla, the service history stored in your account doesn’t automatically follow the car — it stays tied to your Tesla login, meaning the new owner gets vehicle access but not your full maintenance timeline. Factory resets wipe the local touchscreen data, but Tesla’s server-side records (invoices, repair orders, mobile service visits) remain accessible through your account even after the reset completes, so pulling those documents before transferring ownership is the smart move.
Bundle your service PDFs, independent shop receipts, and the touchscreen’s maintenance summary screenshots into a single folder for the buyer, because a well-documented history isn’t just courteous — it’s the difference between a confident resale and a car that looks like it was maintained on a prayer.
Records Persist After Resets
One thing that surprises most used Tesla buyers is how much the car already knows about itself when they take delivery. Persistent logs survive factory resets because Tesla ties maintenance records to the vehicle itself, not your profile. That’s a meaningful distinction.
Here’s what that transfer visibility actually gives you:
- Prior service entries remain visible on the touchscreen after ownership changes
- The Maintenance Summary still shows when each action was last performed (or never)
- Overdue, due soon, and due later statuses carry forward automatically
- A factory reset won’t erase this embedded maintenance history
Service History for Buyers
Knowing that embedded maintenance data survives a factory reset is genuinely useful—but it tells only part of the story.
Service records tie to the seller’s Tesla account, not the vehicle itself—meaning you, as a buyer, won’t automatically inherit that history through the app. Owner transparency matters here: ask the seller to request a Tesla data export *before* completing the transfer. That export captures service invoices, repair summaries, and account-linked documentation that disappears from your view post-transfer.
Without it, retrieving older records may require service subpoenas or persistent Tesla support calls—neither is guaranteed.
Consolidate everything: digital PDFs, paper receipts, tire work, warranty repairs. A bill of sale documents ownership, not maintenance. The cleanest handoff happens before the title changes hands.
Touchscreen Maintenance Summary Access
The touchscreen doesn’t carry maintenance history forward when ownership changes hands—and that’s a detail worth grasping before you assume the car’s service record is sitting in your Tesla app waiting for you. Touchscreen provenance simply doesn’t transfer; a factory reset wipes everything local.
Maintenance portability falls entirely on the seller’s willingness to document.
What disappears during reset and transfer:
- Driver profiles and saved route locations
- Bluetooth pairings and streaming credentials
- App-accessible service summaries tied to the prior account
- Any locally stored maintenance-related touchscreen data
Your best move is requesting physical documentation directly from the seller—invoices, repair orders, or screenshots. Tesla’s transfer process prioritizes access restoration, not historical record migration.
Paper (or PDF) remains your most reliable proof.
How Over-the-Air Updates Work and Why Wi-Fi Matters
Unlike most traditional automakers that require dealership visits to update vehicle software, Tesla pushes firmware wirelessly to your car through a proprietary encrypted VPN called Hermes — the same basic concept as updating your phone, just applied to a 5,000-pound rolling computer.
During the download phase, a green arrow appears in your status bar; you can still drive. Once complete, a yellow clock signals the install phase, which requires Park and roughly 15–30 minutes. Your car can’t move during installation — plan accordingly.
Home Wi-Fi is your best friend here. Large firmware bundles download faster overnight on Wi-Fi than through cellular fallback (Tesla uses LTE via AT&T), which can throttle or pause under weak signal. Connect your home network, and updates practically handle themselves.
Performance, Safety, and Features Delivered Through Tesla Software Updates
Once your car downloads a firmware update, it doesn’t just patch bugs — it can fundamentally reshape how the vehicle performs, protects you, and behaves day-to-day. Software Updates touch nearly every system onboard.
Key improvements Tesla regularly delivers:
- Performance gains — Acceleration Boost enables on Model 3 and Model Y Long Range Dual Motor trim genuinely shorten 0–60 mph times through motor control recalibration
- Safety improvements — Automatic Emergency Braking now recognizes perpendicular crossing traffic and operates above 100 mph
- New convenience features — Dog Mode tweaks, Sentry Mode upgrades, and phone-key behavior changes arrive without dealer visits
- FSD behavioral shifts — Neural network updates reshape lane selection, braking smoothness, and object detection simultaneously
Your older Tesla benefits equally. Updates don’t discriminate by model year.
Touchscreen Alerts You Should Never Ignore
Your Tesla’s touchscreen rarely cries wolf — so when an alert fires, it usually means something real is happening to a physical system or a critical sensor chain. Red brake indicators and steering fault messages demand immediate driver attention; they’re not suggestions. Amber warnings still matter. Even camera obstruction alerts affect your Autopilot’s situational awareness directly.
| Alert Type | What It Signals | Your Response |
|---|---|---|
| Red Brake Indicator | Brake fault or low fluid | Stop safely, contact Tesla |
| Tire Pressure Warning | Pressure out of range | Inspect all four tires |
| Steering/Control Fault | Critical system failure | Treat as emergency |
Critical alerts live at your touchscreen’s bottom status area. Swipe down to dismiss informational popups; never swipe away safety-critical messages without reading them first.
How to Use the Tesla App to Schedule Mobile Service
Tesla’s mobile service system runs entirely through the app — tap service, then Request Service, and you’re already further into the repair process than most dealership phone trees will ever get you.
Describe your concern specifically; vague inputs produce generic responses. Follow the app walkthrough prompts, and Tesla’s diagnostics may accelerate your appointment timeline automatically.
Before finalizing, complete your photo checklist:
- Document the issue visually — photos help technicians pre-stage correct parts
- Confirm visit type — mobile or service center appears in the confirmation screen
- Add concerns early — use “Add Another Concern” before technicians prep their van
- Update notes 24 hours out — changes after that window don’t reach the technician
Message the service team directly through the app for real-time coordination.
Mobile Service vs. Service Center: Which One Should You Book?
Choosing between mobile service and a service center isn’t always your call to make — Tesla’s booking system reviews your described concern and assigns the appropriate service type based on the repair’s complexity and required tooling. You describe the issue, Tesla decides the delivery method. That said, grasping the distinction helps you set realistic expectations.
Mobile Convenience wins for minor, drivable issues — worn wiper blades, key card pairing, or small software concerns. A technician arrives at your driveway or workplace lot, no lobby wait required.
Diagnostic Limits, however, exist in the field. Multi-system faults, suspension work, or anything requiring a lift gets routed to a service center automatically. Pricing stays largely consistent between both options, so convenience — not cost — is usually the deciding factor.
What Tesla’s Mobile Technicians Can and Cannot Fix
Tesla’s mobile service fleet handles more than you might expect — tire rotations, cabin air filter swaps, brake fluid services, and even 12V battery replacements on older Model S, X, and early Model 3 vehicles all fall within a technician’s roadside reach.
What stops mobile service cold, though, is physics and practicality: anything requiring a lift, alignment rack, or structural access simply can’t happen safely in your driveway (or parking garage, or curbside spot).
Knowing which repairs qualify before you book saves you the frustration of a rescheduled appointment and gets your Tesla back on the road faster.
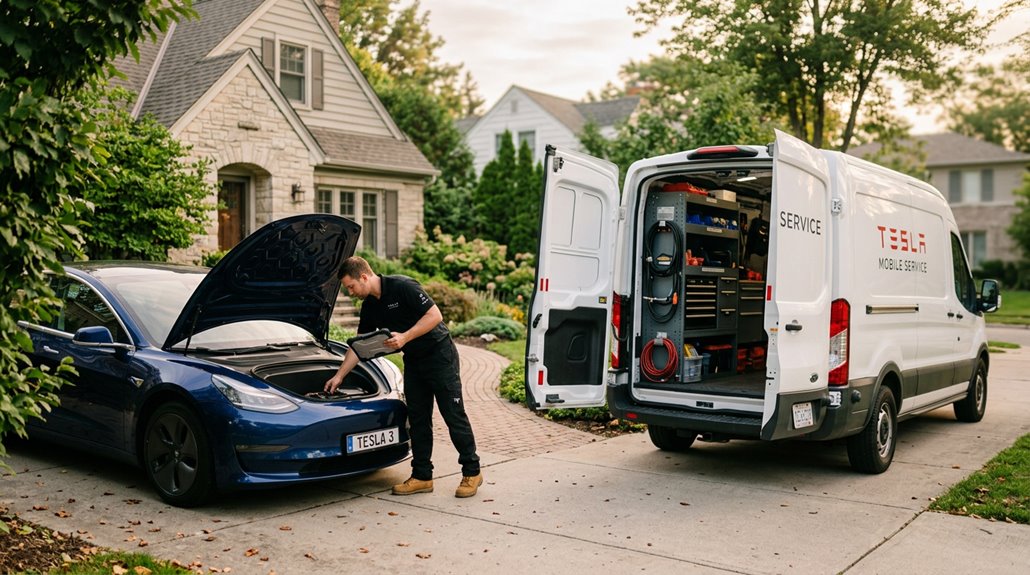
Mobile Service Capabilities
Mobile service has quietly become one of Tesla’s more practical ownership perks — a white van pulls up to your driveway, and a technician handles everything from cabin air filter swaps to full recall campaigns without you ever leaving home. The scope is broader than most owners realize.
Here’s what actually happens during a visit:
- On-site diagnostics using Tesla-specific laptops, clearing error codes or recalibrating systems without replacing parts
- Mobile recalls, including Takata airbag replacements (roughly 31% completed in driveways)
- Software updates and re-flashes delivered via mobile hotspots
- Brake pad checks, tire rotations, and 12V auxiliary battery replacements on eligible vehicles
Anything requiring a lift, spray booth, or high-voltage bay stays service-center-only.
Repair Limitations Explained
The convenience of driveway service does have a ceiling, though — and knowing where that ceiling sits saves you from waiting around for a technician who finally can’t finish the job. Mobile limits kick in fast once complexity rises. High-voltage diagnostics, drivetrain faults, and collision repairs all require a service center bay.
Calibration thresholds matter too — camera or sensor replacements only stay mobile-friendly when recalibration is straightforward; anything demanding specialized alignment equipment gets redirected. Parts availability adds another layer: mobile units carry common stock, but unusual components need separate ordering, which delays your repair.
Technician experience also shapes outcomes — less seasoned techs reasonably stick to simpler swaps. If a job proves too complex on arrival, expect a service center appointment as the immediate next step.
How to Prepare Your Tesla for a Service Appointment
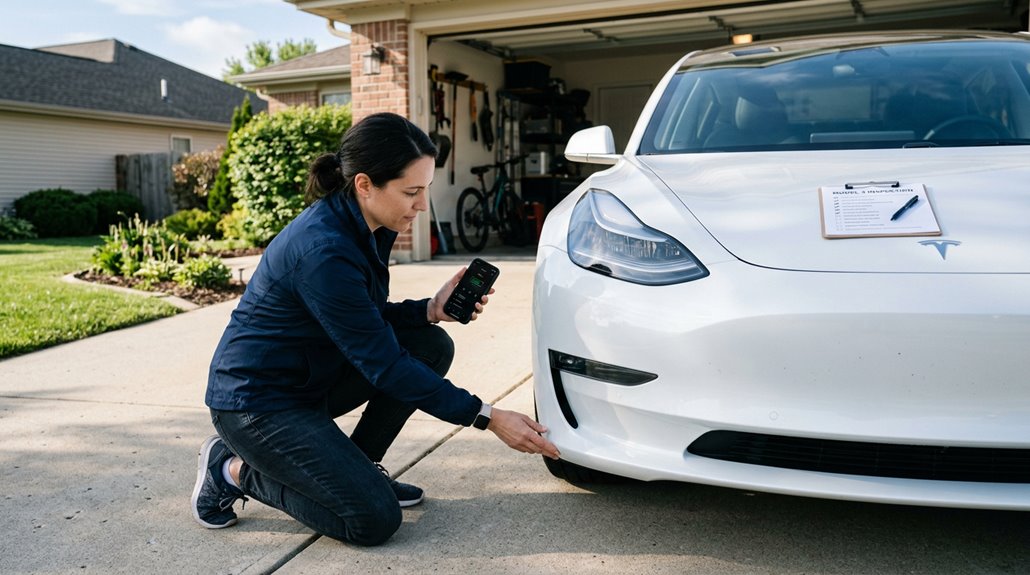
Getting a service appointment right starts well before the technician shows up or you pull into the service bay. Pre-appointment diagnostics through the Tesla app guide the entire scheduling process, so complete every on-screen prompt carefully.
Key accessibility matters more than most owners realize. Technicians need clear workspace and precise location details, especially for Mobile Service visits.
Here’s your pre-appointment checklist:
- Describe every concern upfront in the app to avoid rescheduling delays
- Share gate codes, parking restrictions, and exact vehicle location
- Skip any pending software updates on Mobile Service day
- Bring your key card and charging cable if Tesla specifically requests them
Message the Service team directly through the app if anything needs clarification.
DIY Tesla Maintenance: What You Can Safely Do Yourself
Tesla’s official DIY maintenance program covers more than most owners realize, and three tasks — wiper blade replacement, cabin air filter swaps, and tire pressure checks — sit squarely in your wheelhouse without voiding warranties or requiring a service center visit.
You’ll find wiper blades lift away from the arm with a simple tab release (consult your model-specific owner manual for the exact blade length, since a Model 3 rear differs from a Model Y’s), while cabin air filters tuck behind the glove box or under the hood frunk depending on trim and require nothing more exotic than a Phillips screwdriver and a genuine Tesla replacement unit.
Tire pressure deserves weekly attention — Tesla recommends 42 PSI cold on most Model 3 and Y configurations — because even a 5 PSI drop measurably reduces range efficiency and accelerates uneven tread wear across your contact patch.
Wiper Blade Replacement
Wiper blade replacement ranks among the simplest maintenance tasks you’ll tackle on a Model 3 or Model Y — no lift, no torque specs, no specialty tools. Start by shifting into Park, disabling the wipers, then activating service position through the touchscreen to raise the arms away from the glass.
Key steps to nail the swap:
- Place a soft cloth on the windshield for glass protection before lifting the arm
- Press the release tab and slide the old blade forward until it disengages
- Align the new blade with the arm hook and slide it toward the arm’s end
- Listen for a distinct click, then push-pull test to confirm seating
Worn blades streak and compromise visibility fast — replace them annually.
Cabin Air Filters
Cabin air filters sit quietly behind your passenger-side lower dash, trapping dust, pollen, and road debris before any of it reaches the HVAC blower — and when they clog, airflow drops, odors intensify, and your climate system works harder than it should. Tesla recommends replacement every two years.
Move your passenger seat fully rearward, pull the lower trim panel using plastic tools (protect those clips), and release the cover via T20 Torx or 6 mm screw depending on your build date. Two stacked filters slide out together — fold their pull tabs for easier allergen filtration management next time.
Install replacements with arrows pointing rearward, seat the cover completely, and handle filter disposal responsibly since captured particulates aren’t exactly pleasant. Run HVAC on high afterward to purge residual dust.
Tire Pressure Checks
Tire pressure is one of those maintenance tasks you’ll do more than any other, yet most owners get it wrong — not because it’s hard, but because they skip the right reference point. Your driver’s center door pillar hosts the Tire and Loading Information label — that’s your authoritative spec, not forum posts citing 42 PSI.
Always perform cold checks before driving, since heat artificially inflates readings. Gauge selection matters too; a quality dial or digital gauge beats those flimsy gas-station sticks.
- Check Controls > Service on your touchscreen for individual tire readings
- Remove the valve cap before pressing your gauge firmly onto the stem
- Release excess pressure by depressing the valve’s center metal pin
- Reinstall caps afterward to protect the valve assembly from debris
Lifting Pucks, Torque Wrenches, and Other Tools Tesla Owners Actually Need
Owning a Tesla means you’ll eventually face a maintenance task that requires lifting the car—and that’s where most owners find their standard garage jack setup wasn’t built with a battery-floor vehicle in mind.
Most Tesla owners discover too late that their existing jack setup was never designed with a battery-floor car in mind.
The battery pack spans most of the underbody, making puck compatibility non-negotiable; wrong contact points risk expensive structural damage.
Lifting pucks (rubber or polyurethane with reinforced cores) seat directly into factory jack points, creating a safe padded interface. Grab a four-piece set minimum.
For wheel service, torque calibration matters enormously.
A 1/2-inch drive click-style torque wrench lets you hit manufacturer specifications repeatably—no guessing. Always tighten lug nuts in a star pattern, then re-torque after your first short drive.
Add a breaker bar, plastic trim tools, and wheel chocks, and you’re genuinely prepared.
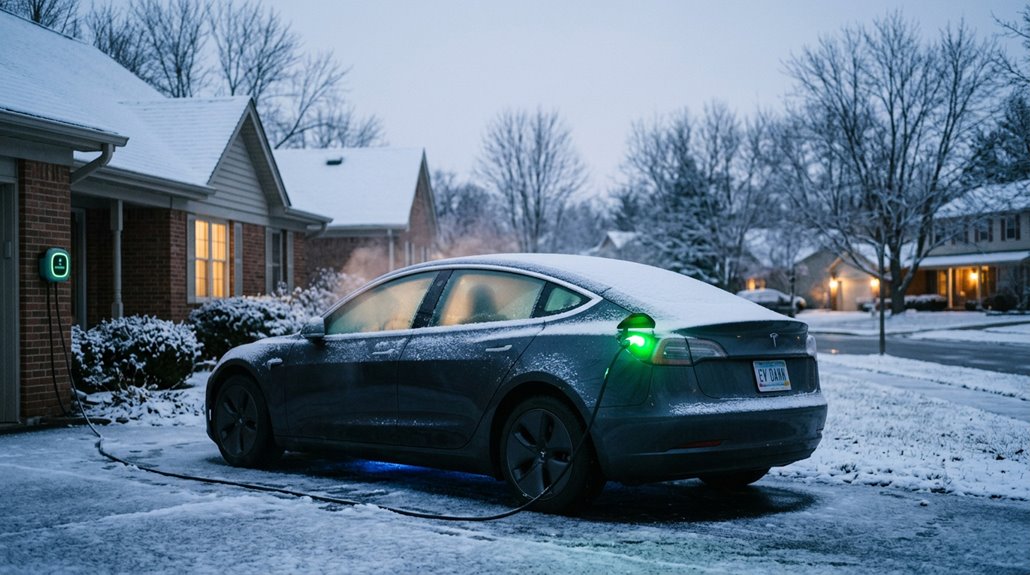
Winter Tesla Ownership: Cold Weather Prep From Top to Bottom
Winter doesn’t care that your Tesla has no engine to warm the coolant loop—it’ll still drain your range, freeze your door seals, and glaze your charge port with a quarter-inch of ice if you let it. Smart battery storage starts with staying plugged in; cold weather pulls heating energy from the grid instead of your pack.
Snow driving demands adjusted regen settings and Chill Mode to prevent abrupt wheel slip on low-traction surfaces.
Prepare systematically:
- Treat door seals with silicone conditioner before temperatures drop
- Switch to dedicated winter tires for meaningful grip on snow and ice
- Use Scheduled Departure to precondition both cabin and battery simultaneously
- Stock your trunk with an ice scraper, blanket, and compact 12V jump starter
How Cold Weather Cuts Range and Slows Charging
Cold air doesn’t just make your commute miserable—it actively works against your Tesla’s range and charging speed through several compounding mechanisms. Battery heating pulls energy directly from your pack before a single mile gets driven. Cabin warmth demands more. Tire rolling resistance climbs. The losses stack fast.
| Factor | Typical Impact |
|---|---|
| Cold battery heating | Up to 40% range loss |
| Supercharger speed | 25–50% slower until warm |
| Highway aerodynamic drag | Compounds winter losses |
| Short trip efficiency | Worst-case scenario |
Charging slowdowns happen because cold cells simply can’t accept current safely at full speed. Tesla’s battery protection logic throttles input until temperatures recover. Routing through a Supercharger triggers automatic preconditioning—use it.
Preconditioning Your Battery for Winter Driving and Charging
Start preconditioning 30–45 minutes before departure. Here’s what it actually handles simultaneously:
- Warms the high-voltage battery toward its ideal operating temperature
- Restores full regenerative braking (often limited below 32°F / 0°C)
- Improves Supercharger acceptance rates by reducing cold-battery throttling
- Heats the cabin without touching stored range
Battery insulation alone can’t maintain thermal readiness during extended cold parking. Scheduled Departure automates this entirely — set it once, forget it.
How to Weatherproof Door Handles and Seals Before Winter
Keeping your battery thermally ready gets you out the door — but only if the door actually opens. Tesla’s frameless windows and flush handles place unusual stress on seals, making freeze-related failures genuinely common.
A warm battery means nothing if frozen seals and handles keep you locked out entirely.
Start with seal conditioning: wash every rubber weather strip completely, then apply 303 Rubber Seal Protectant or WD-40 Specialist Silicone Lubricant evenly along each surface. Protection typically lasts three to four weeks, so reapplication during sustained cold is non-negotiable.
For handle lubrication, spray silicone lubricant directly at the pivot pin, then gently work the handle to distribute it through the mechanism. Never force a frozen handle — frameless glass doesn’t forgive that mistake.
Complete this entire workflow before your first hard freeze.
How to Inspect Lights, Horn, and Turn Signals at Home
Lights and signals don’t fail dramatically — they go quietly, one circuit at a time, until a cop pulls you over or you miss a connection in the rain. Walk your Model 3 with purpose before every season changes.
Start with hazard testing: press the roof-liner button above the rearview mirror and confirm touchscreen indicators flash simultaneously on both sides. Then check each signal independently:
- Test left and right turn signals using the stalk or steering wheel buttons
- Confirm automatic cancellation after completing a turn
- Inspect front and rear turn signal lenses for cracks or dimming LED circuits
- Verify brake lights, puddle lights, and headlights from outside the vehicle
Rapid flashing means a failed circuit — not a quirk. Fix it immediately.
How to Keep Salt and Road Grime From Destroying Your Tesla’s Undercarriage
Once you’ve confirmed your lights and signals are circuit-solid, shift your attention roughly eighteen inches lower — to everything salt, brine, and road slush are quietly destroying every time you drive in winter.
Road salt bonds to exposed metal within days, attacking brake lines, suspension components, frame rails, and fasteners before you notice anything wrong. Your Tesla still carries vulnerable steel underbody elements despite its simplified drivetrain.
Prioritize undercarriage rinsing after every significant winter drive — touch-free spray bays with heated water reach chassis crevices that standard washes miss entirely. Wheel wells and lower control arm pockets trap grime longest, so target those specifically.
Saltproof coatings applied through professional rustproofing services add a meaningful barrier between metal and moisture. Mud flaps reduce spray intrusion. Catch corrosion early; hidden rust repairs are neither cheap nor quick.
High-Mileage Tesla Ownership: What Changes After 100,000 Miles
Crossing 100,000 miles in a Tesla doesn’t trigger the same existential dread it does in a gas car, but that doesn’t mean nothing changes. Battery longevity becomes your primary concern—well-maintained packs often retain 80–90% capacity past 150,000 miles, but charging habits matter more than odometer numbers. Inverter repairs also surface around this threshold (one owner replaced a rear drive inverter at 109,000 miles, still covered under the 120,000-mile powertrain warranty).
What actually shifts:
- Battery degradation replaces engine wear as your main reliability question
- Frequent 100% charges and heavy Supercharging accelerate capacity loss
- Electronics and cooling components generate unexpected costs
- Rattles, interior aging, and suspension wear become more noticeable
Your warranty status fundamentally determines whether high mileage feels manageable or financially precarious.
How to Set a Tesla Maintenance Schedule Based on Mileage and Time
Unlike a gas car’s oil-change sticker on the windshield, Tesla maintenance doesn’t follow a single universal interval—you’re managing two overlapping clocks simultaneously: mileage and time.
Tesla maintenance runs on two clocks at once—mileage and time—not a single sticker on your windshield.
Set mileage alerts at 6,250-mile increments for tire rotation, since tread wear doesn’t pause because your calendar says otherwise.
Layer calendar integration on top: 12-month alerts for wiper blades and brake caliper lubrication, 2-year alerts for cabin air filters, and 4-year alerts for brake fluid health checks. Whichever threshold arrives first wins—that’s the rule.
Low-mileage owners especially need time-based tracking, because rubber degrades and fluids absorb moisture regardless of odometer readings.
Cross-reference everything against Tesla’s Maintenance Summary on the touchscreen, which flags overdue, due-soon, and upcoming items automatically, keeping your schedule honest without requiring spreadsheet heroics.