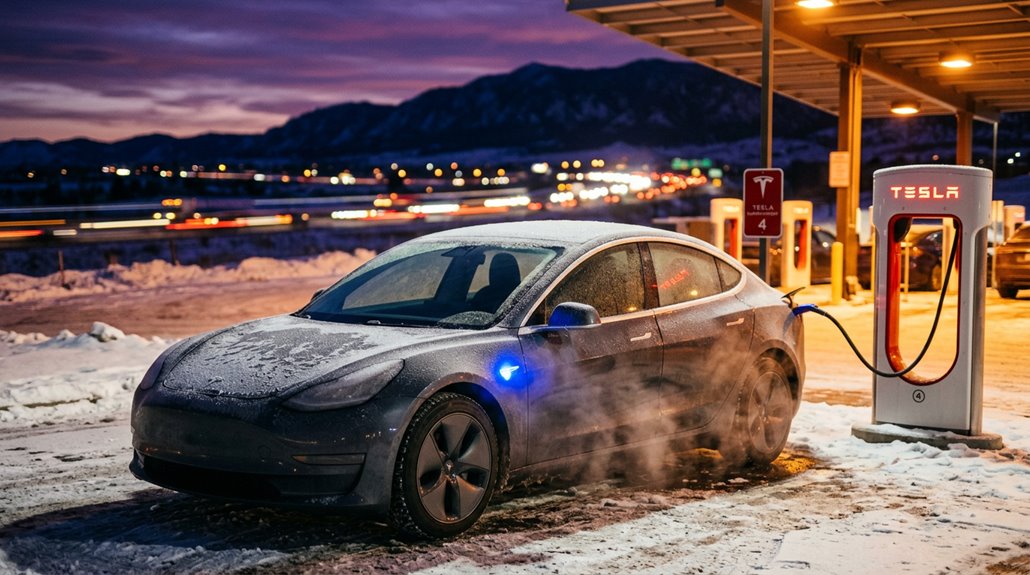
18 miles of range. Midnight. A Supercharger station glowing in the distance. What you do next depends entirely on knowledge most Tesla owners never bother to learn. Three charging tiers, wildly different power outputs, conflicting connector standards, and real-world limitations that can strand you when it matters most—Tesla’s charging ecosystem is more complex than the company wants you to believe. Every detail you need is right here.
Tesla Supercharger, Destination, and Home Charging: How Each One Works
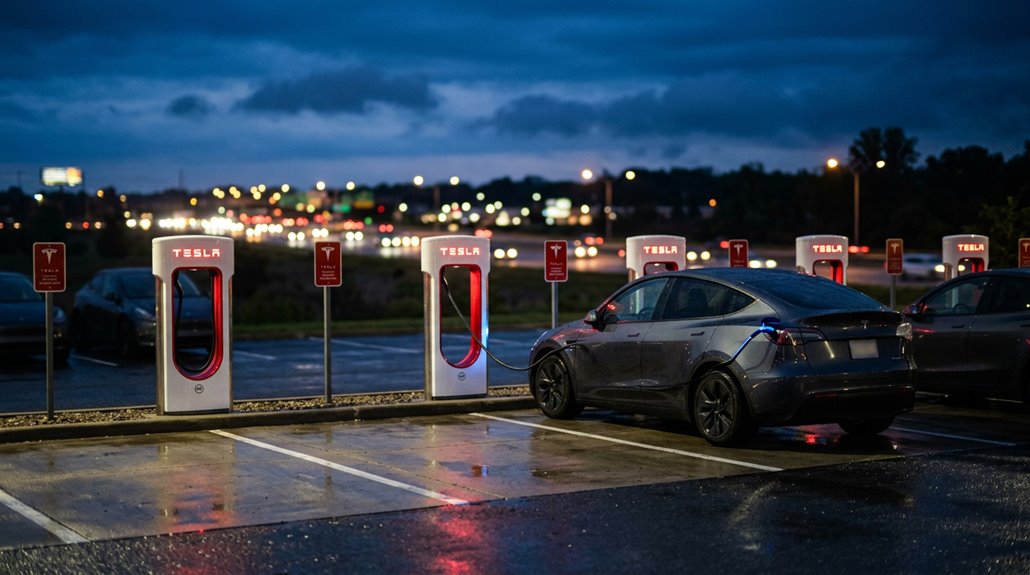
Tesla splits its charging ecosystem into three distinct tiers—Superchargers, Destination Charging, and home charging—and each one serves a fundamentally different use case.
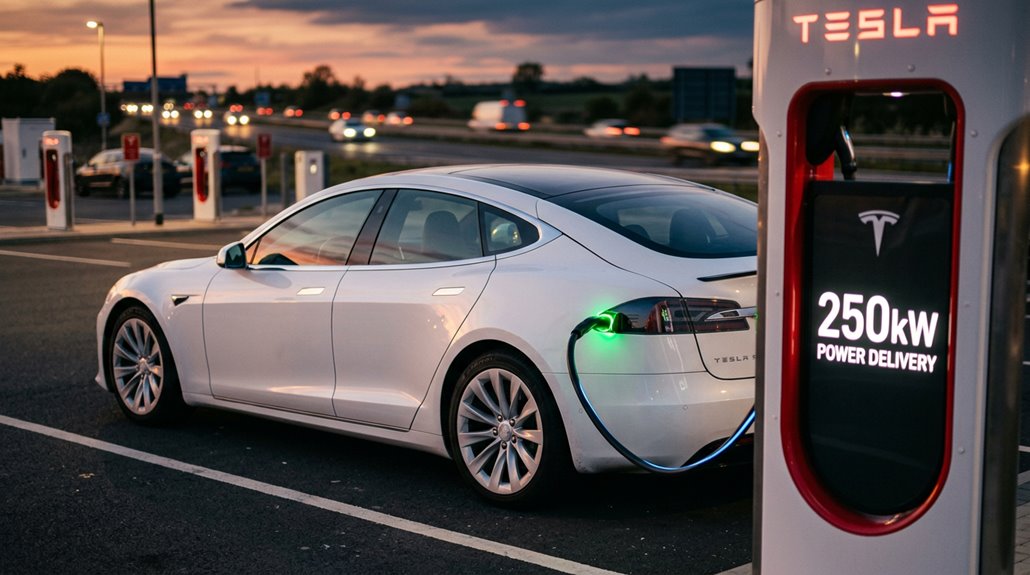
Superchargers deliver DC power directly to your battery, bypassing the onboard AC charger entirely and hitting up to 250 kW at V3 hardware. That speed matters most on road trips, where battery chemistry and temperature dictate how fast electrons actually flow.
At V3 hardware, Superchargers push 250 kW straight to your battery—no onboard AC charger standing in the way.
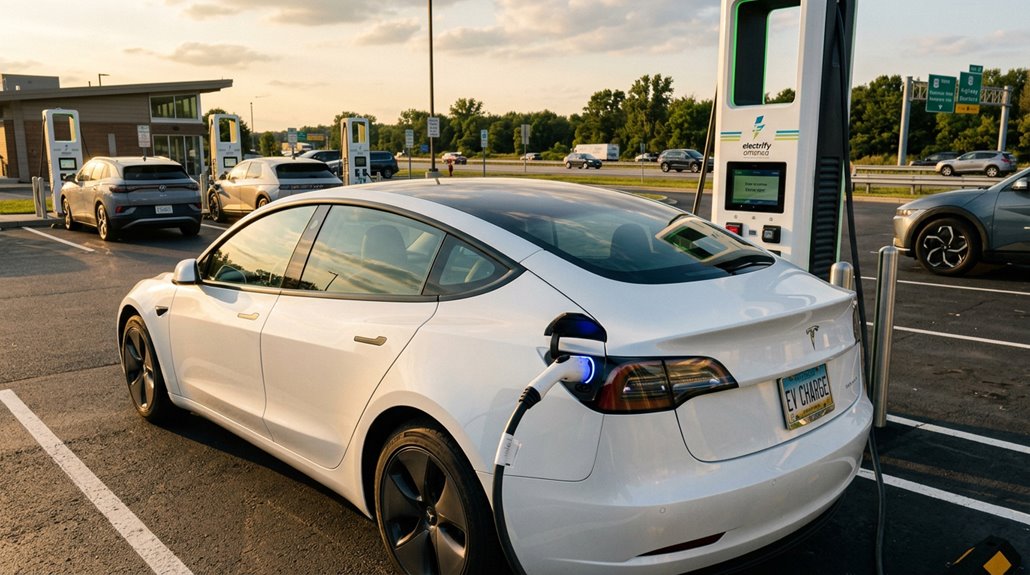
Destination Charging, installed at hotels and restaurants, runs AC Level 2—slower, but perfectly suited for multi-hour stays.
Home charging works the same AC principle, using a dedicated Wall Connector overnight. Connector standards (specifically NACS, Tesla’s proprietary format) unify all three tiers under one plug design, which honestly simplifies ownership more than most buyers initially realize when comparing competing networks. Non-Tesla EVs like the Chevy Equinox EV can now access 17,800+ Tesla Superchargers through a dedicated NACS adapter, significantly expanding their DC fast-charging options on the road. For long-term battery health, Tesla recommends regular home charging over repeated reliance on rapid DC Supercharging.
Tesla Supercharger vs. Destination Charging vs. Home Charging
When you’re deciding which charging method fits a given situation, the answer almost always comes down to three variables: how fast you need power, where you’re parked, and how long you’re staying.
Superchargers win on speed, supplying DC power directly to the battery—no conversion wait.
Destination charging and home charging both use Level 2 AC, meaning your onboard charger does the heavy lifting over several hours.
For battery longevity, slower AC charging at home beats frequent DC fast charging sessions.
Superchargers suit road trips; destination chargers suit overnight hotel stops.
Home charging handles everything routine.
Charging etiquette matters too—don’t occupy a Supercharger stall once you’re full when others are waiting.
Match the method to the moment, and you’ll rarely make the wrong call. If you encounter issues accessing charging resources online, Cloudflare site protection may be blocking your access and require you to contact the site owner with your Ray ID to resolve it.
How Fast Can a Tesla Actually Charge? Real Numbers by Model
Marketing numbers and real-world numbers rarely shake hands, and Tesla charging speeds are no exception. Peak ratings look impressive until you factor in battery degradation, temperature, and state of charge.
Here’s what actually matters:
- Level 1 (120V): Adds just 3–5 miles per hour — barely worth plugging in overnight
- Level 2 (240V): Delivers 14–44 miles per hour depending on trim and amperage
- Model Y Long Range (DC): Hits 10%–80% in roughly 25–30 minutes at a Supercharger
- Model 3 Long Range (DC): Averages ~95.6 kW across that same window, taking about 36 minutes
Charging etiquette tip: unplug near 80%, since charging slows dramatically afterward anyway. You’re not helping yourself by lingering. Most Teslas support an onboard charger capacity of 11.5 kW, which sets the ceiling for how fast any Level 2 home charger can actually deliver power to your battery.
Tesla Model S, 3, X, Y, and Cybertruck Max Charging Speeds Compared
Those real-world averages tell part of the story, but the bigger image snaps into focus when you stack all five models side by side. Model S and Model X both cap at 250 kW peak, though peak tapering kicks in aggressively above 50% state of charge. Model 3 and Model Y hit similar peaks but convert kilowatts into miles more efficiently, thanks to lighter curb weights. Cybertruck matches that 250 kW ceiling while hauling a considerably larger pack, meaning longer absolute charge times despite identical peak rates. Battery longevity also factors in here—older Model S and X variants frequently show degraded sustained output, sometimes dropping to 90–150 kW. You’re effectively comparing five athletes who sprint identically fast but carry very different loads. A healthy 2021+ Model S should complete a 10–80% session in roughly 25–32 minutes on a warm day at a V3 or V4 Supercharger.
Which Tesla Models Support V3 and V4 Supercharger Speeds?
Not every Tesla plays equally well with V3 and V4 Superchargers, and grasping the difference between station capability and vehicle capability saves you a lot of confusion at the stall.
V3 hardware delivers up to 250 kW from a 400V platform, but that ceiling only matters if your specific model and battery generation can actually reach it — Model 3 and Model Y hit that peak most reliably, while Model S and Model X typically charge at lower rates due to pack chemistry and thermal constraints.
To maximize your Supercharger session, you’ll need to account for your vehicle’s software version, state of charge, and battery temperature, because the station can offer the power long before your car is ready to take it. The newer long range and Plaid versions of Model S and Model X now support 250 kW charging, though peak rates are most accessible at low states of charge and taper off as the battery fills.
V3 and V4 Explained
When Tesla rolled out V3 Superchargers, it marked a genuine leap in DC fast-charging design — and V4 hardware is pushing that infrastructure further still. Grasping both generations helps you charge smarter.
Here’s what actually separates them:
- V3 limitations include fixed power-sharing framework, meaning stall congestion reduces your peak rate
- V4 compatibility extends beyond Tesla vehicles, supporting CCS adapters and Magic Dock-enabled access
- V4 hardware improves infrastructure flexibility more than raw speed for most current Tesla models
- Charging curves taper regardless of generation — battery state of charge matters more than hardware version
Your NACS-equipped Tesla works seamlessly at both. V4’s real win isn’t necessarily faster charging for you — it’s fewer people competing for the same stall. Tesla’s 25,000+ Supercharger plugs across North America mean that network scale, not just hardware generation, is what makes long-distance travel reliably practical.
Model Compatibility Breakdown
Grasping which Tesla actually *uses* those higher charge rates matters more than knowing the stations exist. Your vehicle’s hardware determines everything.
Newer Model 3 and Model Y variants with native NACS ports connect directly to V3 and V4 stalls without adapters, achieving peak rates up to 250 kW under ideal conditions.
Older Model S and Model X generations face a harder reality: retrofit compatibility often requires factory-installed hardware upgrades before accessing modern DC fast-charging infrastructure. Tesla’s service records will explicitly flag your vehicle as compatible, conditionally enabled, or simply incompatible (no adapter overrides that verdict).
The practical takeaway? Newer production vehicles get the broadest, simplest Supercharger access. Older ones require homework before assuming full network availability. Owners of older vehicles like the 2017 Model X may need a CCS kit and adapter to access newer Supercharger stalls, depending on whether a prior hardware upgrade was completed.
Maximizing Supercharger Speed
Knowing your Tesla’s peak charge rate matters, but squeezing every kilowatt out of a V3 or V4 Supercharger depends on more than just pulling into the right stall.
Four variables actually control your session:
- Enable battery preconditioning by steering to the Supercharger before arrival—your car’s thermal management system will warm the pack to peak temperature.
- Arrive at lower state of charge; peak power (up to 250 kW on V3) delivers fastest below 20%.
- Avoid stall-sharing—paired stalls split available power between vehicles.
- Keep software updated, since Tesla routinely polishes charging curves through over-the-air updates.
Model 3 and Model Y consistently hit the highest practical rates under ideal conditions. Cold batteries don’t lie—preconditioning separates a mediocre session from a genuinely fast one.
V4 Superchargers are visually distinguishable by their longer cable design and inclusion of a magic dock, though magic dock functionality has been reduced at several locations due to recent changes.
What Tesla’s “200 Miles in 15 Minutes” Supercharger Claim Actually Means
Tesla’s “200 miles in 15 minutes” claim is technically accurate but only under a specific set of conditions you’re unlikely to hit every time you pull into a Supercharger stall. Supplying 200 miles of range in 15 minutes requires averaging roughly 176 kW of power throughout the session — a threshold that demands you arrive with a near-depleted battery (think under 10% state of charge) and a thermally preconditioned pack, since charging curves taper sharply as the battery fills past 50%.
Real-world testing, including MotorTrend’s V3 sessions, landed closer to 180 miles in 15 minutes under those favorable conditions, which means the headline number is better understood as a ceiling, not a floor. The newer V4 Superchargers, capable of up to 500 kW, push that ceiling even higher — though for most Tesla models, the on-board charging hardware still caps actual intake at 250 kW.
Breaking Down the Claim
When Tesla says a Supercharger can add “up to 200 miles in 15 minutes,” that single phrase is doing a lot of heavy lifting. Marketing clarity demands you grasp exactly what’s being measured here.
Here’s what that claim actually breaks down to:
- “Up to” signals a ceiling, not a guarantee
- “200 miles” measures range added, not battery percentage filled
- “15 minutes” captures only the fastest charging window, not a full session
- “Miles” varies by model, since a Model 3 and Model X convert energy differently
Charging variability is real. Your vehicle’s efficiency, battery temperature, and state of charge all influence actual results.
Think of this number as Tesla’s headline benchmark — impressive, useful for perspective, but not a fixed promise stamped on every session. Real-world tests confirmed that achieving these rapid gains requires starting from a low state of charge, since charging speeds slow significantly above roughly 50% SOC.
Real-World Charging Conditions
Strip away the marketing language, and Tesla’s “200 miles in 15 minutes” claim starts looking less like a guarantee and more like a best-case snapshot — one that requires a near-perfect collision of variables most real-world drivers never encounter simultaneously. Battery preconditioning helps, but it works best after sustained highway driving, not a short neighborhood errand. Skip it entirely, and your cold pack charges sluggishly until temperatures climb.
Then there’s charging tapering — that inevitable power drop as state of charge rises. One real-world Model 3 session added 200 miles in roughly 23 minutes, not 15. A Cybertruck logged 134 miles in 17 minutes. These aren’t failures; they’re physics. Your actual results depend on battery temperature, stall version, site congestion, and your specific vehicle’s efficiency rating. Model charging times vary meaningfully across Tesla’s lineup, with the Model 3 hitting 10% to 80% in roughly 20–30 minutes while the larger Model X can stretch that window to 30–45 minutes.
Why Tesla Recommends Stopping Your Charge at 80
If you’ve ever noticed Tesla defaulting your charge limit to 80% right out of the box, that’s not an accident or a conservative guess — it’s a deliberate recommendation grounded in lithium-ion electrochemistry.
Here’s what stopping at 80% actually protects:
- Battery longevity — High state-of-charge voltage accelerates cell degradation, especially in Tesla’s NCA chemistry
- Heat reduction — The final 20% generates disproportionate heat, which destroys pack health over time
- Regen optimization — A full battery can’t absorb deceleration energy, killing efficiency immediately after charging
- Daily sufficiency — 80% covers most commutes without unnecessary chemical stress
Reserve 100% for road trips. Afterward, drop back to 80%. Your pack will quietly thank you in retained capacity years later. Tesla’s Battery Management System actively monitors cell health and optimizes charging behavior to enforce these limits and slow long-term degradation.
How Battery Preconditioning Makes Supercharging Faster
Cold batteries are chemistry’s version of a Monday morning — technically functional, but nowhere near ideal. Cold lithium-ion cells develop higher internal resistance, forcing Tesla’s battery management system to throttle incoming power and extend your session considerably. That’s where battery preconditioning changes the charging psychology entirely.
When you steer toward a Supercharger (or a supported third-party DC fast charger since OTA update 2025.2), your Tesla automatically begins heating the pack before arrival. The difference is measurable: a stronger 30-minute preheat cycle raises battery temperature over 20°C using roughly 3.4 kWh — energy well spent against faster charger ramp-up. Cold-soaked batteries skip this preparation and spend frustrating early minutes accepting far less than the charger’s maximum output.
Precondition deliberately. Arrive ready. The heat pump and octovalve work together to scavenge and redistribute thermal energy from the powertrain, warming the battery pack efficiently before you even pull into a stall.
How V1, V2, V3, and V4 Tesla Superchargers Differ
Tesla’s Supercharger network didn’t arrive fully formed — it evolved through four distinct hardware generations, each pushing power delivery higher while solving the real-world frustrations the previous version exposed.
Grasping these generation differences helps you pick the right stall when options exist.
- V1 (2012): Peaks at 90–120 kW, uses air-cooled cables, and shares power between paired stalls.
- V2 (2014–2015): Reaches 120–150 kW — same power sharing limitations apply when neighbors plug in.
- V3 (2019): Jumps to 250 kW with liquid-cooled cables and eliminates traditional paired-stall power sharing constraints.
- V4 (2023): Delivers 325–350 kW through longer cables designed for easier positioning.
Each jump wasn’t cosmetic — it was infrastructure maturity happening in real time. The V4 hardware is also designed to support future speeds up to 500 kW, with new cabinets planned to reach 1.2 MW capacity by 2025.
How Tesla’s 500 kW Supercharger Stations Work
When the V4 Supercharger spec sheet lists 500 kW for passenger vehicles, that number isn’t marketing rounding — it reflects a genuine structural overhaul that starts before the charging cable even leaves the post.
500 kW isn’t a marketing number — it’s the result of an architecture rebuilt from the ground up.
The framework runs at up to 800 V, which cuts current for a given power level and reduces resistive losses across cables and vehicle wiring.
Behind each stall sits a centralized cabinet distribution system — one 1.2 MW cabinet can serve eight stalls simultaneously, shifting power responsively as vehicles connect or disconnect. That’s smarter than reserving a fixed budget per stall.
SiC thermal efficiency is the quiet enabler here: silicon carbide power electronics generate less heat than conventional silicon, letting the cabinet sustain peak output longer without aggressive cooling intervention — particularly worthwhile during warm-weather operation. The V4 cabinet specs were formally announced on November 14, 2024, confirming the 1.2 MW ceiling that makes this thermal headroom meaningful in practice.
How the Supercharger Network Grew to 80,000+ Connectors Worldwide
That 500 kW per stall output only matters if stalls actually exist where you need them — and building a network dense enough to matter took Tesla from six California stations in 2012 to more than 80,000 stalls worldwide by 2026.
The rapid expansion tells a clear story:
- 2012 — Six stations launched in California
- 2022 — Network crossed 40,000 stalls
- 2026 — Doubled to 80,000+ stalls in under four years
- Regional milestones — The 80,000th stall landed in Saint-Saturnin, France, at a 48-stall site near Le Mans
That doubling happened faster than the entire first decade of growth.
Q1 2026 alone logged 53 million charging sessions providing 1.8 TWh — roughly 20 GWh daily — proving scale actually gets used.
V4 cabinet production is now ramping at Gigafactory New York following the end of V3 cabinet manufacturing on March 16, 2026, with each new cabinet capable of serving up to eight stalls at a power ceiling of 500 kW.
Where Tesla Supercharger Stations Are Located Near You
You can find the nearest Tesla Supercharger in seconds using the official Tesla app, the “Find Us” map on Tesla’s website, or the route guidance system built directly into your vehicle.
Highway corridors and urban centers dominate the network’s footprint, with stations typically positioned near retail, food, and restroom amenities to make a 20–30 minute charge feel less like a stop and more like a planned break.
Specific station pages list stall counts, operating hours, and real-time availability, while third-party tools like PlugShare can supplement that data with user reviews and photos for locations like Pearl, MS (200 Bass Pro Dr.) or Vicksburg, MS (4116 Washington St.). With 45,000+ Superchargers globally, Tesla’s network has already reached a scale that makes finding a station on nearly any major route a realistic expectation.
Finding Nearby Superchargers
Tracking down a nearby Supercharger is straightforward once you know where to look. Tesla’s official Find Us page organizes stations by country, state, and city, giving you charger availability details before you leave the driveway.
Here’s a quick approach that actually works:
- Open Tesla’s Find Us map for real-time station lookup
- Search your city plus “Tesla Supercharger” for fast local results
- Cross-check PlugShare or ChargeFinder when comparing route options
- Confirm access hours and connector requirements before arriving
Third-party tools like MapQuest and Way.com aggregate location data worth bookmarking. Piedmont, SC, for example, runs 8 stalls at 250 kW, available 24/7.
Respecting station etiquette, meaning don’t linger after charging completes, keeps things moving for everyone behind you.
Highway And Urban Locations
Whether you’re planning a cross-country run or just trying to charge without a garage, Tesla’s Supercharger network splits its footprint across two distinct environments: highway corridors and urban centers.
Along interstates, corridor accessibility drives placement—stations appear where route continuity matters most, letting you grab roughly 200 miles of range in 15 minutes and keep moving.
Urban centers serve a different need entirely. Brooklyn alone lists 58 Supercharger stations, many near hotels, parking structures, and commercial districts. That density addresses neighborhood equity directly, giving apartment dwellers without home charging a legitimate daily option.
Tesla’s 80,000-plus global Superchargers (rated up to 325 kW) aren’t randomly scattered—they’re positioned around parking availability, road connectivity, and demand concentration, which explains why some neighborhoods feel well-served while others still wait. To find stations near you, the U.S. Department of Energy’s Alternative Fuels Data Center operates an interactive locator that displays public charging infrastructure installed throughout New York State.
Using Tesla’s Station Map
Finding a Tesla Supercharger near you starts with one tool: Tesla’s official “Find Us” map, accessible directly from Tesla’s website. It’s your most reliable, current source—no third-party guesswork required.
The map delivers exactly what you need:
- Full address and stall count — confirming capacity before you commit
- Charging speed details — some sites push up to 250 kW
- Access hours and pricing — including per-kWh rates and congestion fees
- Connector compatibility — NACS, CCS, and partner-site designations clearly labeled
Mobile integration means you’re never without this data on the road. However, note that offline access isn’t supported—you’ll need connectivity to pull live station status.
Plan accordingly, especially through rural corridors near Charleston or Summerville, SC. In the Summerville area specifically, verified locations include spots like McElveen Buick GMC and Roper St. Francis Berkeley Hospital, though some listed sites show no sign of development as of mid-2025.
How Tesla’s Navigation Picks Supercharger Stops for You
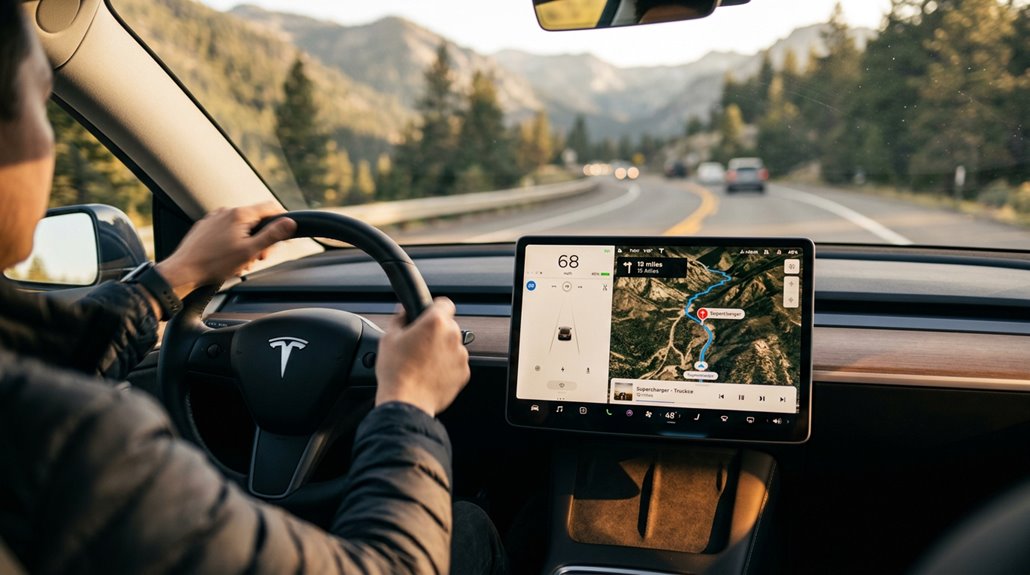
When you plug a destination into Tesla’s route-finding, the system doesn’t just map a route — it quietly solves an energy logistics problem in the background. It factors in driving style, elevation changes, outside temperature, traffic, and even stall availability before committing to a Supercharger stop. The result appears in your turn-by-turn list as a recommended charge duration, not a vague suggestion.
Route preconditioning kicks in automatically once guidance locks onto a Supercharger, warming the battery to its ideal charge-acceptance temperature before you arrive (cutting actual charge time meaningfully). Real-time rerouting handles the unexpected — if a busier station appears ahead, the system may silently redirect you toward a less congested alternative. No confirmation prompt required. The car’s just managing your energy budget, one calculated stop at a time.
Destinations are added as individual stops along the route, and the trip order remains fully editable — you can drag stops to rearrange them and adjust arrival energy targets to directly influence how the system calculates required charge duration at each Supercharger.
How to Plan a Long Road Trip Using Tesla’s Supercharger Routing
Planning a long Tesla road trip is mostly a solved problem — enter your destination, and the Trip Planner handles the heavy lifting, identifying Supercharger stops, estimating charge durations, and sequencing the whole route to minimize total travel time rather than just maximize battery level.
Here’s what actually moves the needle:
- Target arrivals between 10–20% state of charge — DC charging is fastest below 50%
- Enable battery preconditioning — warm packs charge markedly faster at each stop
- Space stops roughly 120 miles apart — efficient pacing without unnecessary detours
- Use route flexibility — remove unneeded stops or redirect around congestion instantly
Shorter, more frequent sessions (sometimes just 10–15 minutes) consistently beat long dwell times as the battery tapers near full capacity. For long-term battery health, it’s also worth noting that optimal battery care means avoiding charges above roughly 70% and not letting the pack drop below around 20%.
What Happens During a Supercharger Session: Authorization, Billing, and Power Delivery
Plugging in at a Supercharger kicks off a sequence that’s more mechanized than most drivers expect — the vehicle and stall complete a digital handshake almost immediately, authenticating your Tesla account and pulling the stored payment method without requiring you to tap anything on the app. Payment reconciliation happens quietly in the background, settled against your stored card once the session closes.
From there, the station and vehicle negotiate power delivery together, adjusting output fluidly as your battery’s state of charge climbs and its thermal curve shifts. You can track everything through the app or center display — that’s real-time session diagnostics, fundamentally. Non-Tesla drivers using Magic Dock or manufacturer adapters follow a similar flow, though app activation and stall identification are typically required before power flows.
Before heading to a station, drivers can check Supercharger stall availability through the Tesla app to confirm the location is operational and has open stalls ready.
What Tesla’s 99.95% Supercharger Uptime Means in Practice
Tesla’s Supercharger network carries a 99.95% uptime figure that sounds airtight — and largely is — but the number rewards a closer look before you treat it as a promise that every stall at every stop will be live when you arrive.
Tesla’s 99.95% Supercharger uptime sounds airtight — until you look closely at what that number actually promises.
Here’s what that metric actually tells you about site reliability and rider expectations:
- 99.95% equals roughly 4.38 hours of downtime per site annually — rare, but real.
- “Up” means 50% capacity is functional, not every stall.
- Individual stalls can be offline while the site still reports healthy.
- Wait times and speed degradation aren’t captured by this number at all.
The network is genuinely dependable. In fact, Tesla’s 2023 Impact Report confirms the network reached 99.97% uptime that year, marking an all-time high for the Supercharger Network.
Just don’t confuse high availability with a guarantee of a frictionless pull-in.
How Tesla’s 100% Renewable Supercharger Claim Actually Works
Uptime numbers tell you whether the stall is live — a separate question worth asking is what’s actually powering it.
Tesla claimed 100% renewable Supercharger energy in 2021, but renewable accounting rarely means what you’d expect. Most Superchargers pull from local utility grids (same mixed sources powering nearby homes), so procurement strategies matter enormously here. Tesla typically purchases Renewable Energy Certificates (RECs) — each representing one megawatt-hour of verified renewable generation somewhere on the grid — rather than running dedicated off-grid solar at 2,699+ stations. That’s bookkeeping, not electrons.
Grid realities make physical site-by-site renewables genuinely impractical at scale. Consumer transparency demands you grasp this distinction: “100% renewable” reflects net annual accounting against corporate carbon standards, not a guarantee your specific charging session avoided fossil-fuel generation entirely. Notable exceptions exist where geography does the work cleanly — all Superchargers in Quebec run on Hydro-Québec hydropower, meaning those sessions carry no REC abstraction whatsoever.
What the North American Charging Standard Is and Why It Matters
If you’ve ever plugged a non-Tesla EV into a public charger and wrestled with a connector the size of a small fist, you already grasp the problem NACS solves.
The North American Charging Standard (formally designated SAE J3400) started as Tesla’s proprietary connector in 2012, then went open-source in November 2022, triggering a cascade of adoption commitments from virtually every major automaker by 2025. That shift matters because NACS consolidates AC and DC fast charging into one compact inlet, eliminating the connector fragmentation that’s made public charging feel like a USB compatibility nightmare for years. Tesla operates about 60 percent of all direct-current fast chargers in the United States, making broad NACS adoption a decisive factor in where and how easily EV drivers can charge.
NACS Explained Simply
What exactly is NACS, and why does it keep showing up in every EV conversation lately? Simple answer: it’s the connector that’s quietly reshaping how North America charges electric vehicles.
Here’s what you actually need to know:
- Connector history — Tesla developed NACS internally, then opened the design publicly in November 2022, eventually becoming SAE J3400.
- Safety features — Built-in fault detection and automatic shut-off protect both you and the vehicle during sessions.
- Communication protocols — ISO 15118-based signaling lets your car negotiate charging parameters directly with the station.
- Adapter options — Bridges between NACS and CCS exist precisely because the shift period isn’t over yet.
One connector handling AC (up to 80A/277V) and DC fast charging (up to 500A/500V) simultaneously? That’s genuinely refined engineering. Ford was first among major automakers to publicly commit to NACS adoption after Tesla opened the standard, triggering a wave of similar announcements across the industry.
Industry Adoption Impact
Comprehending the connector itself is only half the picture — the real story is what happens when the rest of the industry decides to use it. Ford moved first in May 2023, then General Motors, Rivian, and others followed. That cascade effectively ended Tesla’s Network Monopoly — its stranglehold over the most reliable fast-charging infrastructure in North America.
SAE J3400 formalized NACS as a true industry standard, meaning your next EV purchase (regardless of badge) increasingly plugs into the same hardware. The Adapter Ecosystem that CCS1 drivers previously depended on becomes less necessary as native NACS ports reach 1,000-plus installations nationwide. Tesla operates roughly 60% of U.S. DC fast chargers — you’re not just getting a connector standard, you’re getting access to that entire network. However, broader industry adoption of NACS raises important questions about compatibility with non-Tesla vehicles, as many network features still cater primarily to Tesla vehicles, potentially limiting functionality for others.
Why Tesla Superchargers Make Up Three Out of Four North American Fast Chargers
Tesla’s Supercharger network didn’t get to three out of four North American fast chargers by accident — it got there by building more hardware, faster, than anyone else bothered to.
That level of charger ownership reflects a deliberate infrastructure strategy most competitors still haven’t matched. Network density matters because convenience drives adoption. Here’s why that dominance makes sense:
Network density isn’t accidental — it’s the deliberate infrastructure gap most competitors still haven’t closed.
- Tesla operates roughly 17,000 North American chargers across ~2,500 stations
- V4 posts push availability higher with integrated payment terminals
- NACS standardization pulled competitors onto Tesla’s infrastructure
- Strategic site placement near amenities keeps utilization high
You benefit directly from that scale. Every charger Tesla adds strengthens the network’s reliability, making range anxiety genuinely harder to justify with each new installation. The Supercharger network also maintains 99% uptime, a reliability benchmark that third-party charging operators have consistently struggled to match.
Why NACS Adoption by Ford and GM Matters for Tesla Owners
When Ford and GM announced NACS adoption in 2023, they didn’t just validate Tesla’s connector design—they handed you a charging ecosystem that’s rapidly becoming North America’s de facto standard.
Starting with 2025 model-year vehicles, both automakers will ship native NACS ports, meaning the same plug powering your Tesla will eventually serve millions of competing EVs. That standardization works in your favor by reducing the fragmented CCS-versus-NACS terrain at public stations, though it also means you’ll share Supercharger stalls with a broader pool of drivers (something worth factoring into your road-trip timing).
GM, Ford, and Tesla together represent roughly 75% of the US EV market, which means this connector alignment carries enough commercial weight to push the rest of the industry toward a single North American charging standard.
Expanded Network Access
Ford’s announcement in May 2023 — followed by GM’s in June 2023 — didn’t just expand Tesla’s charging network; it fundamentally redefined who the Supercharger network was actually *for*.
Together, these two automakers represented roughly 75% of the U.S. EV market. That’s not a footnote — that’s a structural shift. Here’s what cross-brand interoperability actually delivered:
- Ford and GM drivers gained reliable rural access through Tesla’s established site coverage
- Adapter-based charging bridged the gap while native NACS ports rolled out in 2025 models
- Non-Tesla drivers reduced road-trip friction markedly
- Supercharger availability became a competitive feature automakers actively promoted
You’re no longer charging on a closed network. You’re plugging into North America’s most recognizable fast-charging infrastructure — regardless of what’s in your driveway. GM vehicles adopting NACS means charging at Tesla’s network requires no adapter needed, signaling a broader industry push toward a unified U.S. connector standard.
Standardized Charging Compatibility
Two automakers signing onto NACS didn’t just validate Tesla’s connector — it quietly restructured the entire North American charging ecosystem in Tesla owners’ favor.
When Ford announced adoption in May 2023 and GM followed on June 8, 2023, those three brands collectively represented roughly 75% of U.S. EV market share. That’s not a footnote — that’s charging policy harmonization happening at scale.
GM planned adapter-based Supercharger access starting in 2024, with native NACS ports arriving on new vehicles by 2025. The adapters ecosystem bridges the gap during the shift, letting CCS-equipped vehicles and NACS vehicles coexist without chaos.
For you as a Tesla owner, this means fewer mixed-connector headaches at public stations and a market increasingly organized around one dominant North American interface rather than competing standards fighting for wall space.
How Tesla Owners Access CCS Charging on Non-Tesla Networks
Accessing CCS charging on a non-Tesla network isn’t complicated, but it does hinge on one critical variable: whether your Tesla has native CCS hardware or needs an adapter to bridge the gap. Here’s what actually determines your success:
- Know your hardware — older North American models often require retrofit options to enable CCS compatibility
- Choose adapters carefully — adapter reliability directly affects DC fast charging safety at high thermal loads
- Authenticate correctly — use the network’s app, RFID card, or station interface before plugging in
- Verify compatibility beforehand — not every CCS station supports every Tesla configuration
Your charging speed ultimately depends on station output, your battery’s state of charge, and thermal conditions — not just the cable in your hand.
How to Use Your Tesla on ChargePoint, Blink, and EVgo
When you pull up to a ChargePoint, Blink, or EVgo station in your Tesla, the connector type at that specific stall determines everything—AC stations on all three networks use J1772 plugs, which means the J1772 adapter that shipped with your vehicle becomes your entry ticket.
For DC fast charging on ChargePoint or EVgo, you’ll need Tesla’s CCS1 adaptor (verify support under Settings > Software > Additional Vehicle Information before you drive out), since not every Tesla trim or software version enables it by default.
Each network runs its own app—ChargePoint, Blink, or EVgo—for locating live-availability stations, confirming connector specs and pricing, and initiating the session, though ChargePoint also supports tap-to-charge via its physical card on compatible readers.
Using Third-Party Chargers
Tesla’s third-party charging ecosystem stretches well beyond the Supercharger network, and ChargePoint, Blink, and EVgo each plug into that image differently depending on your connector setup and vehicle configuration.
Here’s what you need to confirm before pulling in:
- Check your connector type — most Level 2 stations use J1772, which your included adapter handles cleanly.
- Verify CCS adapter support under Software → Additional Vehicle Information before attempting DC fast charging.
- Review payment options through each network’s app before arrival — pricing and activation methods vary considerably.
- Run adapter troubleshooting if the session won’t initiate; re-seating the adapter typically resolves handshake errors.
ChargePoint, Blink, and EVgo all support Tesla access when your hardware and network configuration align correctly.
Adapter Compatibility Explained
Most Tesla owners run into adapter questions the moment they pull up to a ChargePoint pedestal or a Blink station for the first time — and the short answer is that the right adaptor determines whether you charge successfully or just sit there looking confused.
Your Tesla’s J1772 adaptor handles AC Level 1 and Level 2 stations exclusively; it’s never for DC fast-charging plugs like CCS1 or CHAdeMO. Forcing an AC adaptor into a DC port damages connectors — physics doesn’t negotiate.
For EVgo DC sessions, only Tesla-manufactured CCS1 adaptors earn network approval; third party safety concerns disqualify uncertified hardware outright.
Always verify adaptor ratings match both the station’s output amperage and your vehicle’s onboard charger capacity, since the adaptor itself never determines charging speed — your car’s internal hardware does.
Finding Available Stations
Pulling up to an unfamiliar ChargePoint pedestal or EVgo column without a plan wastes time — and time is the one thing DC fast charging is supposed to save you. Use connector filtering inside each network’s app before you leave your driveway.
Here’s your four-step station recon routine:
- Filter by connector type — NACS or CCS, depending on your adapter situation
- Check real time availability — occupied stalls appear instantly on live maps
- Confirm power output — Level 2 versus DC fast charging changes your stop dramatically
- Review pricing structure — per-kWh versus per-minute rates affect total cost materially
Always identify one backup station. Sparse fast-charging corridors punish optimism ruthlessly.
How Tesla’s 40,000+ Destination Chargers Work at Hotels and Resorts
Scattered across hotel parking decks, resort valet zones, and upscale shopping centers, Tesla’s Destination Charging network has quietly grown to over 50,000 Wall Connector installations worldwide — and it works nothing like a Supercharger.
Tucked into hotel parking decks and resort valet zones, Tesla’s Destination Charging network now spans over 50,000 installations worldwide.
These are Level 2 AC stations, providing roughly 30–44 miles of range per hour, tuned for vehicles sitting idle during dinner, overnight stays, or extended resort visits. You’re not rushing here.
Access varies by property — some locations fold charging into resort amenities, while others require purchases or paid parking. Hotel etiquette matters: vacating the spot once charged keeps things fair. Many locations charge nothing for electricity, though parking or valet fees still apply.
Think of it as passive refueling — the car charges while you’re already doing something else entirely.
How to Find and Use Destination Chargers on Tesla’s Navigation
Four things worth knowing before you pull in:
- Destination Chargers are built for multi-hour stops — hotels, restaurants, resorts
- Tesla lists 50,000+ Wall Connectors at these locations globally
- No adaptor required if you’re driving a Tesla
- Practice good charger etiquette — don’t leave your car parked after it’s full
The Tesla app and website also support pre-trip planning, while PlugShare fills gaps with user reviews and real parking conditions.
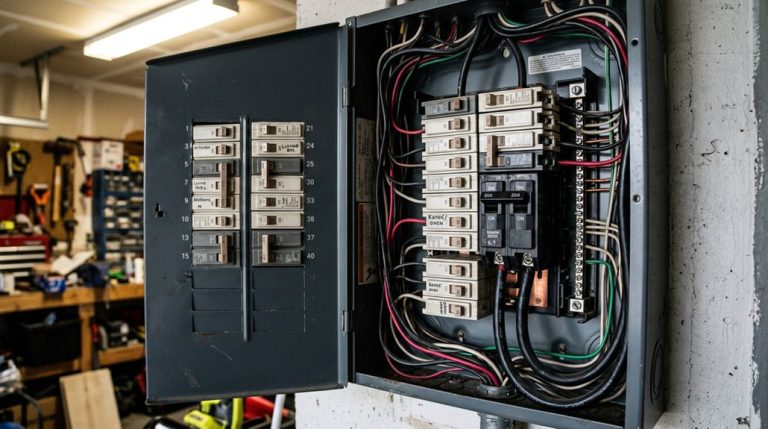
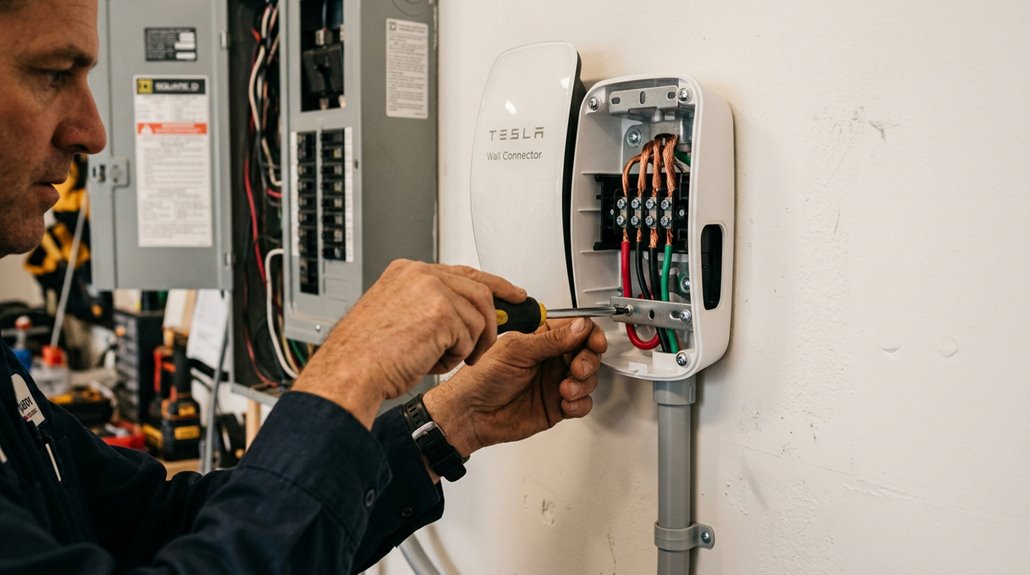
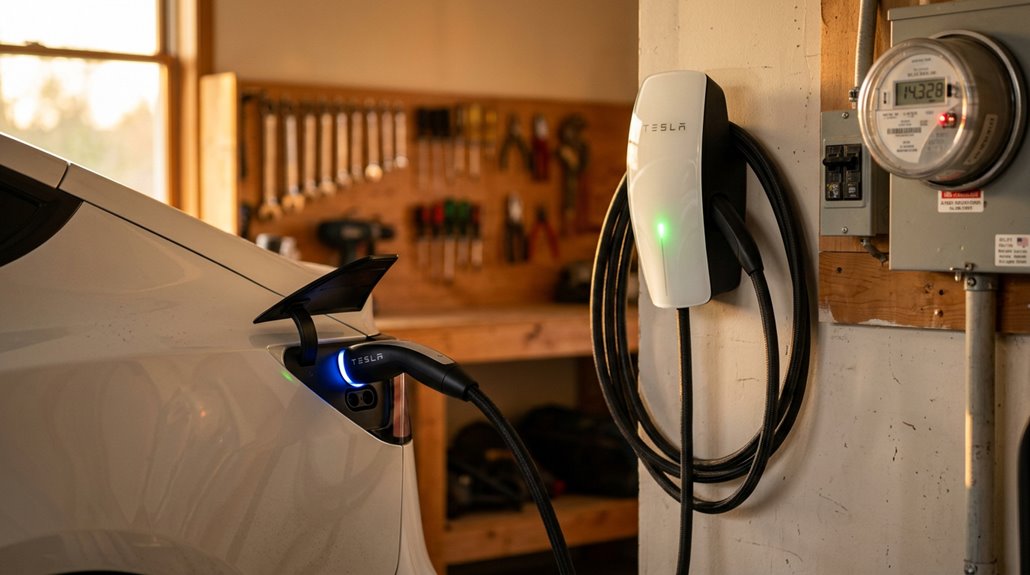
Tesla Wall Connector Gen 3: Electrical Requirements
Destination Chargers handle the overnight and multi-hour stops well enough, but if you want a dedicated home setup that delivers maximum AC charging speed every single time, the Tesla Wall Connector Gen 3 is the hardware worth grasping properly.
It runs on 200–240V AC single-phase input and requires a hardwired, dedicated circuit—no plug-in shortcuts here.
Maximum output hits 48 amps, producing 11.5 kW and roughly 44 miles of range per hour.
That 48-amp continuous load demands a 60-amp breaker (the 125% rule for continuous loads governs that math).
Wiring installation requirements call for 6 AWG copper conductors minimum at full output.
Grounding schemes follow TN/TT configurations for North American installations, and the terminal blocks accept 12–4 AWG copper, giving installers reasonable flexibility across varying panel distances.
How to Install the Tesla Wall Connector Gen 3 Step by Step
Installing the Tesla Wall Connector Gen 3 yourself (with a licensed electrician handling panel work, where local code requires it) demands the right tools upfront: a drill, conduit bender, torque screwdriver, wire stripper, voltage tester, conduit fittings, and appropriately sized conductors for your circuit’s amperage.
You’ll work through a logical sequence — site assessment, mounting the base plate, routing conductors through conduit, terminating wires at both the Wall Connector and the breaker panel, then commissioning via the unit’s broadcast Wi-Fi SSID.
Safety checkpoints aren’t optional formalities; a loose terminal connection on a 60A circuit is a fire waiting to introduce itself.
Tools and Materials Needed
Before you pull a single wire, you’ll need the right tools and materials staged and ready—skipping this step is how a straightforward installation turns into three trips to the hardware store. Your installation checklist covers four core categories:
- Hand tools — torque driver (set to exactly 50 in-lb/5.6 Nm), wire stripper, level, and tape measure
- Drilling equipment — power drill with 3/16 in and 3/32 in bits, plus a stud finder
- Electrical testing tools — multimeter, smartphone for Wi-Fi commissioning, and the QR code from your Quickstart Guide
- Safety materials and parts — properly sized conductors, ground wire, conduit with fittings, and the Gen 3 Wirebox Kit
Neutral isn’t required on Gen 3—only Line 1, Line 2, and ground.
Step-by-Step Installation Process
Once the tools are staged and the circuit’s planned, the actual installation breaks into five clean phases: locating and templating the mount point, prepping the panel and branch circuit, securing the wirebox to the wall, landing the cables, and commissioning the unit.
Use Tesla’s mounting template to mark screw positions and wire-entry alignment precisely—a level here saves embarrassment later.
At the panel, install a dedicated 60-amp two-pole breaker (supporting 48-amp continuous draw), confirming panel clearance for proper conductor routing.
Mount the wirebox using provided fasteners and sealing washers before introducing wires.
Strip conductors to Tesla’s specified length using the integrated gauge, then torque terminals correctly—nothing crosses the sensor area.
Finally, commission via Wi-Fi through your mobile device, enabling remote access for both installer and owner.
Safety and Testing Tips
Safety doesn’t stop once the wiring’s done—it threads through every phase of a Tesla Wall Connector Gen 3 installation, from the moment you approach the panel to the second you push firmware updates post-commissioning.
Four rules that genuinely protect you:
- Personal protective equipment first: Wear 1000V-rated insulated gloves before touching anything inside the panel enclosure.
- Confirm de-energized status: Use a non-contact voltage tester at the wire end—not just the breaker label.
- Lock out the panel: Prevent accidental re-energizing when others share the space.
- Verify grounding continuity: Check this before panel setup begins, not after.
Strip conductors to exactly 5/8 inch, torque every terminal to specification (never by feel), and stay completely dry throughout.
Details save lives.
What Circuit Breaker and Wire Gauge Does It Need?
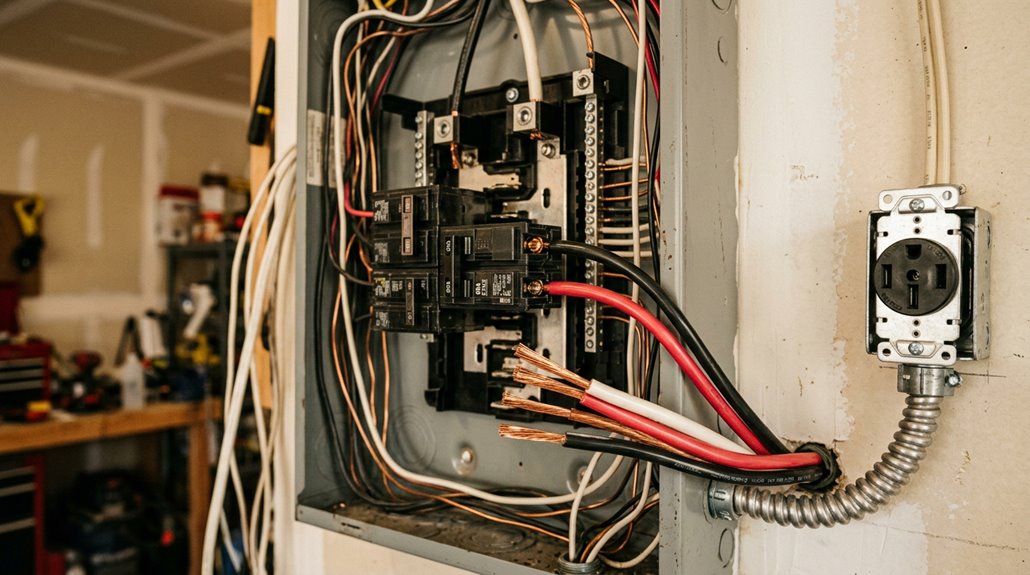
Getting the breaker and wire sizing right isn’t optional—it’s the foundation of a safe, high-performance Wall Connector installation. EV charging qualifies as a continuous load, meaning your breaker must exceed your draw by 25%.
| Breaker Size | Max Charging Output | Minimum Wire Gauge |
|---|---|---|
| 60A (recommended) | 48A | 6 AWG (90°C) |
| 50A | 40A | 8 AWG |
| 40A | 32A | 10 AWG |
Conductor temperature rating directly determines your wire gauge selection. A 60°C-rated breaker terminal requires 4 AWG THWN-2 copper—one full size larger than the 6 AWG permitted with 90°C-rated conductors. Longer runs or demanding installation conditions push those minimums higher. Match your configuration to your panel’s actual capacity, not its theoretical maximum.
Hardwired vs. Plug-In Wall Connector: Which Is Better?
With your breaker sized and your wire gauge locked in, the next decision shapes how your Wall Connector actually connects to that circuit—hardwired directly into your panel or plugged into a 240V outlet like a NEMA 14-50.
Breaker sized, wire gauge locked in—now decide how your Wall Connector actually meets that circuit.
Installation permanence versus charging portability basically splits into four real trade-offs:
- Power ceiling — Hardwired reaches 48 amps (11.5 kW); plug-in typically caps at 40 amps.
- Installation permanence — Hardwired demands a licensed electrician and stays put permanently.
- Charging portability — Plug-in units unplug and relocate whenever your situation changes.
- Durability — Fewer connection points mean hardwired setups wear more slowly over daily use.
Renters or frequent movers benefit from plug-in flexibility. Homeowners committed to one dedicated location get more reliability, higher output, and fewer headaches choosing hardwired.
How to Charge a Tesla on a Standard 120V Outlet
If you’re in a pinch without a dedicated charging setup, your Tesla can draw power from a standard 120V household outlet using the Mobile Connector paired with a NEMA 5-15 adapter (the same three-prong plug powering your lamp).
At 12 amps of continuous draw, you’re looking at roughly 2 to 3 miles of range per hour — enough to recover a 30-mile commute overnight, but not much else.
It’s technically charging, just not the kind you’d brag about.
Understanding 120V Outlet Charging
Charging a Tesla on a standard 120V outlet works — just not quickly. You’re pulling 12A continuously (80% of the 15A breaker rating), which adds roughly 3–5 miles of range per hour. That’s the physics of Level 1 charging.
Here’s what actually matters for safe, consistent use:
- Inspect your outlet — outlet maintenance isn’t optional; discoloration or looseness means stop immediately.
- Dedicate the circuit — shared loads create dangerous heat buildup over long sessions.
- Practice proper charger etiquette — don’t daisy-chain extension cords or ignore worn plugs.
- Charge overnight — low daily mileage is the only scenario where this speed makes sense.
Level 1 works best as a backup, not your permanent solution.
Range Gained Per Hour
Now that you know what makes a 120V setup safe to use, the obvious next question is how much range it actually delivers. Expect roughly 3 to 5 miles per hour, though outlet health and your specific model both shift that number meaningfully.
| Vehicle | Outlet Type | Miles/Hour |
|---|---|---|
| Model 3 | 120V / 20A | 5–7 miles |
| Model 3 | 120V / 15A | 3–4 miles |
| Model S/X | 120V / 20A | 4–5 miles |
| Model S/X | 120V / 15A | 3–4 miles |
| All Models | Worn/Shared Circuit | Below 3 miles |
An overnight trickle across 10 hours realistically adds 30 to 50 miles — enough for short commutes, but mathematically insufficient for anything ambitious.
NEMA 14-50 vs. Wall Connector: Speed, Cost, and Convenience
When you’re setting up home charging for your Tesla, the two most common paths are the NEMA 14-50 outlet paired with a Mobile Connector and Tesla’s dedicated Wall Connector—and they’re not created equal.
The daily tradeoffs come down to four deciding factors:
- Speed: Wall Connector delivers ~44 mi/hr versus ~30 mi/hr for NEMA 14-50—roughly 30–50% faster.
- Cost: Installation tips aside, Wall Connector totals run $1,200–$3,500; NEMA 14-50 averages $500–$1,300.
- Convenience: Wall Connector is hardwired with Wi-Fi integration; NEMA 14-50 stays portable and relocatable.
- Circuit Requirements: Wall Connector needs a dedicated 60A circuit; NEMA 14-50 requires 50A.
Both handle overnight charging comfortably—but high-mileage drivers will notice the difference immediately.
How Much Range Does a Tesla Gain Per Hour on Each Charger Type?
Your charging speed isn’t just about the charger you plug into — it’s a function of voltage, amperage, and your Tesla’s onboard charging hardware working together to convert electricity into usable range.
On a standard 120V Level 1 outlet, you’re looking at a modest 3–5 miles of range per hour (barely enough to offset a short commute), while a 48-amp Level 2 Wall Connector jumps that figure to roughly 30–44 miles per hour depending on the model.
At a 250 kW Supercharger, you can recover approximately 150–200 miles in as little as 15–20 minutes — though that peak rate tapers sharply once your battery climbs past the 80% mark, so road-trip math isn’t quite as clean as the spec sheet implies.
Home Charging Range Gains
One of the first questions most new Tesla owners ask is exactly how much range they’ll actually recover per hour plugged in at home — and the answer depends almost entirely on which charger type you’re using.
Here’s what the numbers actually look like:
- 120V standard outlet: ~3 miles per hour (fine for overnight top-ups, painful for anything else)
- 240V Mobile Connector: ~25–30 miles per hour (solid entry-level Level 2)
- Wall Connector at 11.5 kW: up to 44 miles per hour on a Model Y
- Model S high-amperage setup: approximately 52 miles per hour
Understanding these efficiency tradeoffs helps you choose correctly upfront.
Your daily commute distance, panel capacity, and budget all directly shape which option genuinely serves you.
Destination Charger Output
Destination chargers — the Wall Connectors you’ll find bolted to the wall at hotels, resorts, and workplace parking structures — operate as Level 2 AC stations, typically running at 240V with a 48A output on a 60A dedicated circuit. That setup delivers roughly 30 to 44 miles of range per hour, depending on your specific model.
Here’s the catch: charger amperage sets the ceiling, but vehicle acceptance determines the actual floor. Your car’s onboard charger controls how much AC power it converts. A Model 3 Long Range or Model Y pulls the full 48A, netting around 44 miles per hour. A base Model 3 with a limited onboard charger? Closer to 30. Temperature and battery state of charge quietly trim those numbers further.
Supercharger Speed Comparison
Plug into a Supercharger and the numbers shift dramatically — we’re no longer talking about miles per hour in the double digits. Tesla’s Supercharger network operates across two major hardware generations, and the difference is significant.
Here’s what each charger type actually delivers:
- Level 1 (120V): 3–5 miles per hour
- Level 2 (240V): 25–40 miles per hour
- V2 Supercharger (150 kW): ~360–520 miles per hour (equivalent)
- V3 Supercharger (250 kW): ~800–1,000 miles per hour at peak
Those V3 numbers assume ideal conditions — thermal management keeps your battery receptive, and peak tapering hasn’t kicked in above 80% state of charge. Real-world sessions typically run slightly lower, but the advantage over Level 2 remains genuinely impressive.
How to Charge a Tesla in an Apartment Without a Dedicated Outlet
Living in an apartment doesn’t have to mean giving up on Tesla ownership — it just means rethinking where and how you charge. Apartment charging works best when you combine multiple strategies rather than relying on one solution.
Start with your Tesla’s Mobile Connector plugged into a standard 120V outlet, supplying roughly 3–5 miles of range per hour — slow, but workable for low-mileage days. Pair that with public networks like ChargePoint or EVgo during errands or work shifts, and you’re covering real ground without a dedicated circuit.
Neighbor agreements can provide surprising access, too. A nearby homeowner with a 240V outlet might accommodate a formal charging arrangement. Always get written permission before using any outlet that isn’t clearly designated for EV charging.
Tesla charging infrastructure only feels effortless when your home setup is actually ready to handle daily charging without planning around public stations or slow wall outlets. Many owners only notice the gap when overnight charging takes longer than expected or when they start relying too heavily on Superchargers for routine use. Install a Tesla Wall Connector to make home charging fast, consistent, and fully part of your everyday routine instead of an afterthought.
How to Set Up Scheduled Charging and Off-Peak Rate Charging
Scheduled charging is one of those Tesla features that quietly saves you money every month — once you set it up correctly, it handles the rest. Use the interface to Controls > Charging > Scheduled Charging on your touchscreen, then set your start time to match your utility’s off-peak window (often midnight to 6 AM).
Here’s your off-peak optimization setup sequence:
- Save your Home location in routing settings
- Set charge start time at your off-peak window’s opening minute
- Confirm location-based scheduling activates automatically when parked at home
- Enable preconditioning separately under Scheduled Departure
For schedule troubleshooting, check whether overlapping schedules merged incorrectly — Tesla combines adjacent windows into one block. If charging starts unexpectedly early, Tesla briefly draws power on plug-in to calculate required start time.
Tesla charging infrastructure looks complete on paper until you pull up at a destination charger and realize many public and workplace stations still rely on the J1772 standard. That’s usually when the gap becomes obvious—right when you need a quick charge and don’t want to reroute your plans. Keep a Tesla J1772 charging adapter ready so you can use most Level 2 public charging stations without second-guessing compatibility.
How the Tesla App Controls and Monitors Your Charging Sessions
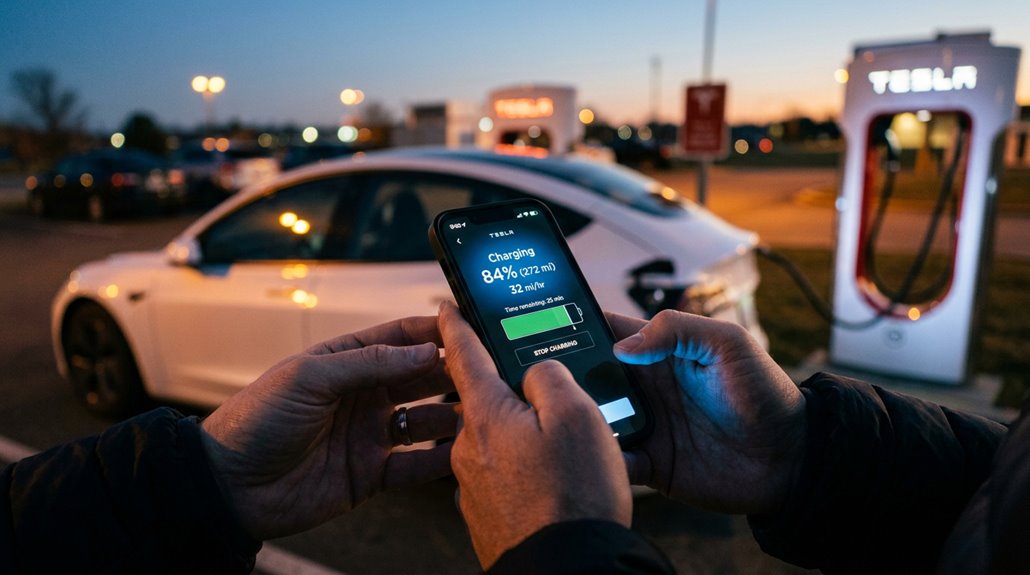
Once you’ve locked in your scheduled charging windows, the Tesla app becomes your remote command center for everything that happens next. App monitoring delivers real-time charge rate, energy added, and estimated completion—all over cellular, so Bluetooth and Wi-Fi don’t matter. Session controls let you adjust on the fly.
| Feature | What It Shows | Requirement |
|---|---|---|
| Live Charge Rate | Current kW delivery | Software 2021.44.25+ |
| Energy Added | kWh per session | App version 4.5.1+ |
| Charge Progress | Battery percentage | Owner account |
| Estimated Completion | Time remaining | Active session |
| Session Cost | Spending estimate | Configured rate plan |
Your charge port light confirms everything physically—pulsing green means charging, solid green means done, red means investigate immediately.
How to Integrate Tesla Charging With Home Solar Panels
If your home runs on solar, you can route that generated power directly into your Tesla’s battery — but the hardware doing the routing matters more than most people realize.
Your solar panels produce DC electricity, your inverter converts it to AC for household use, and your EVSE (like the Tesla Wall Connector Gen 3) pulls from that AC supply, meaning the whole chain needs to communicate cleanly or you’re just charging on grid power with extra steps.
Optimizing that flow means choosing between gross solar charging (matching EV draw to total inverter output) and excess solar charging (matching only the surplus after your home’s loads are satisfied), with the latter cutting your grid dependence far more effectively.
Solar Panel Compatibility
Solar panels generate DC electricity, which your home’s inverter converts to AC before it ever reaches your Tesla’s Wall Connector or mobile connector on a 240V circuit—so despite the clean-energy appeal, direct panel-to-car charging isn’t the standard design.
Your setup flows through three critical components:
- Solar array — panel warranties typically run 25 years, protecting your long-term energy investment
- Inverter — inverter compatibility with Tesla’s monitoring ecosystem determines whether charging automation works
- Home electrical panel — routes converted AC power toward your charging equipment
- EV charging station — delivers power at Level 2 speeds (240V)
Grid-tied solar feeds your panel first, then your Tesla charges from whatever’s available. Simple, sequential, refined.
Optimizing Solar Charging
Turning your rooftop solar into a genuine Tesla charging asset requires more than just plugging in—it demands deliberate coordination between your inverter, home loads, and the car’s charging schedule.
Solar timing matters enormously; scheduling charging between 10 AM and 4 PM captures peak production before your panels start underperforming.
Panel orientation toward true south (in the Northern Hemisphere) maximizes that window considerably.
Tesla’s Charge on Solar feature adjusts power roughly every 10 seconds, responding to real surplus rather than gross generation—so your neighbor’s appliances don’t accidentally charge your car.
Battery smoothing handles cloud-induced dips, preventing nuisance charging interruptions.
If your utility enforces export limits, storing excess energy first and charging from storage keeps you compliant while still maximizing self-consumption across your entire system.
How Tesla Solar, Powerwall, and Supercharger Connect
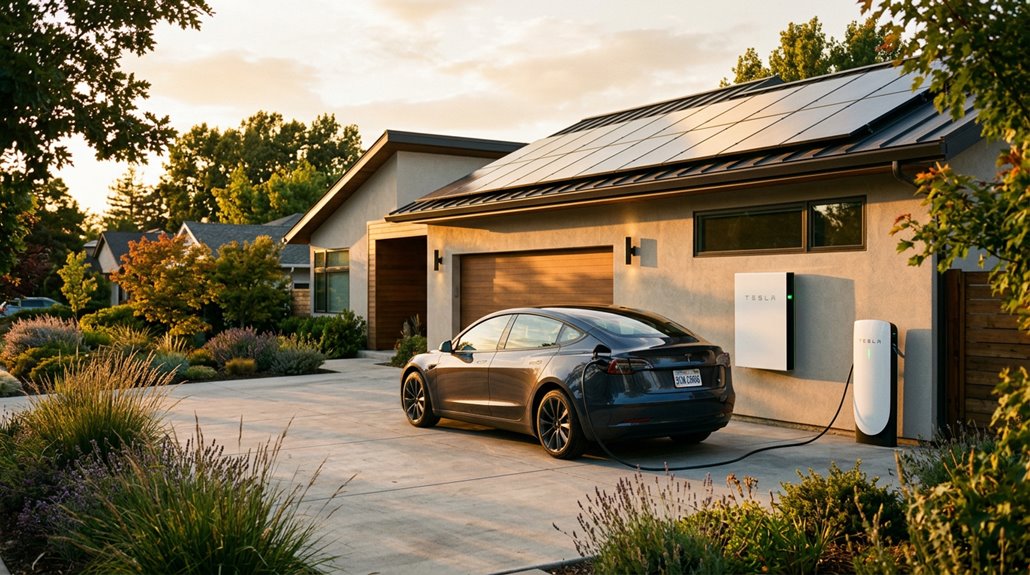
Tesla’s home energy ecosystem isn’t just about generating power — it’s about routing it intelligently, and that distinction matters when you’re trying to charge a Model 3 without touching the grid. The solar handshake between your panels, Powerwall, and Wall Connector happens through gateway roles managed entirely via the Tesla app.
Routing power intelligently isn’t a feature — it’s the entire point of Tesla’s home energy ecosystem.
Here’s what that coordination actually does:
- Monitors excess solar every 10 seconds
- Adjusts charging power responsively to match surplus
- Stops charging when household loads consume available production
- Requires at least 1.2 kW of stable excess before initiating
Superchargers operate completely outside this ecosystem — they’re DC fast-charging stations, not solar-coordinated tools. Your home setup handles surplus routing; Superchargers handle speed. Both serve you, but they’re solving entirely different problems.
How Powerwall Affects Home Charging Speed and kW Output
Your Powerwall’s continuous output rating—not its 13.5 kWh storage capacity—is what actually determines how fast your Tesla charges at home. A Powerwall 2 tops out at roughly 5 kW continuous output, which means it can’t fully sustain a Wall Connector pulling 7–10 kW on its own, forcing the system to either throttle the charge rate or pull the difference from the grid.
Pairing solar with your Powerwall helps close that gap during daylight hours, but your charging speed still shifts based on operating mode, household load, and whether the system’s prioritizing backup reserve over vehicle charging.
Powerwall Home Charging Integration
When you pair a Powerwall with your home charging setup, the relationship between stored energy and charging speed is more layered than most people expect. Powerwall doesn’t directly charge your car — it works through your home panel, shifting energy rather than amplifying it.
Here’s what actually shapes your experience:
- Solar scheduling lets you align EV charging with peak solar production, reducing grid dependence
- Backup prioritization determines whether stored energy protects your home or powers your car first
- Powerwall’s 13.5 kWh capacity covers roughly 18% of a 75 kWh Model 3 Long Range battery
- Charging speed still depends entirely on your EVSE, onboard charger, and circuit rating
Coordination between solar generation, Powerwall state of charge, and scheduled charging releases the real value here.
Output Limits and Speed
Powerwall’s output ceiling — not its storage capacity — is what actually determines how fast your car charges when you’re running off stored energy. Inverter limits cap what the system can actually deliver, regardless of how much energy sits in the pack. Powerwall 2 tops out at 5 kW continuous — below what most Level 2 chargers demand (typically 6–10 kW). That gap forces reduced charging speed or grid supplementation.
Powerwall 3 closes that gap markedly at 11.5 kW continuous, better matching residential charger loads. Battery throughput also matters practically: at 11.5 kW, a 13.5 kWh pack drains in roughly one hour. Faster isn’t always better — higher discharge rates accelerate energy depletion. Your actual speed depends on whichever limit hits first: charger setting, service capacity, or inverter ceiling.
Solar Pairing Benefits
Pairing solar with Powerwall doesn’t just cut your electricity bill — it actively shapes how much power reaches your Tesla and when. Solar arbitrage makes this work: store cheap midday generation, use it during expensive evening charging sessions. Midday resilience means your system keeps producing even when grid rates spike.
Here’s what this pairing actually delivers:
- Daytime solar offsets household demand, freeing grid power for your Tesla
- Stored energy shifts into overnight charging, hitting your battery when rates hurt most
- DC-coupled efficiency reaches 96–97%, meaning less solar is wasted before reaching your car
- Time-of-use optimization saves $800–$2,500 annually in high-rate markets like Orange County ($0.30/kWh)
That’s solar working smarter, not just generating.
What Charging Limits Apply When Using Powerwall as a Source?
Using a Powerwall as a charging source introduces a set of constraints that don’t behave like the familiar 80% charge cap you’d set on your Tesla vehicle.
Powerwall doesn’t offer a user-configurable state-of-charge ceiling. Instead, site limits govern its behavior.
Powerwall skips the user-controlled charge ceiling entirely — site-level limits are what actually dictate its behavior.
If your system has a 10 kW import limit and you’re already pulling 8 kW from the grid, Powerwall charges at roughly 2 kW maximum — not because of battery chemistry concerns, but because the system is balancing your total site draw.
Tesla’s staged charging behavior adds another layer, targeting approximately 80% capacity first, then completing the charge when solar surplus permits.
You’re not setting a cap; the control system is adaptively negotiating power flow based on real-time site conditions.
What Happens If a Supercharger Stall Is Busy or Out of Service?
When you pull into a Supercharger station and half the stalls are dark or occupied, the experience shifts quickly from routine stop to logistical puzzle. Stalled charging happens for real reasons, and grasping them helps you respond smarter.
- Paired stalls share power — your neighbor’s simultaneous session directly reduces your kW.
- Hardware failures — cables, cooling systems, or high-voltage cabinets can kill one stall or an entire bank.
- Software faults — authentication failures leave stalls electrically alive but completely unusable.
- Low state of charge — a busy or broken station becomes genuinely urgent when your next option is miles away.
Check the Tesla app (it lags occasionally), observe stall lights directly, and report malfunctions to ServiceHelpNA@tesla.com with your stall number included.
How Supercharger Idle Fees and Charging Etiquette Work
Tesla’s idle fee system exists for one reason: to keep stalls moving, not to pad Tesla’s revenue. Once your session ends, you’ve got a five-minute grace period before idle fees kick in. After that, expect roughly $0.50 per minute at busy sites—$30 per hour if you’re not paying attention. Fees can also trigger while you’re still connected if you’ve hit the site’s congestion threshold and the lot’s busy enough to qualify.
Here’s the idle etiquette reality: congestion thresholds vary by location, so Tesla alerts you through both the app and touchscreen when conditions apply. Charging to 100% at a packed site is the fastest way to maximize your fee exposure. Charge what the trip needs, unplug, move. Simple.
How Much Does Tesla Charging Cost at Home vs. Superchargers?
For most Tesla owners, the charging math starts at home—and that’s exactly where costs stay lowest. Home savings are real and measurable—averaging $0.17/kWh versus Supercharger rates hitting $0.28–$0.50/kWh.
Here’s what those numbers actually mean for your wallet:
- Model 3/Y RWD costs roughly $11.35–$11.80 per full home charge
- Long Range variants run approximately $14.15–$14.72 per full home charge
- Model S/X lands near $18.90 per full home charge
- Cybertruck reaches about $23.24 per full home charge
Supercharger economics tell a different story—you’re often paying 2x–3x more per kilowatt-hour. Off-peak Supercharging (~$0.14/kWh overnight) softens that gap considerably.
Add solar panels, and your effective cost drops to $5–$10 per charge.
Who Benefits Most From Tesla’s Charging Network: Homeowners, Renters, and Road Trippers
Depending on where you plug in each night—or whether you can plug in at all—Tesla’s charging network hits very differently across ownership situations.
Homeowners with driveways get the best deal: overnight Level 2 charging handles most daily needs without touching a Supercharger.
Renters, meanwhile, often rely on public infrastructure the way homeowners rely on garages—heavily and daily.
Some municipalities have introduced parking incentives policy structure that encourage multifamily landlords to install EV equipment, which helps but isn’t universal.
Road-trippers extract the most obvious value from Tesla’s Supercharger corridor coverage.
Curiously, home depot EVs (contractor-use vehicles with irregular mileage patterns) benefit from network flexibility when job sites vary.
Your lifestyle, parking situation, and weekly mileage finally determine whether Tesla’s network is essential or merely occasional backup.