
Most Tesla owners waste hours chasing the wrong AC fault. A musty smell isn’t always a dirty evaporator. Weak airflow doesn’t always mean a failing compressor. Your heat pump error code might clear with a two-minute reset — or signal something far more complex involving refrigerant pressure and Octovalve positioning. Every fault leaves a distinct fingerprint, and reading it correctly separates a quick fix from an expensive misdiagnosis. Before you touch anything, you need to know exactly what you’re looking for.
Why Your Tesla AC Smells Musty, Sour, or Like Vinegar?
When your Tesla’s AC kicks on and the cabin fills with something between wet gym socks and a salad dressing experiment gone wrong, you’re almost without a doubt dealing with moisture-driven contamination inside the HVAC path.
Cabin humidity is the primary accelerant here. The evaporator coil sits at roughly 35–40°F during operation, condensing moisture continuously — and that standing water becomes a breeding ground for organic growth when airflow stops.
The evaporator coil never fully dries — and stagnant moisture doesn’t wait long before something starts growing.
Tesla’s ventilation design places the cabin filter directly in the moisture stream, meaning a loaded or aging filter absorbs and re-releases odors every startup cycle. Material off-gassing from contaminated filter media compounds the problem, especially after wildfire smoke or pollen exposure. Replacing the cabin air filter with a universal cabin air filter is one of the few low-risk upgrades that generally does not trigger warranty disputes.
Short trips are particularly brutal. The system never fully dries, microbial colonies establish themselves, and what started as condensation becomes a recurring odor problem requiring more than just a new filter. The pattern typically worsens after rain or humid weather, which confirms moisture as the root cause rather than a mechanical fault.
How Tesla’s Heat Pump and Octovalve Actually Control Cabin Temperature
Unlike a resistive heater that just burns electricity to generate warmth, Tesla’s heat pump moves thermal energy that already exists — pulling heat from the drivetrain, battery, or ambient air and redirecting it into the cabin. That distinction matters because heat routing dynamics determine how efficiently your car warms up before you’ve even left the driveway.
The Octovalve sits at the center of this framework, managing coolant pathways across the cabin, battery, and drivetrain loops. Octovalve sequencing allows the system to combine multiple heat sources simultaneously rather than depending on a single element. The compressor pressurizes refrigerant to raise its temperature, transferring that heat into the cabin condenser loop. Tesla’s over-the-air software updates allow the thermal management system’s behavior to be refined and optimized without requiring a service visit.
Independent testing found the heat pump warmed the interior with just 1.1 kWh for a 16°C cabin temperature increase — roughly half what a PTC resistive heater consumes under the same conditions. That’s genuinely efficient thermal engineering, not marketing language. Tesla made this shift universally across its lineup when all models switched to heat pump systems beginning in late 2020.
How to Replace Your Tesla Cabin Air Filter and Clean the Evaporator
That thermal efficiency the heat pump delivers only holds up if the cabin air filter isn’t choking the system — a clogged filter forces the HVAC to work harder, blower motor load increases, and effective airflow through the evaporator drops.
Access the filter housing through the passenger-side footwell after moving the seat fully rearward. Release the lower trim panel’s push clips, then remove the T20 screw (1.2 Nm torque on reinstall) securing the filter cover. Filter orientation matters: arrows face rearward, full stop.
| Step | Action | Spec |
|---|---|---|
| Removal order | Upper filter first, then lower | Pull tab toward you |
| Filter orientation | Arrows toward rear of vehicle | Both filters identical direction |
| Reinstallation order | Lower filter first, then upper | Seat fully before cover |
| Torque spec | T20 cover screw | 1.2 Nm / 0.89 ft-lbs |
For evaporator cleaning, compressed air through the intake path dislodges debris before filter reinstallation. Replace filters every two years per Tesla’s documented interval. After completing the replacement, navigate to Controls > Service > Maintenance to mark the cabin air filter task as performed so the system auto-recalculates the next service reminder without requiring a dealership visit. A DIY replacement takes approximately 15 minutes and costs less than the $70-plus-tax service center quote for parts and labor.
The Most Common Tesla AC Faults and What’s Causing Each One
Tesla AC faults tend to cluster around four failure modes, and diagnosing them correctly means grasping which part of the system actually broke down.
Low refrigerant causes weak cooling rather than complete failure—you’ll notice warm air at the vents while the blower runs normally.
Compressor wear degrades output gradually, often presenting as intermittent cooling before stopping entirely.
Electrical faults (blown fuses, control module failures, or software glitches) can kill the system without touching the refrigerant circuit at all. Tesla vehicles receive over-the-air updates that occasionally address software-related climate control behavior, making firmware version a relevant diagnostic variable.
Finally, airflow restrictions—clogged cabin filters, dirty condensers—strangle performance even when the refrigeration cycle operates correctly.
Each failure mode has a distinct fingerprint.
Low refrigerant requires pressure readings to confirm.
Compressor wear shows up through mechanical noise or high current draw.
Electrical faults throw diagnostic codes. A blown compressor fuse is a widely reported culprit on Tesla forums and can be confirmed with a simple continuity check.
Airflow problems reveal themselves through reduced vent output with normal system pressure.
Chasing the wrong failure mode costs time and money, so reading the symptoms accurately matters before you touch anything.
That musty “dirty sock” smell from your Tesla’s AC doesn’t just go away on its own—it builds up every time you run the system. Stop ignoring it until it gets worse and swap in this Tesla-compatible HEPA cabin air filter replacement kit that helps block dust, pollen, and odor-causing buildup before it reaches your cabin before every drive starts feeling less fresh than it should.
How to Diagnose Tesla AC Problems Without a Dealer Appointment
Before you book a service appointment, your Tesla’s already giving you diagnostic data worth capturing — the app’s Service workflow will surface guided troubleshooting steps the moment you describe your symptom, and those results are worth saving.
Log the exact conditions: whether cold air loss is constant or intermittent, whether it worsens under acceleration (a compressor load clue), and whether the cabin recovers better at idle versus highway speed.
That pattern of specifics — combined with any “Climate control needs service” message pulled from the dash — builds a fault picture precise enough to either resolve the issue without a shop visit or compress diagnostic time markedly when you do go in. Your current software build number, visible under Controls → Software on the touchscreen, should also be recorded before any service interaction, as OTA updates have been known to alter climate system behavior and relevant documentation without announcement.
Spot Symptoms Early
Catching AC problems early on a Tesla means you’re reading system behavior, not waiting for a warning light to make the decision for you. Early indicators of gradual degradation are subtle but consistent.
Watch for these patterns:
- Cabin air feels mildly cool at idle but improves at highway speed — classic low-refrigerant behavior.
- Cooling cuts out intermittently during hard acceleration, suggesting compressor load or protection logic.
- Airflow feels strong but delivers no real cooling — a refrigerant or heat-rejection fault, not a blocked filter.
- “Climate control needs service” appears on the center display before any noticeable comfort loss.
None of these are dramatic failures. They’re the system telling you something’s drifting off-spec before it fully quits. Many software-related climate irregularities are resolved remotely through over-the-air updates, which Tesla routinely pushes without requiring a service visit.
If your Tesla’s AC still smells off even after changing the filter, the real problem is deeper inside the system where moisture and buildup quietly collect over time. Deal with it before every drive starts smelling worse by using a Tesla air conditioning evaporator and HVAC cleaning kit that targets hidden buildup inside the system and helps restore cleaner, fresher airflow before that odor becomes something you just “get used to.”
DIY Diagnostic Steps
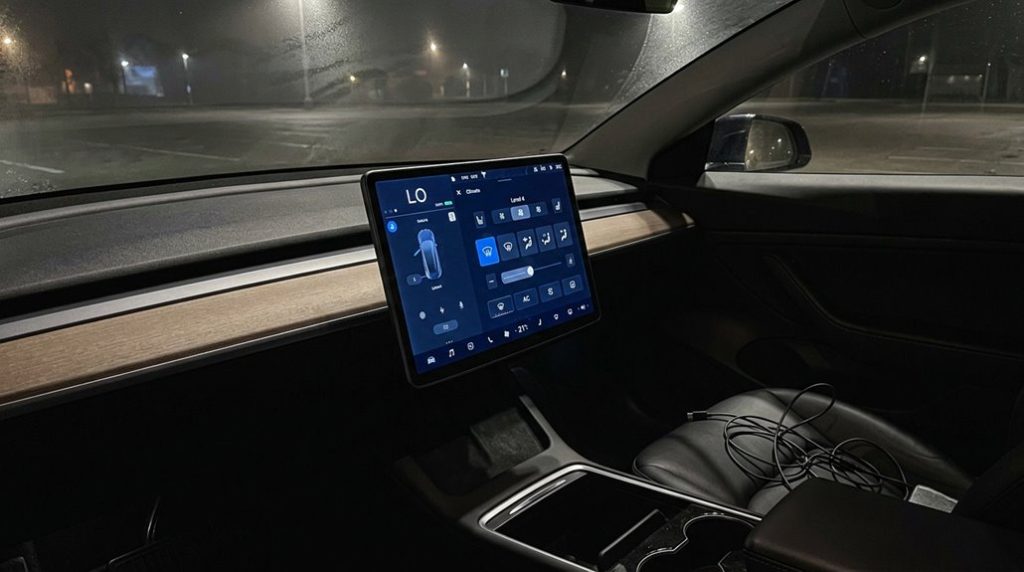
Diagnosing Tesla AC problems doesn’t have to mean handing over your car and your afternoon to a service center. Start with the touchscreen—check for HVAC fault codes or “climate control needs service” warnings, then log any message before clearing it. A soft reset (hold both scroll wheels until the screen restarts) eliminates most firmware ghosts.
Next, pull and inspect your cabin air filters; restricted airflow mimics refrigerant leakcheck failures surprisingly well. Walk the front condenser and radiator openings for packed debris, since blocked fins destroy heat rejection at idle. Listen for clicking (blend door actuator) or high-pitched whining (compressor wear).
If sensor calibration is off, control responses won’t match inputs—test fan and temperature commands across multiple settings to confirm expected behavior before suspecting sealed-system failure. Keep in mind that Tesla’s context-aware display system shifts its information hierarchy based on operational state, so climate data surfaced on screen may look different depending on whether the vehicle is parked, charging, or in motion.
Dog Mode, Camp Mode, and Keep Climate On: What Each One Does
Tesla gives you three distinct parked-climate options—Dog Mode, Camp Mode, and Keep Climate On—and picking the wrong one wastes battery or leaves your pet staring at a blank screen when bystanders walk by.
Dog Mode keeps the cabin at your set temperature while parked and locked, and it displays a prominent center-screen message reassuring passersby that your pet is safe and climate control is active (a small but meaningful detail when a stranger’s about to smash your window).
Camp Mode goes further by keeping USB ports, the 12-volt socket, and the full infotainment system live for extended overnight stays, while Keep Climate On is the stripped-down version—climate only, no message, no media—intended for short stops where you just need the cabin temperature to hold until you return or the battery hits 20%. When planning an extended parked stay that requires Camp Mode overnight, it helps to arrive with sufficient charge since Tesla recommends a daily charging limit of 80% to protect long-term battery health rather than topping the pack to 100% before settling in.
Dog Mode Explained
When you leave a pet in a parked Tesla, three distinct climate modes are available—Dog Mode, Camp Mode, and Keep Climate On—and each one serves a fundamentally different purpose despite all three keeping the HVAC system running.
Dog Mode specifically handles pet diagnostics by actively maintaining a preset cabin temperature. Here’s what defines it:
- Requires 20% minimum battery charge to activate
- Consumes roughly 4 miles of range per hour
- Displays an on-screen message reassuring bystanders the pet is safe
- Sends low-battery alerts to your Tesla app if charge drops below 20%
Legal considerations matter here—visible climate confirmation on the center screen helps prevent misunderstandings that could result in forced vehicle entry by concerned bystanders. While Dog Mode manages cabin comfort independently, it operates entirely separately from Tesla’s driver-assistance features, which require the driver to be present and continuously monitoring the vehicle at all times.
Camp Mode Benefits
Camp Mode fundamentally turns your Tesla into a self-contained overnight habitat—no idling engine, no generator, no compromise.
It maintains your selected cabin temperature, keeps the touchscreen active, powers USB ports, and sustains sleep ventilation to prevent stuffiness and window fogging.
Battery management is straightforward once you know the numbers: expect roughly 1% per hour under mild conditions, meaning an eight-hour night costs approximately 10% (though cold weather can push that to 20% or higher).
The system automatically cuts off at 20% state of charge, protecting your driving range.
One meaningful tradeoff—Sentry Mode and walk-away locking both disable during Camp Mode, so you’re trading surveillance for comfort.
Arrive charged, bring window shades for extreme temperatures, and the math works reliably in your favor.
Before settling in for the night, plugging into a Tesla Supercharger stall ensures you start with a full battery, since cold weather can dramatically increase overnight consumption and drain your pack faster than expected.
Keep Climate Active
Keeping your cabin temperature stable while parked breaks down into three distinct modes—Keep Climate On, Dog Mode, and Camp Mode—and knowing which one to reach for saves you from either wasting battery or leaving a pet in an unsafe situation.
Here’s how each mode stacks up:
- Keep Climate On runs indefinitely until battery drops to ~20%, activated only from inside the vehicle
- Dog Mode locks doors, displays a reassurance message, and pairs well with remote diagnostics to monitor cabin conditions
- Camp Mode keeps USB ports, the 12V socket, and infotainment fully active for overnight stays
- App-based climate (post-2022.12 software) supports energy scheduling but caps at two hours without switching to Keep Climate On
How Much Battery Each Tesla Climate Mode Actually Consumes
How much battery Tesla’s climate modes actually pull isn’t a fixed number you can memorize—it shifts with ambient temperature, cabin setpoint, and whether your system’s heating or cooling. Tesla publishes no single draw figure because ambient sensitivity makes that impossible. Field data fills the gap.
| Condition | Observed Draw |
|---|---|
| 76°F ambient, Sentry active | ~5% per hour |
| 96°F direct sun, 4 hours | ~8% per hour |
That spread—5% to 8%—represents your real-world energy mapping baseline. Heating typically costs more than mild cooling, though heat-pump-equipped Teslas (Model Y, refreshed Model 3) cut that penalty markedly versus older PTC resistive systems. One HVAC test recorded 2.4 kWh over two hours for a 14.5°C cabin rise; a heat-pump configuration achieved comparable warming at roughly half that cost. For accurate mode comparison, treat these numbers as directional field data, not manufacturer ratings.
Frequently Asked Questions
Can a Refrigerant Leak Damage Tesla’s Battery Thermal Management System Permanently?
“An ounce of prevention is worth a pound of cure.” Yes, a refrigerant leak can permanently damage your battery’s thermal insulation integrity and accelerate battery corrosion through sustained thermal stress if you don’t address it quickly.
Does Tesla’s AC Compressor Run on High-Voltage or 12V Power?
Your Tesla’s AC compressor runs on high voltage from the HV battery, powering its brushless motor directly. The 12V system handles only auxiliary control functions—logic signals, system enablement, and communication—not the compression work itself.
How Often Should Tesla Refrigerant Be Recharged Under Normal Driving Conditions?
Unlike combustion vehicles requiring seasonal checks, your Tesla’s refrigerant isn’t part of scheduled maintenance. You shouldn’t need recharging under normal driving conditions—it’s a sealed system, so refrigerant loss signals a leak, not routine depletion.
Can Tesla AC Faults Trigger Performance Throttling or Range Reduction?
Yes, Tesla AC faults can trigger performance throttling and range reduction. When the battery can’t shed heat fast enough, you’ll see power limits, charge tapering, and increased compressor runtime—all cutting into your usable efficiency.
Is Tesla’s AC System Compatible With Standard R-1234yf Refrigerant Service Equipment?
If your Tesla uses R-1234yf, it’s compatible with standard R-1234yf service equipment—but you’ll face compatibility issues if you connect R-134a tooling. Always verify your vehicle’s refrigerant type before selecting service equipment.