We all expect our Teslas to be these perfect creations from heaven that never break or have any faults. Of course, this only happens with Elon’s Tesla, and us peasants have to deal with the daily Tesla problems that do pop up from time to time.
One unfortunate problem is with the charging system and that it often stops for some reason. Like with most phones, the charger can cause issues because of regular use and wear and tear.
In this article, I’ve compiled the 11 most common reasons why your Tesla might stop charging. Some reasons might be out of your control and some might be some minor oversight that you made. In any case, I hope you find this article helpful.
- 11 Possible Reasons Why Tesla Charging Keeps Stopping
- 1. High Outside Temperatures Can Make Your Tesla Stop Charging
- 2. A Faulty Adapter Or Charging Cable
- 3. A Ground Fault Could Be Interrupting the Charge
- 4. A Relay or Contactor Error
- 5. The Over or Under Voltage Protection System Is Activated
- 6. Battery Temperature Outside The Acceptable Range
- 7. Incorrect Pilot Level
- 8. Software Glitch or Communication Issue:
- 9. The Software May Not Be Up To Date
- 10. Tripped Circuit Breaker or Blown Fuse
- 11. Incompatible Charging Station or Power Source
- Does Tesla Stop Charging When Full?
- What Does The Colour On My Tesla Charge Port Mean?
- 2 More Things To Check
- Tesla Charging FAQs
11 Possible Reasons Why Tesla Charging Keeps Stopping
The table below shows 7 of the possible reasons why your Tesla charging stopped unexpectedly. The solutions are also given, but make sure to read the rest of the article for a more in-depth explanation of each issue.
| Reason | Solution |
| High temperature. | Wait for the temperature to drop/ charge inside. |
| Faulty adapter. | Contact Tesla customer service. |
| Grounding issue. | Call an electrician. |
| Relay/contactor error. | Call Tesla customer service. |
| Over/under voltage. | Wait it out or find plan B. |
| Incorrect pilot level. | Adjust it. |
| Software update. | Call Tesla/wait it out. |
1. High Outside Temperatures Can Make Your Tesla Stop Charging
If you were lucky enough to get your hands on a Tesla, you’re probably wondering why your expensive car suddenly stopped charging. Though the company has been touting its cars as resilient machines that can operate in extreme weather conditions, it turns out that high temperatures may cause a charging problem.
The problem seems to be affecting a small number of Tesla owners, and most of them have taken to social media and online forums to complain about the issue. One user on Youtube said that her car stopped charging when the temperature outside reached 95°F (35°C). Here is a link to her video:
How To Fix This Issue
The solution is to charge in a cooler area or wait until the temperature drops before attempting to charge again. Tesla has not yet released a statement about the problem, but it is likely working on a fix. In the meantime, owners should keep an eye on the temperature when charging their cars.
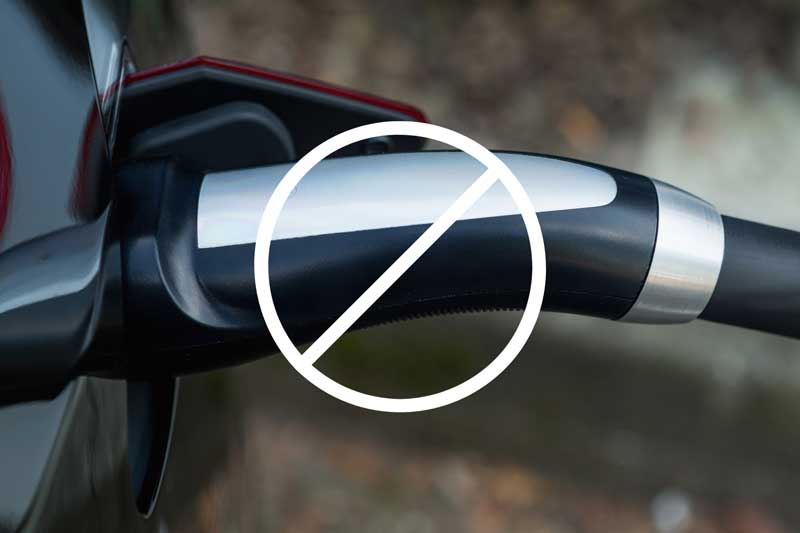
2. A Faulty Adapter Or Charging Cable
It’s also possible that a faulty adapter is the reason your Tesla stops charging. You see, the adapter plays a crucial role in connecting the charging cable to the power source. If it’s defective or damaged, it can throw a wrench in the charging process and bring it to a screeching halt.
Faulty adapters can have all sorts of problems like wonky wiring, faulty connectors, or messed-up circuitry. When these issues arise, the adapter might lose its connection with the vehicle or fail to provide sufficient power. In response, the Tesla’s charging system might notice the problem and put a stop to the charging to avoid any further complications or safety hazards.
So, if you ever experience charging interruptions, it’s worth checking out the adapter for any signs of wear and tear or possible malfunctions.
How To Fix This Issue
Common problems with Tesla adapters include:
- The adapter is not plugged in correctly.
- Damaged or faulty adapter.
- The adapter is not compatible with your Tesla.
If you think the adapter may be the problem, I recommend checking it to see if it is damaged, plugged incorrectly, or faulty. You can also try using a different adapter to see if that solves the problem.
If your adapter is damaged, you can contact Tesla support for a new one.
A loose connection between the adapter and the car can also cause this charging problem. Make sure that the adapter is securely plugged into the vehicle and wall before attempting to charge.
3. A Ground Fault Could Be Interrupting the Charge
A ground fault may be why your Tesla stops charging. This can happen when there is a break in the circuit between the car and the ground.
One way to test for a ground fault is to plug the charger into another outlet. If the problem persists, you are likely looking at a grounding issue. You can also try charging your car from a different location, such as a public charging station.
How To Fix This Issue
When a grounding issue occurs, the charger goes off completely, and the vehicle will not start charging again until the ground fault is fixed. The best way to fix a ground fault is to have an electrician come out and repair the problem.
This is one of the least common reasons your Tesla may stop charging, but it is still a possibility. If you have ruled out all of the other potential causes, this may be it.
4. A Relay or Contactor Error
This is another uncommon problem. A relay is an electric switch used to control the flow of electricity, and the contactor is the switch that controls the flow of power to the car.
If either of these components is not working correctly, it can cause charging issues with your Tesla. This problem is most likely to occur if you have recently changed the charger or the adapter.
How To Fix This Issue
Unfortunately, a relay or contactor error isn’t something you can fix without expert help. If you think this may be the problem, I recommend contacting Tesla customer service. They will be able to diagnose the problem and send you a new charger or adapter if necessary.
5. The Over or Under Voltage Protection System Is Activated
Alright, picture this: your trusty Tesla comes equipped with a nifty overvoltage protection system that’s like a guardian angel for your battery. Its primary mission? To keep that precious battery safe and sound. How does it do that, you ask? Well, it’s pretty clever. This system is designed to sense the voltage levels during charging, and if it detects that the voltage is sky-high and beyond what your battery can handle, it springs into action. It’s like a superhero, swooping in to protect your battery from potential damage caused by excessive voltage.
But that’s not all! This mighty system doesn’t just protect your battery; it also looks out for your overall charging experience. If it senses that the voltage is way too high, it won’t let your car charge. Yep, you heard that right. It’s like a bouncer at the charging club, keeping out the unruly voltage that could cause harm to your beloved Tesla.
How To Fix This Issue
The overvoltage system is usually activated when the voltage exceeds a certain threshold, which can happen if the charger is not working correctly or if there is a problem with the power supply.
If you think that this may be the problem, your best bet is to wait out the storm or try charging your car from a different location. Once the power supply is back to normal, your Tesla should start charging again without issues.
6. Battery Temperature Outside The Acceptable Range
Tesla vehicles have sophisticated battery management systems that closely monitor the battery temperature during charging. If the battery temperature exceeds or falls below the acceptable range, charging may be paused to protect the battery from potential damage.
How To Fix This Issue
In colder temperatures, pre-conditioning the battery before charging can help bring it to the optimal temperature range. In hotter climates, parking in the shade or using sunshades can prevent excessive heating. Wait until the battery temperature returns to the acceptable range before resuming charging.
On a somewhat related note, I wrote an article about Teslas Not Charging at Home and shared a few tips on how to fix it. Check it out!
7. Incorrect Pilot Level
The pilot level is a setting on your Tesla that tells the charger how much power to use. If this setting is incorrect, it can cause your Tesla to stop charging.
How To Fix This Issue
To fix this problem, you’ll need to adjust the pilot level. Chances are you’ve set the pilot level such that the charger is delivering more power than your car can handle, prompting your Tesla to stop charging as a means of protecting the charging system and other internal components.
Adjusting the pilot level can be done from the touchscreen in your car. Once you have changed it, try charging your vehicle again.
8. Software Glitch or Communication Issue:
Occasionally, software glitches or communication issues between your Tesla and the charging station can disrupt the charging process. To address this, try restarting both your vehicle and the charging station.
Power off your Tesla, wait for a few minutes, and then power it back on. Similarly, reset the charging station or unplug and replug it. This can help reset the communication between the two systems and resolve any temporary glitches.
If the problem persists, it’s advisable to contact Tesla support for further guidance or troubleshooting steps.
9. The Software May Not Be Up To Date
Sometimes, a software update can cause charging issues on your Tesla. This is most likely to occur if you have recently received an update on your car.
How To Fix This Issue
Check to see if you have an update on your Tesla and, if you do, install it.
To double check, I recommend trying to charge your vehicle from a different location. If the problem persists, wait at least 8 hours and try charging your vehicle again.
If that does not work, contact Tesla customer service. They may be able to help you troubleshoot the problem or provide you with a software update.
10. Tripped Circuit Breaker or Blown Fuse
A tripped circuit breaker or blown fuse in the charging circuit can disrupt the charging process. Check the electrical panel in your home or the charging station for any tripped breakers or blown fuses. If you find any, reset the circuit breaker or replace the fuse as needed.
If the issue persists, it may require the expertise of an electrician to diagnose and resolve the problem.
11. Incompatible Charging Station or Power Source
Tesla vehicles require specific charging stations or power sources for optimal charging compatibility. Using an incompatible charging station or power source can result in charging interruptions. It’s essential to ensure that you’re using a Tesla Supercharger or a Tesla-approved charging station. These charging stations are designed to provide the necessary power levels and communication protocols required by Tesla vehicles.
Check the Tesla website or mobile app for the nearest compatible charging stations in your area
Does Tesla Stop Charging When Full?
No, Tesla does not stop charging when the battery is full. Tesla vehicles are equipped with a smart charging system that continuously monitors the battery’s state of charge (SOC) during charging. When the battery reaches its optimal capacity, the charging rate gradually reduces to a trickle to avoid overcharging. So it does stop enough not to damage your battery.
However, the charging process does not stop completely unless the user manually ends the charging session or if any other charging issue or safety concern arises. The smart charging system in Tesla vehicles ensures that the battery is efficiently charged while maintaining its health and longevity, providing you with a reliable and seamless charging experience.
In other words, it is safe to keep your Tesla plugged in, even overnight.
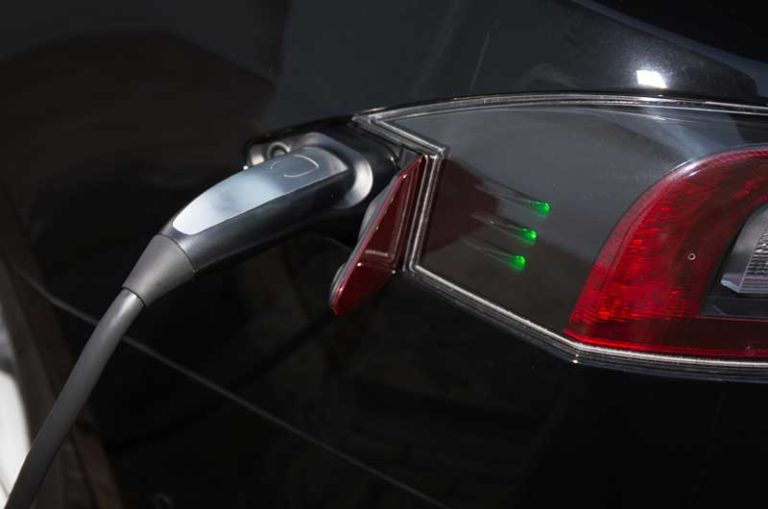
What Does The Colour On My Tesla Charge Port Mean?
Blue Light:
When the charge port displays a solid blue light, it indicates that the charger is connected, but your Tesla is not actively charging. This can occur when scheduled charging is active, or there may be another reason preventing the charging process from starting.
Blinking Blue Light:
A blinking blue light on the charge port signifies that your Tesla is communicating with the charger but has not yet begun the charging process. This can occur when your vehicle is preparing to charge and establishing a connection with the charging equipment.
Blinking Green Light:
When the charge port blinks green, it indicates that charging is currently in progress. As your Tesla approaches a full charge, the frequency of the blinking slows down, indicating that the charging rate is gradually reducing.
Solid Green Light:
A solid green light on the charge port signifies that charging is complete, and your Tesla is fully charged. At this point, you can safely unplug the charger from the charge port.
Solid Amber Light:
If the charge port displays a solid amber light, it means that the connector is not fully plugged into the charge port. To resolve this, realign the connector to the charge port and insert it fully until the light changes to a different color.
Blinking Amber Light:
A blinking amber light on the charge port indicates that your Tesla is charging at a reduced current, specifically in the case of AC charging. This reduced current may occur due to certain charging conditions or limitations.
Red Light:
When the charge port displays a red light, it means a fault has been detected, and the charging process has been stopped. To identify the specific issue, check the touchscreen in your Tesla for an alert or additional information. This alert will provide guidance on how to address the fault and resume charging.
2 More Things To Check
1. Is Your Outlet Still Working?
If you’re charging your Tesla at home, make sure that your outlet is working and you aren’t experiencing a power outage. Its also possible that your electricity tripped, so check that all your other outlets are working too.
A sudden power outage or interruption in the electrical supply can cause charging to stop abruptly. In such cases, check if the power has been restored in your area. Wait until the power is stable and back to normal before attempting to resume charging.
If the issue persists even when the power is restored, ensure that the charging equipment is functioning correctly, and contact Tesla support if needed.
2. Check That The Charging Cable Is Plugged In Correctly
It’s possible that someone walked past your Tesla and accidentally bumped against the charging cable, pulling it out of the outlet slightly. Double check that your cable is plugged into your outlet and your Tesla fully.
Tesla Charging FAQs
Having explored some of the potential reasons why your Tesla stops charging, let’s round-up today’s discussion with some FAQs related to today’s topic.
Do Teslas Stop Charging When Full?
Can a Tesla Charge Slowly at a Supercharger?
Check out these 20 great gift ideas for yourself or a Tesla fanboy.
Contact Us if you have any questions or queries.


