Most Tesla Model S owners are unknowingly wasting time—or money—every single night. Plug into the wrong outlet and you’re essentially charging at a pace that would make a snail look ambitious. Choose the right method, however, and you’ll recoup hundreds of miles overnight without a second thought. The difference comes down to voltage, hardware, and a few hidden costs most guides gloss over. Before you settle into a charging routine, there’s more you need to know.
Tesla Model S Charge Times by Method: Level 1, Level 2, and Supercharger
Charging a Tesla Model S isn’t a one-size-fits-all experience — the time it takes depends almost entirely on which method you’re using, and the gap between those methods is enormous.
Charging a Tesla Model S is never a single experience — the method you choose changes everything.
On a standard 120V outlet (Level 1), you’re looking at a painful overnight trickle that delivers roughly 2 to 3 miles of range recovery per hour, meaning a full charge can stretch anywhere from 32 to 70 hours. That’s less charging, more suffering.
Step up to Level 2 (240V), and things get genuinely practical — expect 10 to 12 hours for a full charge, making it ideal for overnight home sessions.
Then there’s Supercharging, Tesla’s DC fast-charging network, which pushes the Model S from 10% to 80% in approximately 30 minutes. Each method serves a distinct purpose: Level 1 for emergencies, Level 2 for daily life, and Supercharging for road trips demanding rapid, reliable range recovery. Newer Long Range and Plaid versions of the Model S support 250 kW peak charging, with those peak rates most accessible when the battery is at a low state of charge.
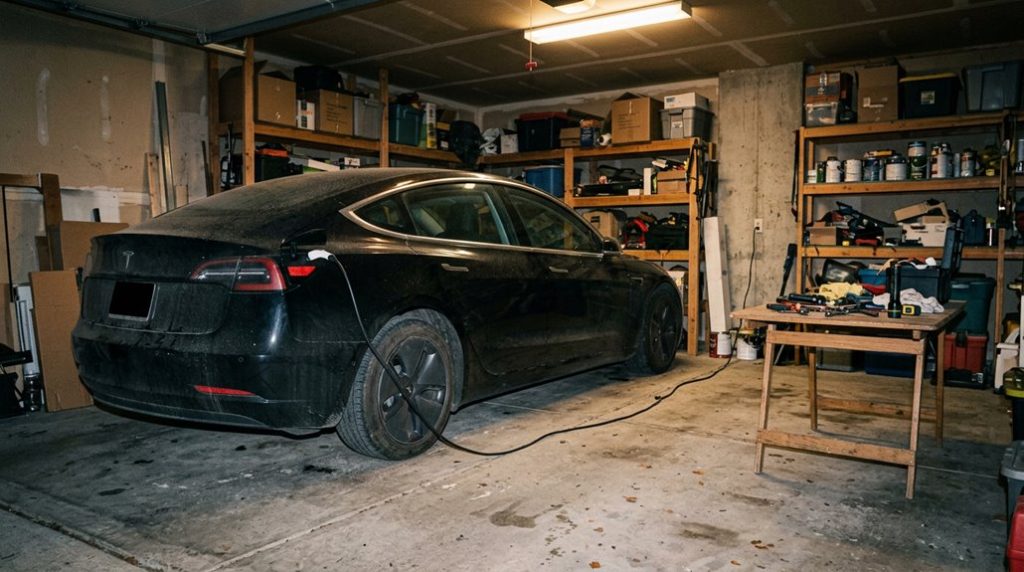
Wall Connector vs. Mobile Connector: Which Charges Your Model S Faster at Home
When you’re deciding between the Tesla Wall Connector and the Mobile Connector for home charging your Model S, the speed difference isn’t subtle — it’s the gap between a tool built for the job and a backup plan dressed up as a daily driver.
The Wall Connector, hardwired into a dedicated 60-amp circuit, delivers up to 11.5 kW (48 amps at 240 volts), adding roughly 41 miles of range per hour to your Model S — a figure the Mobile Connector simply can’t touch, given its dependence on whatever outlet you happen to plug into.
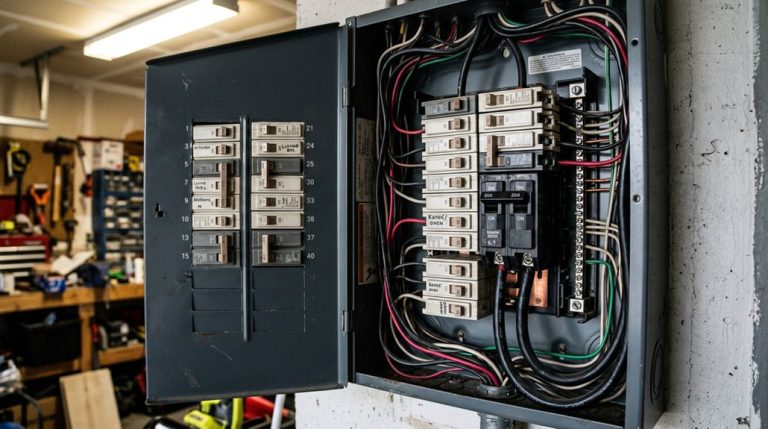
Installation requires a licensed electrician and a dedicated circuit (a real cost, not a footnote), but for a battery the size of the one sitting under your Model S, that upfront commitment pays back every night you wake up to a full charge instead of a half-empty pack. The Wall Connector also connects to Wi-Fi during commissioning, enabling smart charge scheduling so your battery finishes charging close to your departure time rather than sitting at full charge for hours overnight.
Connector Speed Differences
The choice between a Wall Connector and a Mobile Connector boils down to one hard truth: one is a proper home-charging solution, and the other is a backup plan that happens to live at your house.
The Wall Connector delivers up to 41 miles of range per hour on a 60-amp circuit, with connector durability built for daily, high-output use. The Mobile Connector tops out well below that, offering just 3–30 miles per hour depending on your outlet. That gap matters overnight. Charge efficiency drops markedly when your circuit can’t push adequate amperage. The Wall Connector supports up to 11.5 kW (48 amps), making it the clear frontrunner. The Mobile Connector works fine occasionally, but “fine occasionally” isn’t a charging strategy — it’s a compromise. Unlike home AC charging options, a Supercharger uses offboard DC rectification to bypass the onboard charger entirely, delivering far higher power levels directly to the battery pack.
Home Installation Considerations
Before you commit to either option, you need to grasp what each one actually demands from your home — because the hardware difference between a Wall Connector and a Mobile Connector is only half the story.
The Wall Connector requires hardwired installation, a dedicated 240V circuit, and often a permit process that involves local inspectors. That’s a real commitment.
The Mobile Connector, by contrast, plugs into an existing NEMA 14-50 outlet and travels with you, making it ideal if your parking flexibility changes frequently.
Wall Connector suits fixed garages where daily high-speed replenishment matters most. Mobile Connector suits renters, multi-property owners, or anyone not ready to modify their electrical panel.
Your driving patterns, parking situation, and appetite for upfront installation costs should final drive this decision. If you own multiple Teslas, the Wall Connector’s smart power-sharing feature automatically distributes available amperage across vehicles so neither car monopolizes the circuit overnight.
Whichever option you choose, keeping professional installation records and receipts is a practical habit that supports warranty claims and dealer negotiations if a charging-related issue ever arises.
Home charging speed quietly changes how you live with a Tesla Model S. Relying on standard outlets often means slower, less predictable charging that can leave you waiting longer than necessary before every drive. A dedicated setup like the Tesla Wall Connector makes overnight charging consistent, giving the Model S a full charge routine you can count on without daily uncertainty.
Supercharger V2, V3, and V4: What Each Version Actually Delivers for the Model S
Sorting out Tesla’s three Supercharger generations boils down to one practical question: how fast does your Model S actually charge at each one? Battery chemistry, thermal management, and site infrastructure all interact before a single kilowatt reaches your pack.
Here’s what each generation delivers:
- V2 (120–150 kW peak): Stall pairing splits power between adjacent vehicles, so your real-world rate often drops below the ceiling.
- V3 (up to 250 kW): Independent power delivery and liquid-cooled cables make this your most reliable fast-charge option, covering 10–80% in roughly 20–30 minutes.
- V4 (cabinet-rated up to 500 kW): Don’t get excited yet — your Model S runs 400-volt system, so V4’s higher-voltage advantage mostly bypasses you.
- Charge scheduling matters everywhere: Peak rates only apply from low state of charge; expect noticeable tapering above 80%. V4 also includes a payment terminal space for credit card readers, removing the need for app-based payment at supported stations.
V3 remains your highway workhorse. Tesla’s collective cloud data from vehicles on the road continuously refines charging-related route recommendations, helping Navigate on Autopilot better anticipate Supercharger stops along your planned highway route.
Not every charge happens at home, and that’s where delays or limited outlet access can quietly become a problem on longer trips. Having a backup charging option means you’re not stuck planning your day around the nearest fast charger. A portable Level 2 Tesla-compatible mobile charging cable gives Model S owners flexible charging from different power sources, making it easier to recover range when plans change or you’re away from your main setup.
How to Schedule Model S Charging and Precondition the Battery Before Every Trip
Tesla’s scheduling system lets you set a start time, an end-by time, or both, automatically aligning charging with off-peak pricing windows so the car tops off overnight without you lifting a finger. Smart charging and off-peak scheduling can reduce costs to as low as $0.13 per kWh, delivering meaningful savings over thousands of charging sessions.
Pair that schedule with a preconditioning routine (set through the same Schedule menu, down to specific days of the week), and your battery and cabin are already at ideal temperature before you even walk out the door. To enable this feature, simply open the Tesla app, navigate to the Schedule menu, and flip the switch to activate scheduled charging from the Charge tab.
Scheduling Charges Efficiently
Scheduling your Model S to charge at the right time is one of the simplest ways to cut your monthly electricity bill without changing a single driving habit. Time-based optimization means your car charges when rates are lowest, automatically.
Here’s how to set it up correctly:
- Set your start time at or just after your off-peak window begins (midnight, for example).
- Use location-aware automation by saving your Home address so the schedule only activates there.
- Leverage the 6-hour window — you can plug in anytime within six hours of your scheduled start and still capture off-peak rates.
- Override anytime via the Tesla app using Start Charging when you need immediate power. You can also add multiple charging schedules to accommodate different routines throughout the week.
For long-term battery health, Tesla recommends stopping at 80% on long trips to reduce stress on the battery cells and extend overall longevity.
Battery Preconditioning Benefits
Getting your charge schedule dialed in saves money, but it’s only half the equation — a cold battery doesn’t care how cheap your electricity was overnight. Cold degradation is real: low temperatures slow electrochemical reactions, limiting both available power and charging acceptance. That’s where battery preconditioning becomes essential.
Activate it through the Tesla app or set a Scheduled Departure, and the car handles warm maintenance automatically — targeting optimal pack temperature before you drive or charge. Start preconditioning 30 to 45 minutes early in freezing conditions. Navigate to a Supercharger, and the car initiates warming automatically. A properly warmed battery accepts DC fast charging at full speed rather than forcing you through a frustratingly slow ramp-up. The small energy cost upfront pays for itself in shorter charging stops. Tesla’s over-the-air software updates have refined preconditioning algorithms post-purchase, meaning your vehicle’s thermal management behavior can improve without ever visiting a service center.
How Phantom Drain and Supercharger Idle Fees Affect Your Model S Charging Costs
Even after you’ve nailed down your charging schedule and fine-tuned your route, two quieter cost drivers can still chip away at your Model S budget: phantom drain and Supercharger idle fees.
Older Model S packs can bleed 5–15 miles daily while parked. That quiet loss forces earlier Supercharger stops and raises your total kWh consumption over time. Here’s where idle mitigation strategies and Sentry optimization actually pay off:
- Disable Sentry Mode in low-risk locations—it’s one of the heaviest parked-energy consumers.
- Turn off Cabin Overheat Protection when temperatures don’t warrant it.
- Limit third-party app polling, which repeatedly wakes your vehicle and prevents deep sleep.
- Clear the Supercharger stall promptly—idle fees activate the moment charging finishes at busy stations, adding penalties that have nothing to do with energy consumed.
Cold-weather driving can reduce your highway range to 239 miles, which means more frequent Supercharger sessions and a greater cumulative exposure to both phantom drain losses and idle fee penalties.
Control both variables, and your per-mile charging cost drops meaningfully.
Daily Charging Habits That Protect Your Model S Battery Over Time
Your battery’s long-term health comes down less to dramatic moments at the Supercharger and more to the mundane decisions you make at home every night. The goal is simple: avoid extremes on both ends of the charge range.
Battery longevity isn’t built at the Supercharger — it’s built in your driveway, every ordinary night.
Keeping your daily limit around 80% reduces voltage stress on the lithium-ion cells, which degrades capacity over time. Dropping below 20% regularly creates similar strain in the opposite direction.
Routine top-ups beat infrequent large charges every time. Plugging in nightly—even for modest replenishment—keeps your state of charge in that comfortable middle range without dramatic swings.
Level 2 AC home charging generates less heat than Supercharging, and lower thermal exposure directly benefits long-term capacity retention.
If you’re storing your Model S for weeks, target 50–60% and keep it plugged in. Owners with LFP batteries (less common in the Model S) can safely charge to 100% weekly for calibration purposes.
In regions like the EU, thermal management thresholds are defined specifically by pack temperature ranges—such as active cooling engaging at 48°C and heating at -7.5°C—which means your local climate can directly influence how aggressively the battery management system works during charging.
Frequently Asked Questions
Can I Charge My Tesla Model S at a Non-Tesla Public Station?
Yes, you can charge your Tesla Model S at non-Tesla public stations using third-party converters. Always follow public etiquette by moving your car promptly once charging completes.
Does Towing a Trailer Significantly Increase Model S Charging Frequency?
Yes, towing substantially increases your charging frequency. Increased drag drains your battery faster, brake regen recovers less than you’d hope, and you’ll typically stop to charge 30–50% more often on highway trips.
How Does Elevation and Hilly Terrain Impact Model S Battery Range?
Hilly terrain and altitude effects noticeably cut your Model S’s range, as climbing consumes significant battery energy. Regenerative braking recovers some power on descents, but it won’t fully offset what you’ve spent going uphill.
What Happens if I Leave My Model S Plugged in for Several Days?
Like a silent guardian, your Model S’s battery management system keeps watch—holding your charge steady, replenishing small losses, and quietly fighting vampire drain so you’re always ready to roll.
Is It Safe to Charge a Model S During a Thunderstorm or Heavy Rain?
Heavy rain is fine thanks to charging etiquette built into Tesla’s weather-resistant design. However, you’ll want to unplug during thunderstorms, as lightning exposes safety myths about surge protection truly eliminating electrical risks to your Model S.