Tesla’s in-car calendar feature is a great tool to keep you organized and on schedule, and it can help you save time in your daily routine!
Imagine all the extra things you could do with that extra time. Whether it’s catching up on your favorite podcast, making seat heaters warmer, or even just having a longer snooze in the morning, the possibilities are endless.
In this article, I will show you how to make the most of your Tesla’s built-in calendar feature, including how to sync calendars, navigate to events, and make phone calls directly from the calendar. So, buckle up and let’s get organized!
- 1. Enable Calendar Sync on Tesla:
- 2. Use In-Calendar Call, Navigation, and Notes
- 3. Sync Google Calendars Between Your Tesla and Phone App
- 4. Sync Calendar With iPhone & Android
- 5. Import Contacts to Tesla
- 6 Solutions for Potential Calendar Sync Issues
- Request Tesla Call Center Assistance
- How to Sync Outlook Calendar with Tesla Model 3
- How To Set Default Driver Profile on Tesla:
Tesla Calendar is one of the many preloaded features of your electric car that make your driving life easier for Tesla owners. Enable the Calendar, pair the car’s system with your Tesla account and mobile device, and sync all your itineraries from different calendars to simplify schedule management and enhance your driving experience.
1. Enable Calendar Sync on Tesla:
To add and sync one or more calendars with your Tesla, you must first have the Tesla app synced with the car. If you haven’t already, download the app, sign in using the activated credentials, and turn on Calendar Sync under Settings.
You can then view a synced calendar on the touchscreen by tapping on the arrowhead icon at the bottom of the infotainment system and choosing the Calendar icon.
The pop-up will show ‘Enable Calendar Access’ if you don’t have one synced with the system. Thus, you have to allow the Tesla app to access your phone calendar or any other application you may currently use.

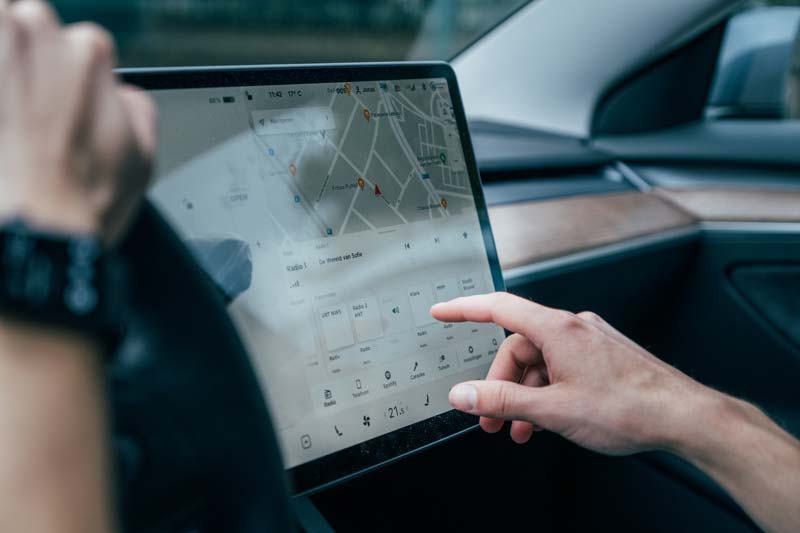
Photo by Jonas Leupe on Unsplash
How To Enable Calendar on Tesla
Verify you have the latest Tesla app version. Ideally, your smartphone’s operating system should be its current version, too. If you use any specific calendar application, such as Google, iPhone, Samsung, or Android, update it to avoid inadvertent errors.
Here are the steps to enable Calendar on Tesla:
- Sign in to the Tesla app on your phone.
- Tap on Settings (the gear symbol).
- Look for Calendar Sync.
- Tap to enable Calendar Sync.
However, don’t sign out from the app just yet. Check your Tesla’s touchscreen now. Tap on the arrowhead, choose the calendar icon and see if your phone’s schedule pops up. Your name, if used for your phone, or the smartphone model number will show up on the top right. You’ll find a filter option next to it on the far right.
The filter option is handy if you have multiple calendars synced with your Tesla. You can switch from any native phone app to Google Calendar or vice versa in the expanded menu and toggle as and when necessary. However, all such apps should be synced with the system.
2. Use In-Calendar Call, Navigation, and Notes
After you sync at least one calendar with the system, the touchscreen pop-up will show you all available information. You’ll see the date on top, the scheduled times on the left column, the essential information in the middle column, and info icons on the right for notes.
With a scheduled address, you can use the navigation icon to get directions and even make a phone call directly from within the Calendar app on your Tesla’s touchscreen.
Tesla’s infotainment system shows you names, addresses, contact numbers, and notes, depending on the details you have in the calendar. If there’s an address for an appointment or scheduled meeting, Tesla shows you a navigation icon, and you can use its route selection.
You can dial phone numbers directly from within the Calendar app on your Tesla’s touchscreen. If a meeting has a video conference link, such as Zoom, you can sign in to it using your credentials or the meeting ID & password.
f you have a phone number linked to a calendar event, you can call the number through the Tesla system.
Tesla will show you alternative routes when you choose a destination on the Calendar app. However, you may not take any of its suggested routes. Tesla Model 3 can auto-navigate to addresses if your scheduled time is within two hours, even if you aren’t using navigation.
Check out this Tesla Model 3 Calendar App Tutorial on YouTube.
3. Sync Google Calendars Between Your Tesla and Phone App
The easiest and quickest way to sync Google Calendar with your Tesla is by using the same account or email address for both. Use your Google account or Gmail address for your phone and the Tesla app and you’ll be prompted to enable Calendar access for your Google account. Once you’ve granted access, all your Google Calendar events and invites will automatically be added to your Tesla Calendar.
Here are the steps to sync Google Calendar with Tesla.
- Go to your phone’s settings (Android or iPhone).
- Go to accounts and add the Gmail address or Google account details.
- Open Google Calendar on your phone and sign in using the exact details.
- Launch Tesla’s mobile app and use the same Gmail or Google details to sign in.
Your Google Calendar will sync with Tesla’s mobile app and car’s infotainment system.
The only issue you may encounter with these steps is if you use separate login credentials for your Google Calendar and Tesla’s app.
Can You Sync Any Google Calendar With a Tesla?
You can sync your Google Calendar with a Tesla instantaneously by using the same email address and password for both accounts. If you don’t use the same Google account for the Tesla app, add the email address to create a new profile for your car.
You must create a new driver profile and grant it access to your Tesla. Unlike in the past, you don’t have to wait for Tesla to authenticate and authorize new accounts or profiles. You can add new accounts or profiles, and Tesla will facilitate the same almost immediately.
Here’s a video showing how you can add an email address for a Tesla account:
Use your Google account or Gmail address while adding a new driver and granting the profile access to your car. Tesla will send a notification email to the address you provide and another for you to reset the password. Choose a password, and your Gmail address is now a Tesla ID.
Use this newly approved Gmail address to sign in to the Tesla app on your phone. Your smartphone is probably already paired with the car. Log in to the Tesla app with the new ID and password. Enable Calendar Sync using the steps mentioned earlier in this guide.
Pro Tip: Can you change the Tesla on-screen icons?
Tesla has changed the icons in the dock for easy access. This gives you the ability to create a summer and winter profile with your icons and buttons as the seasons change. That way you will have easy access to the heated steering wheel and seat option on the Model X for example. In the summertime, you might not need or want those buttons.
4. Sync Calendar With iPhone & Android
If you use a different phone device, such as an iPhone or Android, you can still sync your native calendar apps with your Tesla. To do this, ensure that the latest software updates are installed on your phone, and then go to the Tesla app’s settings and add your calendar service accounts.
Tesla Calendar Sync for iPhone
The latest Tesla app version for iPhone is slightly different. You have to ensure that the Calendar Sync is enabled on the Tesla app for the iPhone native application to pair.
Here’s the process to sync iPhone Calendar with Tesla:
- Open the Tesla app on your iPhone.
- Sign in if you haven’t already.
- Tap on your avatar in the upper right corner.
- Scroll down to get Settings.
- Tap on the Settings icon (gear symbol).
- You’ll see the Calendar Sync option.
- Tap on the button to enable it.
If your iPhone and the Tesla app are already paired with the car, Calendar Sync will automatically connect the two interfaces and update per your selected settings.
Ensure the mobile access option is turned on for your car’s system in the Safety & Security settings.
Tesla Calendar Sync for Android
Your Google Calendar or a native phone application for Android, such as Samsung, should get automatically synced when you enable the feature on the Tesla app. The only instance when this may not happen is if your phone’s auto-sync feature is turned off.
All contemporary Android phones have an auto-sync feature, which is essentially about data usage. The auto-sync feature isn’t turned on by default because smartphone manufacturers and Android take the standard approach of reducing or limiting data consumption.
Here are the steps to ensure Tesla calendar sync for Android:
- Go to Settings on your Android smartphone.
- Look for Auto Sync* in your Account Settings.
- Enable the Auto Sync option.
- Your Android Calendar should sync with Tesla.
The auto-sync feature on Android is not placed identically among the settings options of all phones. Depending on the phone brand, model, and Android version, you may find this option in networks, data usage, or as a standalone setting, such as Accounts & Sync.
5. Import Contacts to Tesla
Tesla imports your contacts and recent calls automatically when you pair your phone using Bluetooth unless you turn off this function while connecting the two devices. You can disconnect an already paired device and add it afresh. The same steps apply to every new phone you add.
How To Sync Contacts To Tesla
Here’s how to import your phone contacts to Tesla:
- Tap on the Bluetooth icon (top right corner) on Tesla’s touchscreen.
- Turn the Bluetooth on, and ensure your phone is discoverable.
- If your phone’s Bluetooth is on, it will show up on the touchscreen.
- Add a new device for an unpaired phone and sync the two devices.
- See the Contacts and Recent Calls option as the devices pair. This feature is enabled by default. Don’t turn it off.
- Ensure you have enabled the Allow Mobile Access feature in Tesla.
- Verify if the auto-sync feature on your phone is enabled.
- Tesla should import your contacts and recent calls.
Potential Calendar Sync Issues
You may experience a few issues while syncing your Tesla with a calendar app, be it Google, iPhone, Android, Samsung, Outlook, or other applications. All such auto sync and updates depend on the same set of prerequisites.
Here’s a list of the common teething glitches:
| Potential Issues | Nature of the Problem |
| Tesla App | The mobile app isn’t on or you’re logged out. |
| Mobile Access | Mobile access is turned off in your Tesla. |
| Cellular Network | Your phone’s network signal strength is weak. |
| Internet Connectivity | Your phone or car has poor internet speeds. |
| Bluetooth Access | Car or phone Bluetooth is off or not working. |
| Calendar Not Updating | The calendar’s update settings aren’t right. |
6 Solutions for Potential Calendar Sync Issues
You may have one or more potential issues hindering the auto-sync feature in your Tesla, whether you use the car or its mobile app. Address each of these probabilities to remedy the auto-sync problem.
1. Stay Signed In on the Tesla App
Don’t sign out from the Tesla app. The Tesla mobile app should run in the background on your phone for auto-sync to work in real-time. You may experience phone-specific issues caused by background processes or applications.
According to Tesla’s prompt on its cars’ infotainment system, iPhone users should turn off the Background App Refresh feature for all other applications through Settings > General options. Doing this enhances the reliability of calendar updates.
2. Ensure Mobile Access is Enabled
Your mobile access to Tesla’s onboard system must be enabled at all times. If you’re using a different phone with its calendar synced with your Tesla, provide mobile access to that device. Tesla has multiple driver profiles. Toggle these based on your needs and the phone you are using.
How to Enable Mobile Access in Tesla
Here are the steps to enable Mobile Access:
- Tap on the car logo on the Tesla touchscreen to expand menu.
- Select the Safety & Security option on the left column.
- Scroll down to the Mobile Access option.
- Tap on Allow Mobile Access.
3. Check Your Cellular Network
A cellular network’s signal strength at a specific place and time can influence auto-updates. If the LTE network or the mobile internet isn’t working properly, your Tesla Calendar app won’t receive real-time or scheduled updates.
Unfortunately, network reception is beyond your control. Of course, you could change network providers if you have consistent connectivity issues.
If the option exists, connect to a stable Wi-Fi system to sync your calendar instead.
4. Check Your Internet Connectivity
Teslas have integrated internet connectivity and cellular data. Both devices should have active internet connections and adequate data speeds for auto-sync to work seamlessly.
You may switch your Tesla to a Wi-Fi hotspot or cellular data to solve this issue.
5. Ensure Bluetooth Access is Enabled
Check if your phone and Tesla’s Bluetooth are enabled. Your phone should be discoverable over Bluetooth. Already paired phones should connect automatically if both Bluetooths are on.
Unpaired phones must be synced before the Calendar app can receive any updates.
6. Is Your Tesla Calendar Not Updating?
The Tesla Calendar app on your car’s infotainment system has three lines with as many dots on the top left. Tap on this icon to choose when you want the Calendar to show up on your screen, which is basically the frequency.
There are 4 ‘Show Calendar’ options upon entry: never, morning, morning & evening, and always. This pop-up also shows the last update time of your car’s calendar. Select your preference, and the Calendar app will pop up on the touchscreen accordingly.
Tesla Calendar app auto-updates should work in real-time and sync seamlessly, irrespective of the frequency you choose to have the interface pop up on the touchscreen. Hence, any update or sync failure is likely due to one of the other reasons explained in this guide.
Request Tesla Call Center Assistance
Keep in mind, while the Calendar feature and its integrated settings are exceptionally useful, Tesla sometimes complicates several processes for user safety, privacy, and data security.
So, it’s always good to check with Tesla support for any specific queries or concerns. With these tips, you can stay organized and on schedule, and even enjoy new features such as an online calendar and routable locations with reminders from your Google Calendar app or Outlook calendar.
With the latest software updates, you can access even more features on your Tesla Model S, Model Y, or any other Tesla electric vehicle.
How to Sync Outlook Calendar with Tesla Model 3
To sync your Outlook calendar with your Tesla Model 3, you’ll need to ensure that your phone is paired to your vehicle and that you are logged into the Tesla mobile app. Once these prerequisites are met, follow these steps:
- On your Tesla mobile app, tap on “Profile” to expand the menu, then go to “Settings” and select the menu item “Calendar Sync.”
- Make sure your phone has the most recent version of the Tesla mobile app installed for optimal functionality.
- On your phone, access the settings and grant permission for the Tesla mobile app to access and sync your calendar.
- Once permission is granted, the mobile app will periodically and automatically send calendar data from your phone to your Model 3.
By syncing your Outlook calendar with your Tesla Model 3, you’ll be able to view your scheduled events on the touchscreen display.
If an event includes an address, you can even navigate to the event’s location directly from the calendar entry. Additionally, the touchscreen may notify you of better routes due to traffic for events taking place within the next hour.
Stay organized and informed on the go with seamless integration between your Outlook calendar and your Tesla Model 3.
How To Set Default Driver Profile on Tesla:
To set a default driver profile on your Tesla vehicle, follow these steps:
- Start by expanding the menu on the touchscreen display of your Tesla.
- Tap on “Controls” and then select “Settings” from the expanded menu.
- In the settings menu, scroll down and find “Driver Profiles” or a similar option.
- Tap on “Driver Profiles” to access the driver profile management screen.
- On this screen, you should see a list of existing profiles or the option to create a new one.
- Select the profile you want to set as the default.
- Look for an option to set the selected profile as the default or primary profile for the vehicle.
- Enable or toggle this option to designate the chosen profile as the default driver profile.
By setting a default driver profile, your Tesla will automatically load the selected profile when you enter the vehicle. This means that your preferred settings, including seat position, climate controls, and media preferences, will be applied automatically.
It ensures a personalized driving experience tailored to your preferences each time you get behind the wheel.
Can I use my Outlook calendar with my Tesla?
How do I make phone calls directly from my Tesla calendar?
Check out these 20 great gift ideas for yourself or a Tesla fanboy.
Contact Us if you have any questions or queries.


