Your Tesla’s premium audio system is quietly underperforming — and the factory preset is why. Those default equaliser settings weren’t built for your ears, your music taste, or the specific acoustic geometry of your cabin. They were built for nobody in particular. The difference between mediocre and extraordinary sound isn’t a hardware upgrade — it’s knowing exactly which frequency bands to adjust and why. A few precise moves change everything you hear.
How to Open the Tesla Equaliser on the Touchscreen
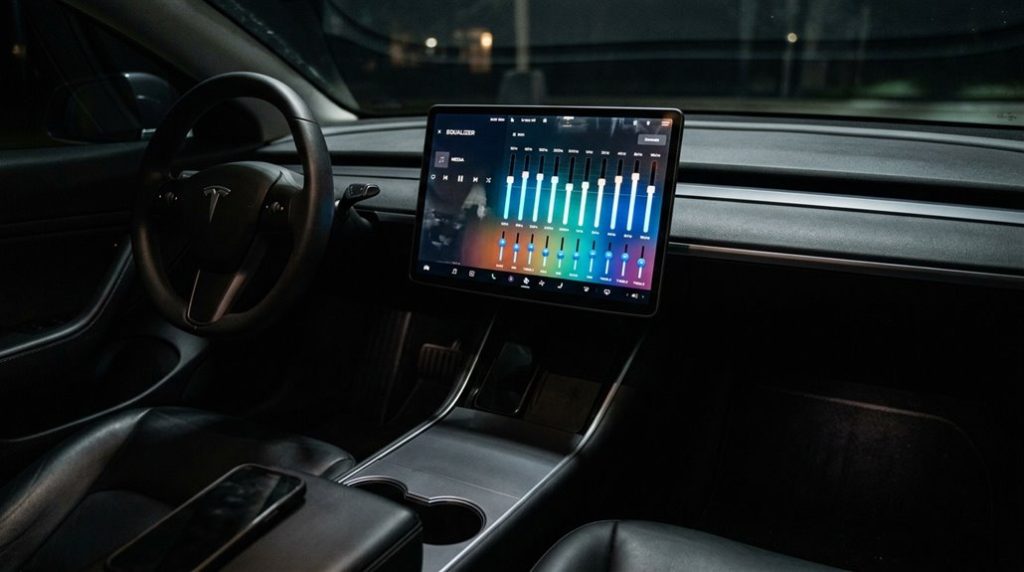
Getting to Tesla’s equaliser takes a few taps rather than a thorough exploration through vehicle settings. Your touchscreen exploration starts at the active media screen — wherever you’re streaming Spotify, radio, or Bluetooth audio.
Tesla’s equaliser is just a few taps away, starting from whichever media source you’re currently streaming.
From there, tap the speaker or equaliser-style icon, typically sitting in the upper-right corner of the media player panel. If the icon isn’t immediately visible, expand the media pane to a larger view (it compresses compact controls when minimised). Once you tap through the audio settings tile, the equaliser bands appear.
Alternatively, voice shortcuts cut the process down entirely. Say “Hey Tesla, adjust equalizer” and the audio settings open hands-free — useful when you’d rather not prod the screen mid-drive. Note that voice access is confirmed through video walkthroughs rather than the official owner’s manual, so treat it as a reliable shortcut rather than a guaranteed feature.
Trim level matters too; RWD variants may lack full equaliser access. Premium models offer a 10-band equaliser for finer control and more precise frequency adjustments across the available sliders.
If you want to confirm which hardware generation your vehicle runs before diving into audio settings, navigate to Settings → Software → Additional Vehicle Information on the touchscreen, where your hardware label is displayed.
What Tesla Equaliser Bands Actually Control
Tesla’s layout runs from deep low-end rumble up through the highest shimmer your speakers can reproduce, with each band doing a distinct job.
Bass handles 31–100 Hz, where kick drums and low frequency resonance live. Amplify it too far and perceptual masking kicks in — lower frequencies overwhelm adjacent bands, burying detail.
Bass-Mid covers 100–315 Hz, shaping warmth and body (think bass guitar fullness).
Mid-Range (400 Hz–1.25 kHz) controls vocal clarity and instrument presence — cut it and vocals recede noticeably.
Mid-Treble (1.6–5 kHz) adds bite and edge; overdo it and consonants turn harsh.
Treble (5–16 kHz) delivers sparkle and air across cymbals and high harmonics.
Each band interacts with its neighbours, so adjusting one always influences what you perceive in the others. The quality of your audio experience also depends on the underlying hardware generation — MCU3’s AMD Ryzen platform delivers noticeably faster audio interface responsiveness and richer processing headroom than older MCU1 or MCU2 systems. For the most transparent test of how each band performs, playing FLAC files from USB gives you an uncompressed reference that reveals exactly what your adjustments are doing to the signal.
Starter Tesla Equaliser Settings That Work Across Most Music
Before touching individual bands, you need a workable baseline — something that sounds decent on a Tuesday afternoon playlist and holds up when you switch genres.
Your listening environment and driver preference both shape where you land, but a proven starting curve removes the guesswork.
One widely cited five-band starting point is +4.0, +2.5, -1.5, +3.0, +4.5.
That mild V-shape lifts bass and treble while pulling back the lower mids slightly — clearing up congestion without gutting warmth.
Model-specific baselines worth trying first:
- Model 3 / Model Y: Bass +5, Treble +4, Fade -1
- Model S: Bass +2, Treble +4, Fade -2
- Model X: Bass +1, Treble +5, Fade -1
- Subwoofer: Hold at 7 across all models
- Starting position: Centre fade, flat mids before adjusting anything
Change one band at a time.
Isolating adjustments tells you exactly what each move does. If you ever lose your way with settings, a broken or missing link in your saved configuration can leave you starting from scratch, so note down any baseline that works for you.
Keep in mind that model-year incompatibility between hardware revisions — such as the removal of ultrasonic parking sensors in later Model Y builds — can affect how cabin acoustics behave and may shift which baseline settings feel most balanced to you.
Tesla Equaliser Profiles for Rock, EDM, Classical, and More
Once you move past a flat or neutral starting point, genre-specific EQ curves let you shape your Tesla’s audio system around how a recording is actually built. Rock, for instance, responds well to a warmer low-mid lift alongside stronger upper presence — a profile like Bass +4.5, Bass-Mid +2.0, Mid-Treble +3.5, and Treble +4.0 gives guitars and kick drum the energy they need without turning cymbals into weapons. Tesla’s over-the-air software updates can occasionally affect audio system behaviour, so it’s worth revisiting your saved EQ profiles after any vehicle update to confirm your settings remain intact.
EDM pulls harder in the opposite direction, leaning on deep sub and bass enhancements (think Bass +6.0, Treble +5.5, with a controlled Mid-Range cut at -2.0) to recreate that club-style low-end foundation your Tesla’s speakers can actually deliver. For classical music, the goal shifts entirely toward restraint, with subtle boosts across the board — Bass +1.0, Mid-Range +1.5, and Treble +2.5 — to preserve the natural orchestral balance that heavy EQ curves would otherwise disrupt.
You can fine-tune your Tesla EQ all you want, but it won’t fix low-quality, compressed audio. Most drivers don’t notice what they’re missing until they hear it done right. Don’t settle for average sound on a premium system—plug in this USB-C high-resolution music drive and hear the difference every time you drive.
Genre-Specific EQ Curves
Different genres genuinely demand different EQ strategies, because a setting that makes a rock guitar crunch feel alive will turn a classical string quartet into a muddy, over-processed mess. Bass psychoacoustics explains why: your brain interprets low frequencies differently depending on musical situation. Smooth genre shifts require deliberate profile switching, not guesswork.
Here’s what each genre actually needs:
- Rock: Boost upper mids and treble (+3.5–+4.5) for guitar bite and drum snap
- EDM: V-shaped curve with heavy sub-bass (+6.0) and a midrange cut (−2.0) for punch
- Classical: Restrained across all bands (+1.0 to +2.5) to preserve orchestral staging
- Pop: Elevated highs (+4.5) with moderate bass for vocal clarity
- Jazz: Mid-forward profile (+5.0 to +6.0) prioritising instrument separation
Just as Tesla delivers remote software updates overnight that recalibrate acceleration response and battery management without you touching a thing, saving your genre-specific EQ profiles means your preferred sound is always ready the moment you select a playlist.
Recommended Band Settings
Although Tesla’s flat EQ setting won’t get you thrown out of any audiophile societies, it’s leaving real performance on the table.
Each genre benefits from deliberate band adjustments that work alongside speaker placement and headphone simulation processing.
For rock, try +4.5 / +2.0 / +1.5 / +3.5 / +4.0 dB across Bass through Treble — punchy without burying vocals.
EDM and hip-hop demand heavier low-end: +6.0 / +3.5 / -2.0 / +2.5 / +5.5 dB prioritises sub-bass impact.
Classical recordings respond better to restraint — +1.0 / -1.0 / +1.5 / +2.0 / +2.5 dB preserves natural timbre and soundstage width.
When unsure, start with a V-shaped curve (+4.0 / +2.5 / -1.5 / +3.0 / +4.5 dB) and adjust in 0.5 dB increments using familiar tracks. Tesla’s over-the-air software updates mean audio processing features and EQ capabilities can be refined or expanded after purchase, so revisiting your saved profiles after a firmware update is always worth doing.
How to Use Balance and Fader So Sound Reaches the Right Seats
Once you’ve dialled in your EQ profile, balance and fader let you direct that tuned sound to exactly where you’re sitting — balance shifts audio left or right across a -10 to +10 range, while fader moves it front to rear across the same scale.
A driver-only setup typically benefits from centering the balance (or nudging it slightly left for right-hand-drive vehicles) while pushing the fader toward the front, so rear speakers don’t dilute the soundstage you’re actually hearing.
Centering both controls at 0 restores even cabin distribution, which works best when every seat is occupied and no single listener should dominate the mix. Tesla’s over-the-air software updates continuously refine vehicle systems, meaning audio settings and presets may shift slightly following a new firmware release, so it’s worth revisiting your saved configuration after major updates.
Understanding Balance Controls
Before touching the equaliser, it’s worth grasping two controls that affect where sound actually lands in the cabin: balance and fader.
Balance handles left-right perception, shifting audio between the driver and passenger sides. Your seat positioning and listener preference both influence where this control should sit. Here’s what you need to know:
- Balance defaults to centre, splitting audio evenly
- Moving it left pushes sound toward left speakers
- Moving it right shifts output to the right side
- Uneven left right perception often signals a balance issue
- Hearing tests can reveal whether one ear compensates for imbalance
Small adjustments matter here. Tesla’s slider responds quickly, so resist the urge to drag it dramatically. Centre is always your reference point before experimenting further. The Model Y’s seven-seat layout option means passengers spread across three rows, making fader adjustment especially important for ensuring rear occupants receive balanced audio coverage.
Adjusting Sound Per Seat
Now that you grasp how balance shifts audio left and right, it’s time to layer in the second control that completes the image: fader. Fader moves sound between front and rear seats — straightforward, but powerful for seat specific imaging.
| Scenario | Fader Direction |
|---|---|
| Driver-focused listening | Push forward |
| Rear passenger comfort | Push rearward |
| Whole-cabin playback | Centre position |
Dragging fader forward concentrates audio toward the front seats, pulling it rearward enhances coverage for back passengers (useful for children needing clearer audio). Together, balance and fader create a targetable sound zone inside the cabin. These audio controls are accessed through the same in-cabin display that handles vehicle functions like tyre pressure monitoring across Tesla’s modern lineup.
For passenger comfort during shared trips, shift both controls temporarily, then restore centre defaults afterward. Neither adjustment touches your EQ tone — they purely reposition where sound lands.
Centering the Audio Stage
With balance and fader now working together, the real question becomes where to anchor them so sound fills the cabin evenly rather than piling up in one corner. Centering both controls builds listener symmetry before you attempt any seat-specific steering.
Start here:
- Set balance to 0 (dead centre, left-right split equal)
- Set fader to 0 (front-rear distribution matched)
- Confirm you’re parked before adjusting anything
- Listen for acoustic imaging collapse — uneven settings kill the sound stage fast
- Use centred settings as your reference baseline, not your final position
From centre, small moves matter more than large ones. Shift balance or fader by two or three points at most, then stop and listen. Overcorrecting pushes sound into one zone and flattens the stereo field entirely. This is especially worth noting in the Model X, where the panoramic windshield and falcon-wing doors create an unusually wide cabin that can spread acoustic reflections unevenly across all three rows.
Immersive Sound On or Off: Which Setting Works Better?
Tesla’s Immersive Sound setting widens the cabin soundstage by layering echo and reverb processing over the raw stereo signal — simulating spatial depth rather than providing true discrete multichannel audio. Grasping this distinction helps you match the surround processing to your actual listener preferences.
Turn it Off when accuracy matters. Stereo imaging sharpens, instrument separation becomes clearer, and tonal balance stays honest — especially useful during critical listening sessions. Some owners report the processed version actually sounds worse than the clean stereo signal.
Turn it On (or set it to Low/Standard) when you want a larger, more enveloping feel for casual playback. Newer software includes an Auto mode that adjusts immersion based on content type, which handles mixed listening reasonably well.
One practical rule: if vocals drift off-centre or instruments lose definition, reduce or disable it immediately. The Model 3 Highland’s upgraded hardware already delivers strong separation, making heavy spatial processing largely unnecessary.
When to Reset Your Tesla Equaliser Back to Default
Even the most carefully tuned EQ curve eventually hits a wall — repeated adjustments produce diminishing returns, software updates quietly scramble your saved values, or a genre switch makes your bass-heavy rock curve sound like a muddy mess on acoustic recordings.
Knowing when to reset keeps your troubleshooting clean. Hit the default button when:
- Software bugs cause EQ values to display correctly but sound reverted
- Genre shifts shift priorities from punchy bass to vocal clarity
- Multiple tweaks leave your curve harder to refine than before
- Balance or staging issues need isolating from EQ slider interference
- A fresh software update changes how settings persist after shutdown
Access the EQ through the settings icon above your Media Player volume controls, restore defaults, then reapply adjustments systematically. Resetting isn’t admitting defeat — it’s separating a tuning problem from a hardware or software problem before you waste another hour chasing sliders.
Even with dialed-in Tesla audio settings, long drives can still fall flat once the playlist runs out and the cabin goes quiet. That’s usually when passengers start checking their phones and the vibe drops fast. Don’t wait for that moment—plug in this Tesla karaoke microphone set and turn every drive into something people actually stay engaged in.
Frequently Asked Questions
Does Adjusting the Tesla Equaliser Affect Battery Range or Energy Consumption?
Adjusting your Tesla’s equaliser won’t meaningfully affect battery range. The battery impact is negligible—energy draw comes mainly from volume levels, not EQ curves. Heavy bass enhancements add minor audio power demand, but range effects are fundamentally nonexistent.
Can Tesla Equaliser Settings Sync Across Multiple Vehicles on One Account?
Tesla doesn’t currently support account syncing or profile sharing for equaliser settings across multiple vehicles. You’ll need to manually recreate your preferred adjustments in each car individually, as settings remain local to that specific vehicle.
Do Tesla Software Updates Ever Reset Saved Equaliser Settings Automatically?
Over 90% of Tesla owners aren’t sure if software updates wipe their EQ. They don’t automatically trigger factory resets, but you should back up your user profiles manually, since cloud backups aren’t officially guaranteed to preserve your settings.
Does the Tesla Equaliser Work Differently With Bluetooth Versus Wired Audio?
The equaliser controls work the same way, but Bluetooth latency and codec impact can change how your adjustments sound. You’ll notice the EQ responding differently with wireless sources, even though you’re using identical settings.
Can Passengers Adjust Equaliser Settings From the Rear Seat Controls?
You can’t adjust equaliser settings from Tesla’s rear controls — they’re reserved for seat adjustments. To change the sound, you’ll need front touchscreen access, which also addresses privacy concerns around who’s modifying shared audio profiles.