Most Tesla owners never touch their app’s charging settings — and quietly pay $40+ more per month than they have to. Configuring your Wall Connector for scheduled home charging requires navigating a frustratingly specific setup: exact Wi-Fi standards, precise firmware sequencing, and case-sensitive credentials that will silently kill your progress if you skip a single step. Get it right, though, and your electricity bill tells a completely different story.
What You Need Before Starting Tesla App Home Charging Setup
Before plunging into the Tesla app setup, you’ll need the right hardware in place—and that choice matters more than most people expect.
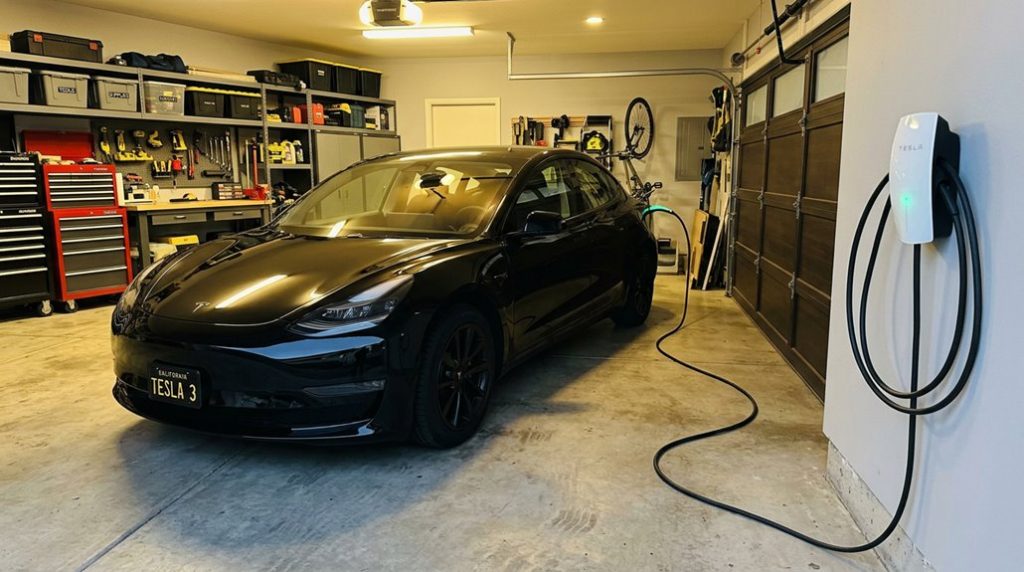
Vehicle readiness starts with knowing what your car can actually accept. A Wall Connector delivers up to 11.5 kW and 48 A, translating to roughly 44 miles of range per hour. A standard 120 V outlet? Two to three miles per hour—technically charging, but barely useful overnight.
Not all charging is equal—a Wall Connector delivers 44 miles per hour while a standard outlet barely manages three.
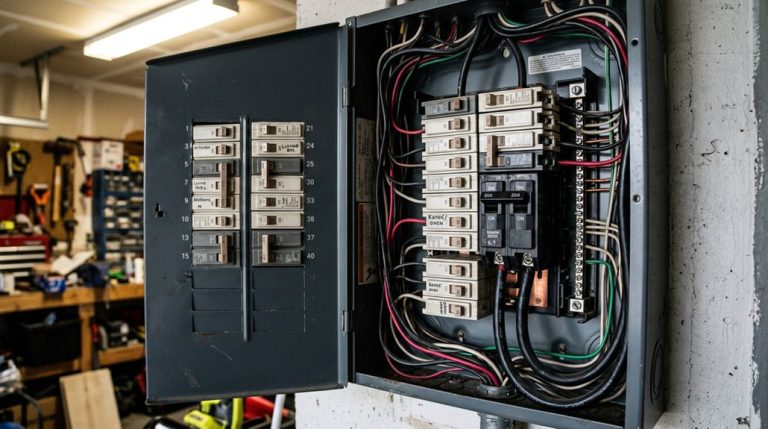
Breaker selection is equally critical. Tesla recommends matching your circuit breaker to your vehicle’s onboard charger capacity, which directly determines charging speed. Getting this wrong means leaving performance on the table.
You’ll also need Wi-Fi connectivity at the installation location, a registered Tesla account, and the Wall Connector’s QR code from the Quickstart Guide for commissioning.
Consult a certified installer before ordering equipment—ideally scheduling installation before vehicle delivery so you’re charging from day one. To protect long-term battery health, Tesla recommends setting your charge limit to 80%, as high state-of-charge voltages accelerate cell degradation over time. It’s also worth noting that all driver profiles in the Tesla app should have your home address added, as missing this step can cause home charging sessions to appear as “other” rather than recognized home charges.
A messy charging cable is easy to ignore—until it starts dragging, tangling, or wearing out faster than it should. If you’re already using the Tesla app to manage smart home charging, your setup should match that same level of ease. Keep your charging area clean with a Tesla Wall Connector cable organizer.
Add Your Wall Connector to the Tesla App
Hardware bolted to the wall means nothing until the Tesla app recognizes it—so registration is where your Wall Connector actually becomes useful. Open the app, tap the menu in the top-right corner, and select Add Product. From there, the app prompts you to scan the QR code from your Quickstart Guide (the small document included in the box). That code carries the unique credentials needed to pair the unit.
Next, the app asks you to join the Wall Connector’s dedicated Wi-Fi network. Press the charging handle button for roughly five seconds until a pulsing green light appears, then tap Connect or Join when prompted. The connector may push a firmware update automatically at this stage—let it finish.
Once your home Wi-Fi link is confirmed, mobile control becomes fully active, giving you real-time charging status, scheduled charging, and guest access management. Setting a scheduled departure time through the app allows the Wall Connector to align charging with off-peak electricity rates, which can reduce costs to as low as $0.13 per kWh. The whole process takes up to five minutes. Note that charging session tracking only begins after the mobile app setup has been fully completed.
Tesla app charging can schedule your sessions perfectly, but most owners still have no clear idea what each charge is actually costing them until the bill arrives. That’s where small blind spots start adding up over time. Track real charging costs in real time with a smart Wi-Fi energy monitoring plug.
Connect Your Wall Connector to Your Home Wi-Fi
With the QR code scanned and your Wall Connector registered in the Tesla app, the next step pulls everything together—connecting the unit to your home Wi-Fi network. This handoff completes registration and enables remote access, letting you monitor charging status directly through the app.
Here’s what happens: the app prompts you to join your home Wi-Fi, transferring that credential to the Wall Connector. The unit then drops its temporary broadcast network (TeslaWallConnector_XXXXXX) and connects to your router instead. Don’t switch to mobile data mid-process—that interrupts the handoff and forces a restart.
A few security considerations worth noting: the 12-digit setup password printed on your Quickstart Guide is case sensitive, so enter it exactly. Once connected, your Wall Connector appears as an active Tesla energy product in the app, with firmware updates delivered automatically. Unlike Supercharger stations, which use offboard DC rectification to deliver power directly to the battery pack, the Wall Connector supplies AC power that your vehicle’s onboard charger converts. The whole process typically wraps within five minutes. If you’ve misplaced your Quickstart Guide or the password is illegible, Tesla’s support page provides a backup QR code and password.
Enter Utility Rates and Set Your Home Charging Baseline
You’ll choose between a listed plan (Tesla already has your utility’s structure) or a custom tariff (you build it manually). Custom tariffs support time-of-use windows and seasonal pricing across up to three seasons—handy when your utility charges differently in summer versus winter. To further reduce costs, schedule charging to finish near your departure time so the battery isn’t sitting at a high state of charge longer than necessary, a practice that also helps reduce unnecessary battery stress.
| Field | Listed Plan | Custom Plan |
|---|---|---|
| Utility selection | App database | Manual entry |
| Time-of-use editing | Not required | Slider controls |
| Seasonal pricing | Pre-loaded | Up to 3 seasons |
| Weekend pricing | Auto-applied | Configurable |
| Save confirmation | Summary screen | Summary screen |
Pull your rates from your electric bill, review the summary, then tap Save. Your home charging cost baseline now reflects reality. The right tariff allows Powerwall to prioritise cheaper energy, reducing what you spend on electricity over time.
Schedule Home Charging for Off-Peak Hours in the Tesla App
This smart scheduling approach means plugging in won’t trigger immediate charging. Instead, your Tesla waits until the scheduled time, then starts automatically. That delay is the whole point — it’s basic grid integration working in your favor.
If your off-peak hours vary by weekday versus weekend, use the start time that applies most often. Tesla supports time-of-use rate structures, so once scheduled, Charge Stats can track your actual costs against those rates, confirming the schedule is providing real savings. The scheduling interface, like most vehicle settings, is delivered and updated through Tesla’s over-the-air updates, meaning new features or improvements can appear without any dealership visit or hardware change.
Fix Wall Connector Setup Errors in the Tesla App
When your Tesla Wall Connector setup stalls, the culprit is almost always one of three things: a bad QR code scan, a network handshake failure, or outdated firmware blocking registration.
Make sure you’re scanning the QR code from the original Quickstart Guide (not a photo of one), then confirm your home Wi‑Fi is a 2.4 GHz WPA2‑CCMP/AES network—not a captive portal, which actively blocks the pairing process.
If the app still won’t complete registration after five minutes, download the latest firmware from Tesla and push it manually through the Wall Connector’s local update page, accessed by connecting directly to its “TeslaWallConnector_XXXXXX” access point. Using a non-certified charger can create targeted warranty denial risk for charging-related components, so sticking with Tesla’s official Wall Connector hardware protects your coverage if a charging system fault is ever claimed.
QR Code Scanning Issues
Lost your guide? QR label recovery is still possible.
Power down the breaker, remove the Wall Connector from its base plate, and check inside the enclosure for the backup label.
Tesla’s diagnostic tool also works using your part and serial numbers.
Your vehicle’s VIN on the touchscreen can be cross-referenced through Controls to confirm configuration details that may assist in matching your Wall Connector setup to the correct regional charging specifications.
Network Connection Errors
For signal troubleshooting, work through these common blockers:
- Band mismatch – Temporarily disable 5 GHz on your router and retry connection
- Weak coverage – Move your router closer; the Wall Connector broadcasts its access point for only 15 minutes
- Router restrictions – Disable captive portals, guest network limits, firewall blocks, and MAC address filtering
Captive portal awareness matters here: those login-required networks (common in offices) fully prevent registration.
Home networks don’t typically use them, but double-check yours. Once your Wall Connector is successfully connected, configuration and monitoring are managed directly through the Tesla app account you created when placing your vehicle order.
Firmware Update Failures
Firmware update failures in the Tesla app aren’t always what they look like — sometimes the update itself isn’t the problem, but rather a breakdown earlier in the setup chain.
Missing QR code credentials from the Quickstart Guide can block commissioning entirely, meaning the firmware stage never actually starts.
Local interruptions — a dropped browser session, an unreachable access point — can abort uploads mid-process. If that happens, power cycle the Wall Connector (circuit breaker off, then on) and retry.
Phone proximity matters too: during Tesla One update flows, moving your phone away from the Wall Connector disconnects the download immediately. Stay close until it finishes.
Also, WPA3 Wi-Fi encryption isn’t supported, so check your router settings if connectivity stalls after the update completes.
Tesla’s over-the-air software updates are designed to improve vehicle functionality post-purchase, but this same delivery mechanism means any disruption to the wireless connection during a firmware push can leave the process in an incomplete state that requires a full restart.
Frequently Asked Questions
Can Multiple Users Share Access to One Wall Connector Through the App?
Multiple accounts can’t share admin control of one Wall Connector, and Tesla doesn’t offer guest passes. Instead, you authorize each vehicle by VIN in the Tesla One app’s access settings.
Which Wall Connector Access Control Settings Require Tesla One Instead of the App?
You’ll need Tesla One for initial Access Control configuration, physical keycard pairing, breaker ratings, and maintenance scheduling setup. The Tesla app only manages these settings after commissioning’s complete.
How Many Tesla Vehicles Can Be Authorized Under Authorized Teslas Only Mode?
“The more, the merrier!” You can authorize up to 10 Tesla vehicles under Authorized Teslas Only mode. Authorization limits cap the maximum count at 10 vehicles, each identified by VIN, through your Tesla app’s access-control settings.
Can the Tesla App Integrate Wall Connector Charging With Home Solar Panels?
You can’t fully integrate Wall Connector charging with home solar panels through the app alone. For effective solar management and grid interaction, you’ll need a Powerwall paired with your vehicle and Tesla account.
What Does Compatibility Mode on the Gen 3 Wall Connector Actually Do?
Think of it as a safety net—Compatibility Mode switches your Gen 3 Wall Connector to a legacy protocol, providing reduced current to resolve handshake faults between your charger and older EV software versions.