Your Tesla Wall Connector is mounted, wired, and completely useless without a Wi-Fi connection. Most owners assume the hardest part is the installation — it isn’t. The real frustration starts when you’re staring at a QR code, a temporary network prompt, and credential fields that reject perfectly valid passwords. Scheduling, real-time monitoring, and remote diagnostics are all sitting behind a setup process that stumps even seasoned installers. Getting it right comes down to a few critical details most guides skip entirely.
Which Wall Connectors Actually Work With the Tesla App
Not every Tesla wall charger plays nicely with the Tesla app — and that distinction matters before you mount anything to your garage wall.
The units that actually qualify are Wi-Fi-enabled models that support QR-code-based registration: specifically, the Gen 3 Wall Connector and the Universal Wall Connector.
Both belong to Tesla’s current Wall Connector family and share the same app registration workflow. You scan the QR code from the Quickstart Guide, join the charger’s temporary Wi-Fi network, then connect it to your home network. After that, it appears in the Tesla app for scheduling, control, and data access.
Legacy compatibility is practically nonexistent here. Older Wall Connector generations without Wi-Fi registration don’t appear anywhere in Tesla’s app setup flow — no QR code, no commissioning path, no app access.
Third-party integration does exist (the app *Wall Monitor for Tesla* supports Gen 3 and Universal models), but that’s a workaround, not an official Tesla feature. Once connected, the app also lets you view charging data and receive firmware updates automatically for your wall connector. Both the Gen 3 and Universal Wall Connector use the NACS connector standard, which unifies home, Destination, and Supercharger charging under a single plug design.
What You Need Before Starting Wall Connector Setup
Before you touch the app, make sure you’ve got three things locked in: an active Tesla account (or Tesla Partner Portal account if you’re a pro installer), the QR code from the Wall Connector’s Quick Start Guide, and a working home Wi-Fi network that the unit can actually join during commissioning.
Your phone needs local network or location permissions enabled so the app can detect the Wall Connector, and you’ll want to be physically near the unit since your phone has to join its Wi-Fi network mid-setup. The Wall Connector’s serial number is also required during commissioning and is found on the product label inside the front cover.
Registration can run up to five minutes, so don’t close the app, wander off, or assume the silence means something broke. Once setup is complete, the Wall Connector’s Wi-Fi connection enables smart charging schedules that let you automatically charge during off-peak hours and finish near your departure time.
A Tesla that charges overnight without any real visibility can leave you guessing—whether it actually started, how much it added, or if something interrupted the session. That uncertainty is exactly why many owners rely on a Tesla Wall Connector, giving them a stable home charging setup that connects cleanly with app-based control so every session is tracked, managed, and ready before the next drive.
Tesla App Account
Setting up your Tesla Wall Connector starts with one non-negotiable prerequisite: a Tesla app account. Without one, the registration process simply won’t move forward. If you already own a Tesla vehicle or energy product, sign in using your existing credentials — your account carries over seamlessly. No Tesla product yet? Download the Tesla app and create an account first. During setup, enable multi factor authentication to strengthen your account privacy against unauthorized access (a smart habit regardless).
Once your account is active, the app becomes your control center for scheduling, monitoring, and managing your Wall Connector long after installation. This applies whether you’re charging a Tesla or another EV. One account, one app, full access — exactly the kind of straightforward framework that makes setup manageable rather than miserable. The app also consolidates multiple Tesla devices — including your vehicle, Powerwall, and solar inverter — for centralized management in one place. Tesla’s vehicle software delivers over-the-air firmware updates through the same connected infrastructure, meaning your car’s features and charging behavior can be refined automatically without visiting a service center.
QR Code Access
The Quick Start Guide that ships inside your Wall Connector’s packaging isn’t just filler — it carries the QR code that kicks off the entire setup process. Scan it with your smartphone camera before touching anything else. That label holds the QR credentials tied specifically to your unit, releasing the configuration flow for Power Management, Wi-Fi connection, and circuit breaker settings.
Before scanning, confirm three things: the Wall Connector is powered on, the Tesla Pros app is installed and updated to version 10.8 or greater, and installer permissions are enabled (Local Network on iPhone, Location on Android). Without those permissions, the app simply won’t detect your charger’s local network. Miss any one of these prerequisites, and setup stalls before it even starts. Once connected, the app also enables scheduling, firmware updates, and usage monitoring that basic charging without Wi-Fi cannot support — features that make the most of Wall Connector ownership. Much like Tesla’s vehicles, which receive over-the-air software updates that improve functionality after purchase, the Wall Connector can also be updated remotely once it is connected to your home network.
Home Wi-Fi Ready
Getting your Wall Connector onto a stable home Wi-Fi network isn’t optional — it’s the backbone of every app-driven feature you’ll use after installation. Scheduled charging, charging history, and remote troubleshooting all depend on a live connection.
Before your installer arrives, do a quick signal mapping exercise: stand at your intended mounting location and check your phone’s signal strength. Weak bars there mean your Wall Connector will struggle too.
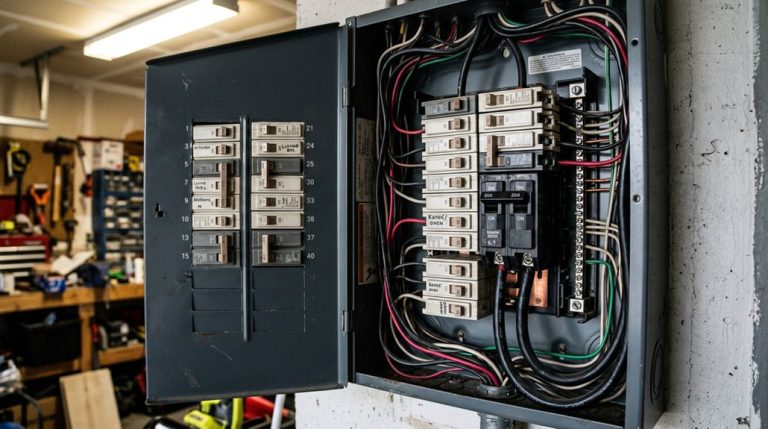
Router placement matters more than most owners realize. If your panel sits in a detached garage or a far corner of the home, your router may not reach comfortably. Consider a Wi-Fi extender beforehand.
The charger needs solid network access to complete commissioning through the Tesla One app — a dropped connection mid-setup creates unnecessary headaches. Unlike Superchargers, which use offboard AC-to-DC rectification to handle high-power conversion at the station level, your Wall Connector relies on the vehicle’s onboard AC charger, making the app connection your primary tool for managing and optimizing home charging sessions.
How to Find and Scan Your Wall Connector QR Code
Your Wall Connector‘s QR code lives in the Quick Start Guide that shipped with the unit—not on the outside of the charger itself, which trips up more owners than you’d expect.
Open the Tesla app, navigate to your profile, select Add/Remove Product, choose Wall Connector, and the app will immediately prompt you to scan that code using your phone’s camera.
If the guide is lost or the code is damaged beyond recognition, remove the Wall Connector from its base plate by backing out the mounting screws, because Tesla prints a backup QR code and Wi-Fi credentials (typically a network named TeslaWallConnector_ followed by a unique identifier) on the inside of the unit. Using a non-certified charger on your Tesla can create targeted warranty denial risk for related charging components, so verifying that your Wall Connector is a genuine Tesla product before completing setup is worth the extra moment.
Locating Your QR Code
Pairing your Tesla Wall Connector to the app starts with a single printed label — the QR code — and knowing exactly where to find it saves you the frustration of hunting around a freshly installed unit.
Your first stop is the Quick Start Guide included in the Wall Connector package. That guide’s front face carries the QR label Tesla’s app expects during initial pairing.
If that guide has wandered off (it happens), interior access to the unit itself provides a backup label. You’ll need to remove the top and bottom screws, then gently pull the connector off its base plate to expose the internal label.
Either source works — the guide is simply faster since the unit stays on the wall. Once connected, the same app also serves as your delivery and ownership hub, where you can manage everything from scheduling pickups to handling over-the-air software updates that resolve many issues without a service visit.
Manual Entry Options
When the Quick Start Guide isn’t in arm’s reach, Tesla’s commissioning flow doesn’t stall — it pivots to manual entry instead. You’ll supply the local credentials directly, bypassing the QR shortcut entirely without losing any configuration capability.
Manual commissioning requires two specific inputs:
- SSID — the Wall Connector’s unique commissioning network name
- WPA2 password — the network’s corresponding security key
- Browser interface access — connect via the Wall Connector’s own Wi-Fi, then configure through your browser
- Commissioning settings — set breaker rating, output amperage, and Power Management post-connection
These credentials belong to the Wall Connector’s local network, not your home Wi-Fi.
Once connected, every configuration option available through QR scanning remains fully accessible — same destination, slightly longer road. A properly commissioned Wall Connector can deliver up to 44 miles per hour of range restoration, making accurate breaker and amperage configuration during this step especially important for maximizing overnight charging performance.
How to Connect Your Wall Connector to Home Wi-Fi
Connecting your Tesla Wall Connector to home Wi-Fi starts with one non-negotiable prerequisite: the Tesla app. Once you’ve joined the Wall Connector’s temporary broadcast network, the app shifts you directly into home Wi-Fi configuration—no detours, no guesswork.
Select your home network carefully. The Wall Connector only supports 2.4 GHz bands running WPA2 or WPA3 security protocols on 802.11 infrastructure mode. Open networks won’t work—full stop. Enter your password accurately, because an incorrect entry is the single most common reason setup stalls here.
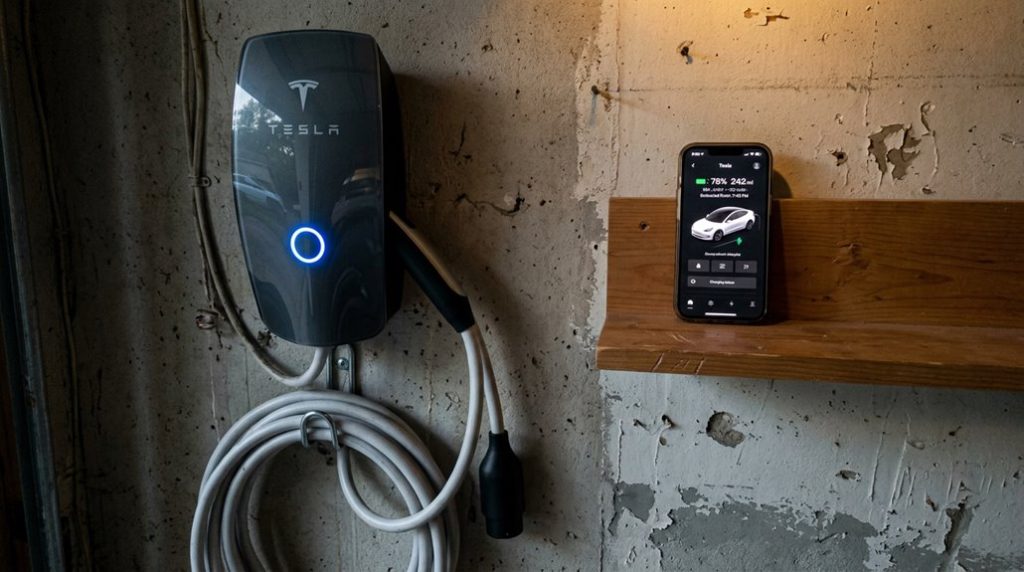
After successful connection, your Wall Connector appears inside the app, revealing real-time charging status and access to device firmware updates (which you’ll actually want, since updates improve performance over time). Your phone’s local network permissions must also be enabled, or the app may lose visibility during commissioning. Grant those permissions before you start, not after frustration sets in. Much like Tesla’s vehicle systems, the Wall Connector benefits from collective cloud data that Tesla continuously refines to improve device performance and reliability over time.
A home charging setup feels complete until you’re caught without the right connection at a friend’s place, a rental, or even a garage outlet that doesn’t match your usual routine. That’s where many Tesla owners quietly keep a Tesla Mobile Connector on hand, giving them a reliable backup way to charge wherever a standard outlet is available—so a missed charging plan never turns into a disrupted day.
How to Schedule Charging and Monitor Status in the Tesla App
Once your Wall Connector is registered and pulling data through your home Wi‑Fi, the Tesla app becomes your scheduling and monitoring command center—and it’s genuinely more capable than most owners realize.
Scheduling works by defining exactly when your vehicle charges:
- Open the app, select Schedule, then choose your current or saved location (home, work, wherever the car sleeps).
- Set your preferred charging window for off-peak optimization—nights and weekends typically carry lower utility rates.
- Save multiple schedules for different locations, toggling each on or off as your routine shifts.
- Use remote monitoring to track real-time charging status, session history, and Wall Connector diagnostics without walking to the garage.
Note that vehicle-level schedules live in the car itself, while the app handles charger-level control separately.
Preconditioning (cabin and battery prep before departure) is also distinct from scheduling—don’t conflate the two.
EU owners should also be aware that their vehicles support three-phase AC charging at up to 11 kW via Type 2/CCS2, which can significantly affect how charging windows and session durations are calculated compared to North American single-phase setups.
What Changes Once Your Wall Connector Is on Home Wi-Fi
Scheduling and monitoring are only as useful as the data feeding them—and that data pipeline opens the moment your Wall Connector lands on your home Wi-Fi network. Before Wi-Fi, your charger exists in isolation. After it, everything shifts.
| Feature | Before Wi-Fi | After Wi-Fi |
|---|---|---|
| App visibility | Not listed | Device appears in Tesla app |
| Software updates | Manual only | Delivered automatically |
| Charging data | Unavailable | Real-time status and history |
You’ll gain real-time charging status, firmware updates delivered automatically, and consolidated visibility alongside other Tesla energy products. Your Wall Connector also retains local privacy—its web-based interface remains accessible at its local address for offline diagnostics without routing data externally. That’s useful when your network misbehaves but your charger doesn’t. Registration itself takes up to five minutes, after which the Wall Connector appears in your app, fully operational and ready to report.
How to Fix Common Wall Connector Registration Errors
Even with a flawless installation, the Wall Connector registration process has a handful of failure modes that can stop setup cold—and most of them trace back to one of three culprits: a stalled app flow, a Wi-Fi handshake problem, or a missing Quick Start Guide.
Even a perfect Wall Connector installation can still hit registration walls—usually from app glitches, Wi-Fi issues, or missing documentation.
Here’s how to address each systematically:
- Stalled “Registering Device” screen: Wait a few minutes, then retry. A delayed retry—sometimes days later—has cleared app-side glitches for some users.
- Wi-Fi dropout during setup: Force your phone to stay on the Wall Connector’s network and select “always connect” when prompted.
- Wrong password entry: The twelve-digit WPA2 password is case-sensitive—mistyping it blocks the `http://192.168.92.1` interface entirely.
- Persistent failures: Use the app’s Diagnose button as your first diagnostic indicator, then power-cycle the breaker as a core reset procedure before re-uploading firmware.
Frequently Asked Questions
Can Multiple Tesla Accounts Share Access to One Wall Connector?
Tesla doesn’t officially support Account Linking for Shared Access between multiple accounts—you’d authorize specific VINs instead. Add up to 10 vehicles under “Authorized Teslas Only” in the Tesla One app, bypassing account drama entirely.
Does the Wall Connector Still Charge Without an Active Wi-Fi Connection?
Yes, your Wall Connector supports offline charging without active Wi-Fi. You’ll lose smart features, but local control guarantees power still flows to your Tesla the moment you plug in.
Will Registering a Wall Connector Void Its Existing Installation Warranty?
Absolutely nothing about registration voids your warranty — it’s the world’s most straightforward setup step. Registration impact is minimal; warranty transfer depends on installation quality, not app onboarding.
Can a Wall Connector Be Transferred to a New Homeowner After Moving?
Yes, you can transfer a Wall Connector to a new homeowner after moving. Like title documentation in ownership transfer, you’ll need the QR code, SSID, and WPA2 password to re-register it under the new Tesla account.
How Many Wall Connectors Can One Tesla Account Support Simultaneously?
Like Pandora’s box, Tesla hasn’t set a defined ceiling — account limits on maximum chargers aren’t published. Your practical constraints come from electrical load-sharing, capping you at four Wall Connectors per shared circuit.