Most Tesla owners don’t realize their pristine paint job is already living on borrowed time. Highway debris tears through that glossy clear coat faster than you’d expect—and over 60% of owners see chips within the first year. The scarier part? Grabbing the wrong touch-up kit can leave your Midnight Silver or Pearl White Multi-Coat looking worse than before you started. Not every kit on the market deserves a place near your Tesla.
Tesla’s OEM Kit vs. Dr. ColorChip: Which One Actually Wins?
When you crack open Tesla’s official touch-up kit and a bottle of Dr. ColorChip side by side, the brand equivalence becomes immediately obvious. Multiple owners and reviewers have confirmed what forum threads have whispered for years: Tesla’s kit appears to be a private-labeled version of Dr. ColorChip’s system. Same core method, same blending solution logic, same targeted use case (rock chips and minor paint defects, not panel resprays).
The repair economics here are straightforward. Tesla’s version benefits from OEM convenience—vehicle-specific ordering tied directly to your paint code. Dr. ColorChip wins on aftermarket credibility and broader brand history across multiple vehicle platforms. When comparing costs, a touch-up kit typically runs well under $50, a fraction of what a service center repair would cost for more extensive paint damage.
Neither kit delivers invisible repairs. Both reduce chip visibility dramatically when applied correctly, with final results depending on chip size and blending technique. Your actual choice comes down to where you prefer to shop, not which product outperforms the other. The Dr. ColorChip kit includes paint, a blending sealer, and a brush, with multiple coats recommended for deeper chips to achieve the most complete coverage.
Even small chips on a Tesla can stand out more than you expect, especially under direct sunlight where metallic and multi-coat finishes reveal every imperfection. Left untreated, those spots can also start to expose the underlying surface over time. A Tesla OEM-compatible touch up paint pen kit lets you correct paint chips with a close factory match, helping maintain a cleaner finish and preventing minor damage from becoming a longer-term cosmetic issue.
Why Pearl White Owners Can’t Use the Standard Tesla Touch-Up Kit
If you drive a Tesla in Pearl White Multi-Coat (paint code PPSW), the standard touch-up kit isn’t your solution—it’s your problem waiting to happen. Pearl White’s factory finish relies on multi layering—color, pearl, and clear coat stacked deliberately—to achieve that characteristic pearl depth. A single-stage touch-up can’t replicate that construction.
| Factor | Standard Kit | Pearl White Requirement |
|---|---|---|
| Finish System | Single-stage | Multi-coat layered |
| Pearl Depth | Not replicated | Requires pearl mid-coat |
| Repair Visibility | Higher in sunlight | Needs blending solution |
The result? Your repaired chip looks flatter and duller than the surrounding panel, especially when exposed to direct light. Tesla’s OEM Pearl White kit (PPSW-specific) improves color accuracy, but it still won’t fully recreate factory multi layering. For minor chips, it’s acceptable. For anything larger, you’re better off consulting a professional body shop that comprehends multi-coat refinishing. Dedicated PPSW-specific kits like the Paint2Fix option are formulated to be UV and weather resistant, helping repaired areas hold up against fading and cracking over time. It’s also worth noting that Tesla builds its vehicles on a shared hardware platform, meaning paint and trim specifications remain consistent across trim levels of the same model, so color-matching by trim level alone won’t account for finish-layer differences.
How to Match Your Tesla Touch-Up Paint Code Before You Buy
Ordering touch-up paint by color name alone is how you end up with a bottle that’s close—but not close enough. Tesla uses four-character paint codes for precise paint code verification, and you’ll find yours on the driver door jamb sticker. Look for the “PNT:” prefix—the actual code follows it. “PNT: PBSB,” for example, means Jet Black. That prefix isn’t part of the code you’re ordering.
Common codes include PPSW (White), PMNG (Midnight Silver Metallic), PPSB (Deep Blue Metallic), and PMMR (Red Multi-Coat). Write yours down exactly—one wrong letter produces the wrong formula.
If the label is faded or damaged, a VIN check solves the problem quickly. Tesla dealers and most touch-up paint suppliers can pull the color record directly from your VIN. Your VIN is also accessible through the touchscreen’s Controls menu, giving you a reliable cross-reference if your door jamb sticker is unreadable. Before ordering, use the included test card to verify the color match against your vehicle’s actual finish. Following these ordering tips keeps you from buying twice—which, given touch-up kit prices, is worth the extra two minutes.
What the Tesla Touch-Up Kit Includes and What It Doesn’t
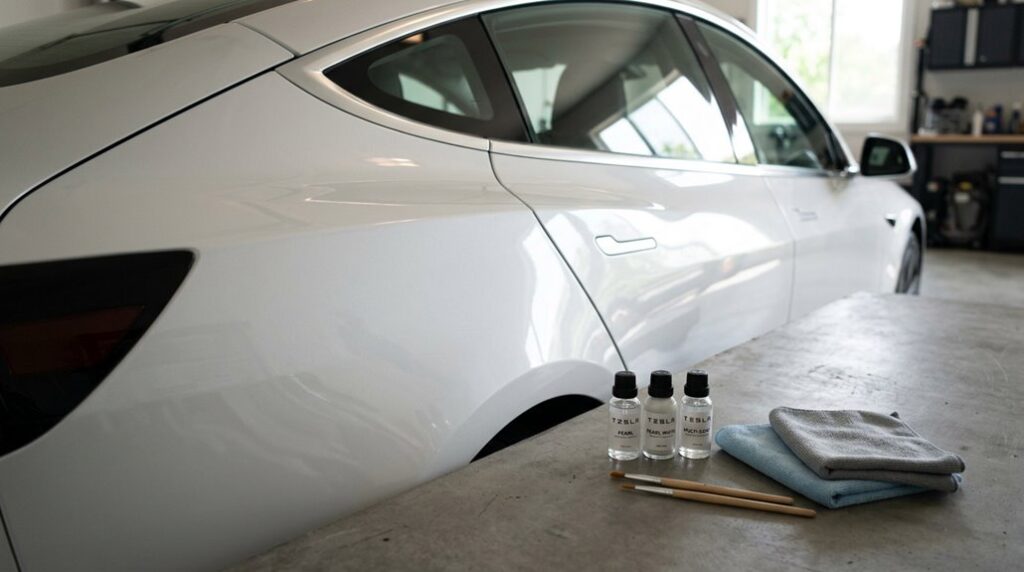
Tesla’s OEM touch-up kit ships with a 0.5 oz paint bottle, a 1 oz blending solution, a squeegee, a micro brush, an ultra brush, a wiping cloth, and a microfiber towel — everything sized for spot repairs, not panel repaints.
The color you ordered is already matched to your VIN’s factory code, so compatibility isn’t a gamble as long as you bought the right kit for your specific exterior (Pearl White Multi-Coat and Midnight Silver Metallic aren’t interchangeable, and Tesla will remind you of that the hard way).
Where this kit genuinely earns its keep is in a repeatable layering process: thin coats applied with the micro brush, blended at the edges with the blending solution, and built up gradually until the repaired chip levels out with the surrounding clear coat. The paint bottle contains a mixing ball inside that requires thorough shaking before use to ensure the color is properly blended before application. Keeping detailed records of any touch-up work performed can support your vehicle’s documented maintenance history, which Tesla’s service records attach directly to the VIN and can aid resale value.
What’s Inside the Kit
Cracking open a Tesla touch-up paint kit for the first time can feel either reassuring or underwhelming depending on what you were expecting.
The Tesla Shop’s official kit includes 0.5 oz of OEM-matched base paint, 1 oz of blending solution, a squeegee, micro brush, ultra brush, wiping cloth, and microfiber towel — solid fundamentals for precise application tips on small chips and scratches.
Packaging variations across sellers matter more than you’d think. Tesla-Protect offers 50 ml each of base paint and clear coat, while PAINT2FIX bundles up to nine micro brushes, gloves, wax, and specialty Polytex cloth.
What none of them include: sanding blocks, body filler, or spray equipment. These kits handle chips and minor scratches competently, not collision damage.
When choosing a color for touch-up work, it’s worth noting that white resists UV fading longer than other paint options, which can make color-matching easier to maintain over time.
Compatibility and Color Matching
When you order a Tesla touch-up paint kit, you’re not buying a universal fix-all — you’re buying a color-specific, OEM-matched solution built for one job: filling small chips and surface scratches on factory-painted exterior body panels. Select the wrong color code, and paint accuracy drops immediately. Tesla sells kits by exact factory color, so Pearl White Multi-Coat isn’t interchangeable with Solid Black — full stop.
Environmental effects complicate things further. Painted panels age under UV exposure, temperature cycling, and oxidation, meaning your three-year-old Midnight Silver door may read slightly different from fresh factory paint. The kit won’t fix non-factory wraps, repainted panels, rust, dents, or clear-coat dulling without underlying color damage. It handles chips. That’s its lane — and it stays in it. It’s also worth noting that Tesla’s continuous over-the-air updates have never extended to paint — the physical exterior remains one area where owners must manage maintenance entirely on their own.
Repeatable Layering Process
The Tesla Paint Repair Kit ships with exactly what you need to handle a chip — and precisely nothing more. The layer sequencing is straightforward: shake the OEM paint, apply it, let it settle, then run the blending solution over the repair. Curing times matter here — rushing this sequence produces visible edges. Tesla’s expansive network relies on NACS connector standard to unify charging across Supercharger, Destination, and home setups under a single plug design, a level of hardware consistency that underscores the brand’s attention to integrated system engineering.
| Component | Purpose | Included |
|---|---|---|
| OEM Paint Bottle (0.5 oz) | Color fill layer | ✅ Yes |
| Blending Solution (1 oz) | Smoothing layer | ✅ Yes |
| Primer | Base adhesion layer | ❌ No |
| Clearcoat | Protective top layer | ❌ No |
The kit handles surface chips cleanly. Deeper damage reaching bare metal requires primer and clearcoat — tools you’ll source separately.
How to Apply Tesla Touch-Up Paint Without Leaving Marks
Applying Tesla touch-up paint cleanly comes down to controlling three variables: surface condition, layer thickness, and tool precision.
Start with thorough surface cleaning — wash the chip with soap and water, dry it completely, then wipe it with rubbing alcohol to strip wax and oily residue. Contamination underneath paint causes bubbling and flaking, so don’t skip this step.
Clean the surface first — soap, water, alcohol — or contamination will ruin everything underneath.
Temperature control matters more than most owners expect. Work on a surface below 85°F, and bring your touch-up pen to room temperature before opening it. Cold paint flows poorly; hot surfaces accelerate drying before the coat levels properly.
Use a micro-brush or fine-tip applicator and dab — don’t drag — paint directly into the defect. Apply thin coats, waiting 5–15 minutes between each layer. After the final coat sets (just dry to the touch), lightly blend the edges with a microfiber towel to eliminate visible shift lines.
Before starting any paint work, confirm your vehicle’s tire pressure and exterior condition using the vehicle condition monitoring display, which provides real-time diagnostics without requiring external tools.
Tesla paint finishes are unforgiving—what starts as a small chip can quickly become a noticeable blemish. Without proper sealing and blending, even minor damage can stand out more than expected. An automotive paint repair kit with clear coat and precision applicators helps smooth out imperfections and blend repairs into the surrounding finish, keeping the surface consistent and protecting exposed areas from further wear.
How to Get a Clean Finish With Tesla Touch-Up Paint
Getting a clean finish with Tesla touch-up paint isn’t just about filling the chip — it’s about controlling every step that follows the fill. Surface prep sets the foundation. Wax, road film, or dust left on the surrounding area will cause uneven blending and visible contamination marks. Wipe the area clean with a degreaser before you do anything else.
Once the paint cures (give it at least 24 hours), your polishing technique determines whether the repair disappears or announces itself. Apply rubbing compound in small, circular passes to level any raised edges around the chip perimeter. Follow with a polish bar or finishing product to restore gloss consistency between the repaired spot and the surrounding factory clear coat.
Metallic finishes like Midnight Silver Metallic demand tighter blending precision because color-depth mismatches show faster. Finish with a clean, lint-free microfiber wipe to pull residue without reintroducing contamination. Tesla’s software-first design philosophy, which pushes over-the-air firmware updates to vehicles without requiring hardware retooling, does not extend to paint corrections, meaning any chip or scratch repair remains a fully manual process with no digital shortcut.
Frequently Asked Questions
Can Tesla Touch-Up Paint Kits Be Used on Wrapped Vehicles?
Like painting over wallpaper, it won’t stick right. You shouldn’t use Tesla touch-up paint kits on wrapped vehicles — wrap compatibility doesn’t exist here, and adhesive residue creates bonding failures that permanently damage your film.
How Long Does Tesla Touch-Up Paint Typically Last Before Fading?
There’s no fixed timeline for color longevity, but you can expect UV resistance to weaken faster with heavy sun exposure. Proper prep, waxing, and shaded parking materially slow fading on your touch-up repairs.
Does Temperature or Humidity Affect Tesla Touch-Up Paint Application Results?
Yes, both temperature and humidity directly affect your application conditions and overall results. Environmental effects like heat, cold, or moisture can interrupt drying, weaken adhesion, and leave visible repair edges, so you’ll want stable, dry conditions.
Can Touch-Up Paint Fix Scratches That Have Reached the Primer Layer?
Yes, touch-up paint can address primer repair, but you’ll need thin, layered coats for proper paint bonding. Clean the area first, and expect visible edges since the surrounding clear coat is missing.
Is Tesla Touch-Up Paint Safe to Use Near Trim and Rubber Seals?
Tesla touch-up paint isn’t ideal for trim safety or seal compatibility. You’ll want to mask rubber seals and surrounding trim carefully before applying, since paint and blending solution can permanently stain or damage those surfaces.