Most homeowners assume pulling a Tesla charger permit is straightforward administrative busywork. It isn’t. Behind that paperwork sits a web of electrical requirements—panel capacity, breaker sizing, wire gauge—where one miscalculation means a failed inspection or a genuine fire risk. The margin for error is razor-thin, and inspectors know exactly where to look. Before you schedule that permit appointment or touch a single wire, there are critical details about this process that could save you from an expensive, dangerous mistake.
Does Your Panel Support a 48-Amp EV Charger Circuit?
Before pulling a permit or ordering a single foot of conduit, you need to know whether your existing electrical panel can actually handle a 48-amp Level 2 charger—because the answer isn’t as simple as checking the number stamped on your breaker box. Panel capacity matters, but it’s only half the story.
Here’s the math: NEC 625.41 classifies EV charging as a continuous load, meaning your circuit must be sized at 125% of the charger’s draw. A 48-amp charger thus demands a dedicated 60-amp circuit (48 × 1.25 = 60). Wire sizing follows accordingly—typically 6 AWG copper minimum, or 4 AWG for runs exceeding 50 feet.
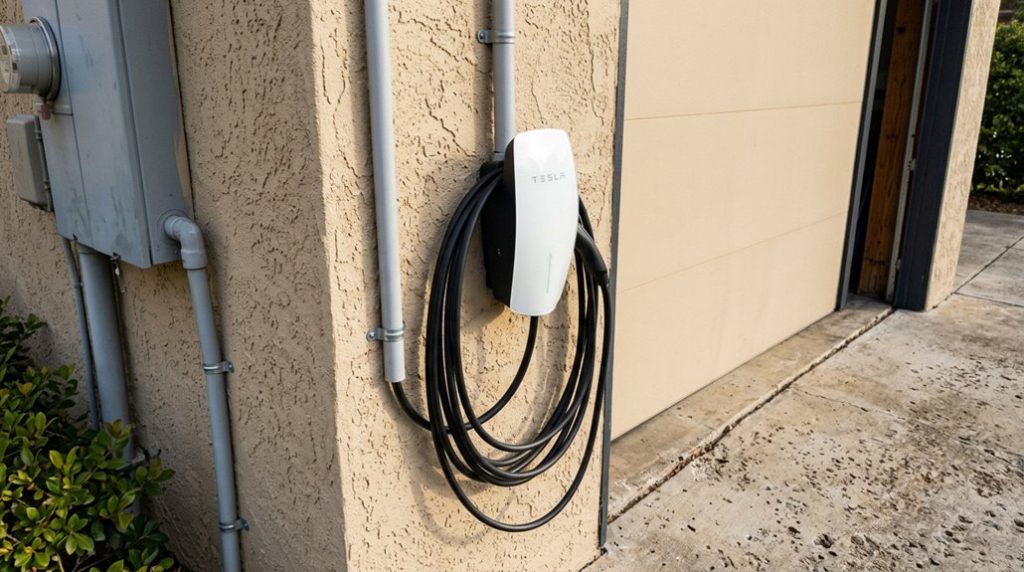
A 200-amp panel can usually absorb that addition comfortably. A 100-amp panel? Much tighter. The real deciding factor isn’t the panel’s rating—it’s your total household load calculation, which an electrician must complete before installation begins. For homeowners navigating borderline capacity situations, smart load management devices can dynamically reduce EV charging current to prevent overloading the panel without requiring a full service upgrade. Tesla’s Wall Connector is designed specifically for Level 2 home charging, delivering roughly 14–44 miles of range per hour depending on your vehicle’s trim and the circuit amperage available.
HOA Approvals and Utility Upgrades Before You Apply
Once your panel math checks out, the electrical work still can’t start yet—because your HOA might’ve something to say about it first. Most HOAs treat charger installations as design requests, not just electrical ones, so you’ll need written approval before scheduling any work.
Start HOA negotiation early by submitting documentation that includes your installer’s credentials, equipment specs, and a conduit routing plan. Aesthetics matter to review boards.
Simultaneously, handle utility coordination before you apply for permits. A 48-amp Tesla Wall Connector circuit draws roughly 11.5 kW continuously, and your utility needs to confirm your service entrance can handle that load without triggering a transformer upgrade. The Wall Connector should be installed on a dedicated 60-amp circuit with 6-gauge wiring and proper grounding checks confirmed by a licensed electrician.
If your state has right-to-charge protections (California Civil Code 4745 is a strong example), HOAs can impose reasonable restrictions but can’t block installation outright. Knowing your rights before negotiation keeps the process moving faster and with less friction. As of 2026, 15+ states have enacted right-to-charge laws that explicitly limit HOA authority over EV charger installations.
What Your EV Charger Permit Application Actually Needs
Pulling together a permit application sounds straightforward until you’re staring at a checklist that spans electrical schematics, site plans, and manufacturer data sheets—all before anyone touches a wire.
A permit application looks simple—until the checklist hits you like a wall of schematics and data sheets.
Most jurisdictions want specific charger documentation upfront: the Tesla Wall Connector‘s amperage rating (typically 48A), your panel schedule showing available breaker capacity, and load calculations confirming your service can handle the added demand without tripping into chaos.
You’ll also need a site plan sketching the charger’s location relative to your panel, plus the Wall Connector’s manufacturer data sheet verifying its UL listing and outdoor rating if applicable.
Some departments require fault current calculations too—not just a vague “it’ll probably be fine.”
Inspection timing matters more than people realize. Submit everything complete the first time, because incomplete applications reset your timeline.
Once approved, schedule your rough-in and final inspections strategically so your installer’s schedule aligns with the inspector’s availability. Gaps here cost real days. Keeping professional installation records and receipts from your permitted work also supports any future warranty claims if Tesla ever evaluates your vehicle’s charging system.
Residential permit fees for a Level 2 charger commonly range from $50 to $300, so budgeting for this cost before you begin keeps the project on track.
What Goes on Your Electrical Single-Line Diagram
The single-line diagram is where permit reviewers actually verify that your installation makes electrical sense—so if yours is vague or incomplete, expect a rejection before anyone gets near your panel.
Label your service voltage (typically 240 V single-phase for North American residential) and note your main panel’s ampere rating. Reviewers want to see exactly how power flows from source to Wall Connector.
Mark your dedicated two-pole breaker—commonly 60 A feeding a 48 A continuous load setting—and show the conductor path clearly. List copper conductor size, wire type (THHN/THWN in conduit works well here), and approximate run length, since voltage drop influences conductor selection.
Include the equipment grounding conductor and trace it back to the panel’s ground bar termination; Tesla’s installation guidance treats proper grounding as non-negotiable. Depict the Wall Connector as a continuous load (multiply your breaker rating by 1.25 when calculating). Specific numbers beat vague labels every time.
For runs exceeding 100 feet, consult the NEC to account for voltage drop, which may require you to upsize from 8 AWG to 6 AWG to maintain safe and efficient current delivery to the Wall Connector. Unlike Tesla’s Supercharger network, which uses offboard DC rectification to handle high-power conversion at the station level, your home Wall Connector relies entirely on the vehicle’s onboard AC charger, making proper conductor sizing at the residential circuit even more critical to safe operation.
Your Pre-Closeout Inspection and Permit Closeout Checklist
After your Wall Connector is physically mounted and wired, you’ll need to request a final inspection before the jurisdiction closes out your permit—scheduling it beforehand wastes everyone’s time and may trigger a failed inspection by default.
Most jurisdictions accept requests with as little as 24 hours’ notice, though staff capacity varies.
During inspection, the inspector verifies that your installed charger matches approved plans: conductor sizing, conduit routing, breaker rating, and panel connections all get scrutinized.
Clearances around your panel and Wall Connector must remain accessible—cramped equipment fails quickly.
For documentation retention, keep permit applications, load calculations, panel schedules, charger specs, and electrician credentials for at least five years.
Also preserve quarterly performance records (session times, energy delivered, uptime).
Inspectors occasionally request these post-closeout.
A properly installed Wall Connector on a dedicated 60A breaker can deliver up to 44 miles per hour of range restoration, making verified wiring documentation especially relevant if you later need to demonstrate system capacity to an insurer or future buyer.
Your pre-closeout checklist, simplified:
- Charger matches approved specs
- Circuit wiring matches single-line diagram
- Breaker sizing correct
- Clearances maintained
- All paperwork filed and retained
Frequently Asked Questions
Which Local Agency Actually Handles EV Charger Permit Applications for Residential Properties?
Your local building department handles EV charger permit applications—not your utility provider. If you’re in an incorporated city, contact the city’s building division. In unincorporated areas, you’ll work with the county building and safety office.
Can I Submit My Tesla Charger Permit Application Entirely Online?
You might hit a digital highway or a dead end—it depends on your jurisdiction. You can often complete online submission with digital signatures, but some cities, like Anaheim, still require in-person filing.
How Long Does the Permit Review Process Typically Take to Complete?
You’ll typically see permit review and inspection windows completed in 1–2 weeks, but typical timelines vary widely by jurisdiction—some fast areas approve in days, while others take months.
What Fees Should I Expect to Pay When Applying for a Charger Permit?
While fees vary by location, you’ll typically pay $150–$300 in permit fees for a basic home charger installation. Inspection costs are usually included, but plan reviews or panel upgrades can push your total higher.
Will an Unpermitted Tesla Wall Connector Installation Affect My Future Home Sale?
Yes, an unpermitted Tesla Wall Connector creates real resale liability. You’ll likely face disclosure obligations during the sale, which can delay closing, trigger renegotiations, or force costly rework before buyers and lenders approve the transaction.