Most Tesla Model 3 owners upgrade their audio and immediately regret it — not because the sound disappointed them, but because one wrong move can disable their airbag system entirely. Before touching a single wire, you need to know whether your car runs nine speakers or seventeen, because every tool, part, and decision branches from that one answer. Get this sequence right, and you’ll have premium sound without a single warning light.
Identify Your Model 3’s Base or Premium Audio System First
Before committing to any audio upgrade, you’ll need to confirm exactly which system Tesla installed in your Model 3, because the hardware differs meaningfully by trim and model year. Trim verification is your starting point—RWD models typically carry the 9-speaker base package, while Long Range and Performance trims ship with premium configurations ranging from 15 to 17 speakers depending on production year.
Tesla has revised speaker counts across refresh cycles, so don’t assume a single layout applies universally. Speaker inspection closes the gap between documentation and reality. Check the trunk for subwoofers (premium trims added one or two upward-firing units depending on revision), scan the dash for three midrange drivers, and examine door panels for additional tweeters or dual-woofer arrangements exclusive to premium builds.
Misidentifying your system before purchasing components wastes money and creates fitment problems. Two minutes of physical verification saves considerably more time downstream. The Model 3 audio system was designed from scratch by former Bang & Olufsen engineers, meaning its architecture differs fundamentally from conventional OEM setups you may have modified in other vehicles. It is also worth noting that the Highland refresh introduced significant cabin upgrades, including acoustic rear-window glass, which directly affects how audio performs and how any upgrade should be approached in post-2023 builds.
Power Down the Car and Remove Interior Panels Without Damage
Shutting the Model 3 down correctly before touching any interior panel isn’t optional—it’s the step that separates clean installs from expensive mistakes. Shift into Park, disable Sentry Mode, kill climate control, and close every door, frunk, and trunk before issuing the shutdown command through Controls > Safety > Power Off**. Also disable Bluetooth** to eliminate any wireless-triggered wake events during your work session.
Once you confirm the prompt, the touchscreen goes dark. That black screen is your green light—any active display means the car hasn’t fully settled, so wait it out. Keep in mind that the vehicle doesn’t have a conventional off state, so even after shutdown the car can still wake from certain triggers if conditions aren’t properly managed—deep sleep prevention from overlooked active modes like Camp Mode or scheduled updates is a real risk during extended work sessions.
Before removing trim, inspect airbags, particularly door-mounted side-curtain units, and treat those areas as no-pry zones. Elsewhere, use plastic trim tools, not metal. Tesla interior panels use concealed clips rather than exposed fasteners, so pull straight and evenly—aggressive lateral prying snaps clips that aren’t cheap or fun to source. It’s also worth noting that Tesla’s over-the-air software updates can trigger automatically if a scheduled update was pending, potentially waking the vehicle mid-install and complicating an otherwise clean teardown.
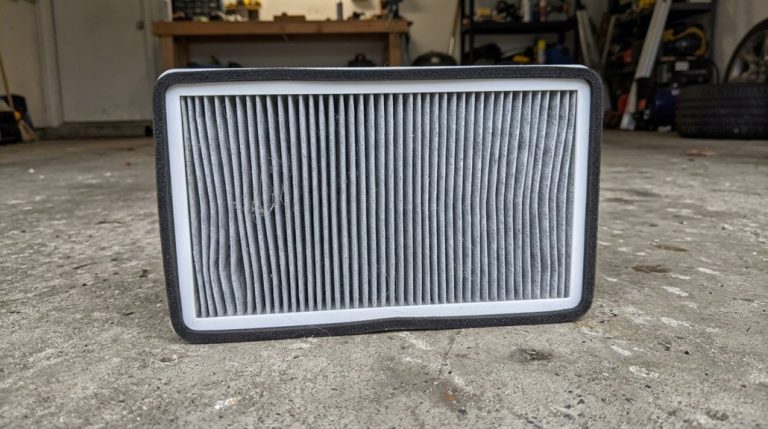
That road noise you hear at highway speed isn’t just background—it’s stealing detail from your Tesla’s audio system every time you turn the volume up. Quiet the cabin before it keeps masking your music with a sound deadening material kit for cars that reduces vibration and road noise so your Tesla speakers can deliver cleaner, sharper audio before you keep blaming the system instead of what’s surrounding it.
Run Signal and Power Wiring Through the Cabin Without Electrical Issues
With the panels off and the car properly powered down, wiring is next—and how you route it determines whether this install stays clean for years or becomes a rattling, chafing mess inside six months.
Use the passenger-side firewall grommet as your primary pass-through. Punch only a cable-sized hole, apply dielectric grease, then feed a stiff leader wire through first. Tape your actual cable to it with a narrow electrical-tape wrap to avoid snagging. For shielded cable routing across the cabin, thread through the factory steel tunnel toward the driver’s side using fish tape as the retrieval tool.
| Step | Detail |
|---|---|
| Grommet entry | Punch minimum hole for 12-gauge wire |
| Leader wire | Stiff wire first, cable second |
| Cabin crossing | Steel tunnel, fish tape retrieval |
| Grounding best practices | Single chassis ground point, no floating grounds |
Leave deliberate slack. Tight pulls stress connectors and guarantee regrets. Before committing to a dedicated hole, check whether an existing firewall opening used by other wires offers a ready-made pass-through that keeps your penetration count low and your moisture sealing intact. Keep your installation documented with receipts and professional-grade records, since professional installation records strengthen your position if Tesla ever evaluates a warranty claim tied to a modified system.
If your Tesla Model 3 audio still feels like it’s missing depth, it’s usually the low-end bass that never quite shows up when you turn the volume up. Fix that empty sound before every drive starts feeling flat with a high-quality subwoofer upgrade for Tesla Model 3 that delivers richer bass and fuller sound without cluttering your cabin before you get used to a system that’s holding your music back.
Install Your Tesla Model 3 Speakers, DSP, and Subwoofer Correctly
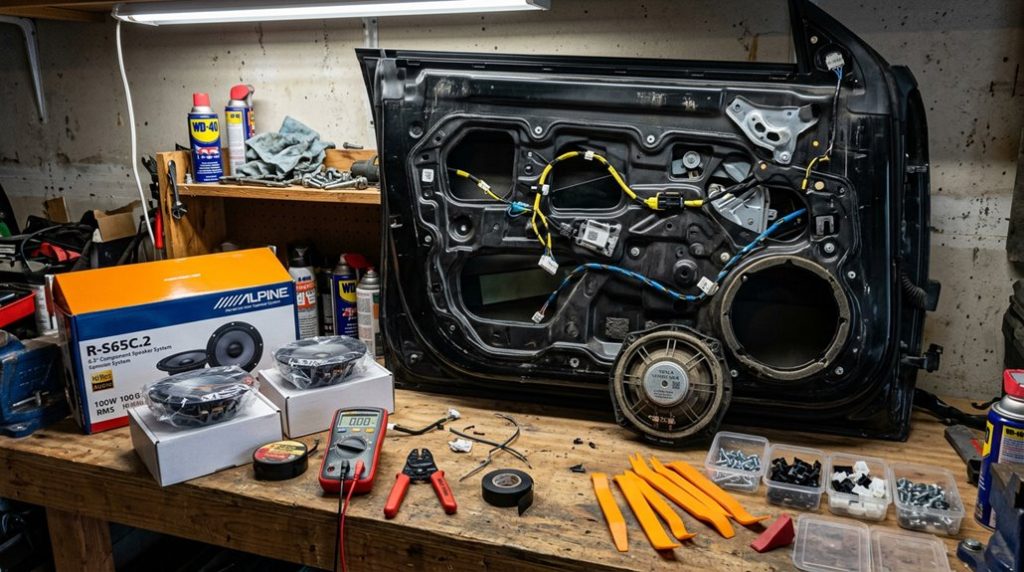
Every speaker, DSP module, and subwoofer you’re installing has a specific mechanical and electrical sequence—skip it, and you’ll either crack a door clip, introduce a ground loop, or spend an afternoon chasing a rattle that traces back to one misaligned fastener. Start with door panels: remove fasteners in order, release clips without prying blind, and swap tweeters and midrange drivers as matched pairs to preserve stereo balance.
Once speakers are seated, configure your DSP before finalizing any mounts. Crossover settings determine which frequencies each driver handles, so mismatched slopes create phase cancellation you’ll hear immediately. Match impedance and power handling to your amplifier’s output. Because the Model 3 combines its infotainment and Autopilot hardware into a single integrated unit, avoid tapping into or disturbing those systems during any audio installation.
For the subwoofer, secure mounting and correct polarity aren’t optional—loose enclosure damping generates resonance that undermines everything upstream. Bolt the sub down, verify polarity with a 1.5V battery tap, then confirm all remote-trigger connections are chained correctly before powering the system. If you’re working on a 2021+ Model 3 SR+, a plug-and-play speaker-enabling harness can activate four additional dormant speakers without cutting a single factory wire.
Frequently Asked Questions
What Does a Tesla Model 3 Audio Upgrade Typically Cost in Total?
If you’re budgeting like most Model 3 owners, expect $400–$1,400 total. Your component breakdown covers speakers and DSP; labor estimates run $240–$900. Watch for hidden fees—subwoofers spike average cost fast.
How Long Does a Complete DIY Model 3 Audio Upgrade Realistically Take?
You’re looking at a full weekend project for an estimated duration of 6–8 hours if you’re a first-timer. Trim removal, cable routing, and reassembly consume most of that time—not the components themselves.
Can I Install Aftermarket Audio Without Voiding My Tesla Warranty?
Yes, you can. The Magnuson-Moss Warranty Act protects you—Tesla must prove causation, not just modification. Clean installs, plug-and-play components, third party certifications, and warranty transferability considerations keep your coverage intact across unrelated systems.
What Skill Level Is Required to Complete This Upgrade Independently?
You’ll need intermediate DIY skills—comfortable with trim removal and connector routing. Speaker swaps are manageable independently, but advanced wiring integration and acoustics tuning push complexity beyond basic ability, requiring professional know-how.
Should I Test the System Before Reinstalling All Interior Trim Panels?
Skipping a bench test is the biggest mistake you can make — verify wiring continuity before reinstalling anything. Power up temporarily, confirm every channel fires correctly, then close it all up.