This is where Tesla’s Sentry Mode comes in to improve the overall security features of your Tesla. But how do you set up Tesla’s Sentry Mode?
After parking the car, go to your Tesla’s security settings and then toggle Sentry Mode to turn on. In the alternative, you can turn your Tesla’s Sentry Mode on using the Tesla app on your phone. You also need to format a USB drive so that you can review the footage on your Tesla’s Sentry Mode.
Because of the security risks involved with expensive cars such as Tesla, you need to make sure that you are doing what you can to protect your vehicle. As such, knowing how to set up Sentry Mode and use it can be one of the biggest things that you can do on your part when it comes to protecting your Tesla.
- Unlocking the Mystery: What is Tesla's Sentry Mode?
- Get Ready to Protect Your Tesla: What You Need to Use Sentry Mode
- Setting It Up: A Walk Through the Process
- Tesla's Sentry Mode vs. the Competition: Making it Stand Out
- Understanding TeslaCam and Its Capabilities:
- Using the Tesla App to Activate
- How to Enable Sentry Mode on Your Tesla Model
- How to Enter and Access the Footage
- Ideal Settings
Unlocking the Mystery: What is Tesla’s Sentry Mode?
When it comes to cars today, one of the many different factors that people tend to consider is the security system that comes with the vehicle.
That’s because many different vehicle manufacturers are now quite concerned about vehicle security especially when the number of carnappers and thieves has been rising. And when you have a pretty expensive car, the issue becomes even bigger.
In that case, having a Tesla can be a problem for those who want to keep their cars secure because of how expensive a Tesla can be.
But the good news is that Tesla cars actually have a good security feature that will allow you to make sure that the vehicle will basically protect itself from any undesirable incident when you leave it alone in your home or in a parking lot. This feature comes in the form of Sentry Mode.

So, basically, Sentry Mode is just using whatever the Tesla already has to protect the vehicle.
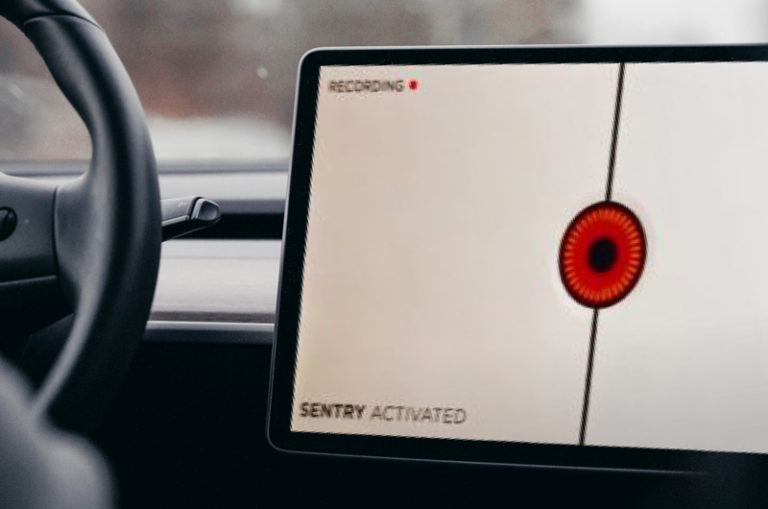
What happens during Sentry Mode is that, when you turn this feature on, the infotainment system will light up and show that the Sentry Mode is active as soon as someone is standing too close to the vehicle. From there, the vehicle will use all of the cameras at its disposal to record its surroundings.
Of course, when someone is trying to tamper with the vehicle such as when that person is already trying to break into your car or do something drastic just to access the vehicle, Sentry Mode will activate the car alarm and increase the brightness of the infotainment display while playing loud music so that the vehicle would be able to alert people nearby or scare away the possible thief.
On top of that, the vehicle will also send a notification to the owner through the Tesla mobile app.
So, the reason why Tesla’s Sentry Mode is important is that it is basically the next step in-car security.
Car alarms and dash cameras have been useful for a very long time but Sentry Mode takes the technology even further thanks to how it makes use of the vehicle’s many different cameras and sensors to give the car a more well-rounded coverage in terms of its security features.
On top of all that, Sentry Mode is a fully automated feature that works on its own the moment you turn it on.
There is no doubt that Teslas are quite expensive, and that fact alone makes it a big target for thieves. As such, having a great security feature for your Tesla should be a good idea.
Get Ready to Protect Your Tesla: What You Need to Use Sentry Mode
Now that you know how Sentry Mode works, let’s now look at what you need to do for this mode to work. Basically, there is nothing that you need here except for a Tesla manufactured in 2017 onwards and a USB drive. This is because earlier Tesla didn’t have Sentry Mode.
Of course, the purpose of the USB drive is for you to have a storage device for the video footage collected by the vehicle when you activate Sentry Mode.
When you are using a USB, you can basically use any USB device that has been formatted to what the Tesla is compatible with. However, the best USB drive is the one that Tesla itself sells because this has already been formatted.
So, before you use your USB storage drive, it is important that you format it first because Teslas will only accept certain storage device formats for your USB device.
However, if you don’t want to use the USB device that Tesla sells, the best you can use is a USB drive that is under 32 GB because that is the only device that’s quite easy to format.
If you have a USB driver that’s under 32 GB, plug the device into your computer. On the device’s name in your Devices and Drivers or in This PC, what you need to do is to right-click on the USB device’s name, click format, and choose the fat32 format style.
After that, open the drive and then create a folder called TeslaCam and then eject the drive.
You can also easily format any kind of USB drive in your Tesla. All you need to do is to plug it in the Tesla’s USB port, go to Safety and Security, and then Format the USB Device.
This is by far the easiest way for you to do it. You can do this if you have a USB device that’s over 32 GB.
You can also talk through the car speaker. Great for practical jokes :)
— Elon Musk (@elonmusk) October 27, 2021
Setting It Up: A Walk Through the Process
Now that you already have everything settled, let’s look at how you can set up Sentry Mode on Tesla.
- The first thing you need to do is to plug your Tesla USB Drive or your formatted 32 GB drive into the USB port found in your Tesla. This should be relatively easy to find because there aren’t plenty of ports on Teslas.
- From there, park your vehicle. This may be at home, in the mall, or in a parking building near your office.
- When you have already parked your car, don’t exit it yet. What you need to do next is to go to your Tesla Settings on the infotainment tablet.
- Go into Safety and Security Settings after you have entered the Settings option.
- You can format the USB device here in case it hasn’t been formatted to fat32 yet.
- After the device has been formatted, the TeslaCam logo should be seen in the upper right corner of the screen. This should be close to the LTE and Bluetooth logos.
- On the same Safety and Security Settings page, that is where you will be given the option to turn on or off your Tesla’s Sentry Mode. By turning this option on, you can even choose which places you don’t want to use Sentry Mode such as places that have been tagged as your home or office because you probably already trust the security in those places. Now, this can be useful because Sentry Mode eats a lot of power.
- If you want to save any of the footage recorded by your Tesla, you can go and click the Dashcam button so that it will automatically use your USB drive to save the footage.
- Tesla’s Sentry Mode should more or less be the same in all Tesla models as long as they have been manufactured from 2017 onwards.
Here’s a rundown of how you can make full use of your Tesla’s Sentry Mode:
Tesla’s Sentry Mode vs. the Competition: Making it Stand Out
When we are comparing Sentry Mode to the security features that some other vehicles have, we are basically comparing it to the tried and tested dashcam that most cars today have. So, with that, let’s look at what makes Sentry Mode more advantageous:
| Features | Tesla | Other Cars |
| Coverage | Nearly 360 degrees. Covers up to 95% of the entire car’s surroundings. | Limited to the front and back of the car most of the time |
| Number of cameras | All four Tesla cameras are used. | Usually limited to only two cameras. |
| Power usage | Four hours of operation can eat about 1.5% of Tesla’s power. | Depends on the dashcam. Some dashcams need an external power supply to function. |
| Video Selection | You have the option to choose the video footage you want to store so that the storage device won’t fill up quickly. | Usually stores all of the recorded footage. Dashcams fill up a storage device rather quickly. |
| Companion app | Sentry Mode works in conjunction with Tesla’s companion app. | Not all dash cams come with companion apps. |
Understanding TeslaCam and Its Capabilities:
TeslaCam is a built-in dashcam system in Tesla vehicles that uses the car’s cameras to record video footage of the vehicle’s surroundings. Here’s what you need to know about TeslaCam and its capabilities:
How It Works
TeslaCam uses the vehicle’s cameras to record video footage and store it on a USB drive. The footage is recorded in a series of 1-minute clips, and is stored in a special folder on the USB drive. When the USB drive is full, the oldest clips are automatically deleted to make room for new ones.
Accessing the Footage
To access the video footage recorded by TeslaCam, you’ll need to remove the USB drive from the car and plug it into a computer. Once you’ve connected the USB drive to your computer, you can view the video clips using any media player software.
Storage Requirements
To use TeslaCam, you’ll need a USB drive with at least 32GB of storage capacity. Tesla recommends using a USB drive with a write speed of at least 4 MB/s, and a read speed of at least 10 MB/s. You can use either a USB-A or USB-C drive, depending on the type of USB port in your Tesla.
Dashcam Recording
In addition to using TeslaCam for security purposes, you can also use it as a dashcam to record your drives. To enable dashcam recording, you’ll need to create a new folder on your USB drive called “TeslaCam”. Any footage recorded while driving will be saved to this folder.
Using the Tesla App to Activate
If you want to activate or access Sentry Mode remotely, you can use the Tesla app on your smartphone. Here’s how to use the Tesla app to activate Sentry Mode:
Step 1: Open the App
Open the Tesla app on your smartphone and sign in to your Tesla account.
Step 2: Select Your Tesla Vehicle
Select the Tesla vehicle for which you want to activate Sentry Mode. You can select the vehicle by tapping on the vehicle’s image or name.
Step 3: Tap on Security
Once you have selected your vehicle, tap on the “Security” icon in the bottom menu bar.
Step 4: Setup Tesla Sentry Mode
To activate Sentry Mode, simply toggle the “Sentry Mode” feature to the “On” position.
Step 5: Accessing Sentry Mode Footage
To access Sentry Mode footage, tap on “Cameras” and select “Sentry Mode Events.” From there, you can view any events captured by Sentry Mode.
Note:
In order to use the Tesla app to access Sentry Mode, your vehicle must have an active Wi-Fi or cellular connection. Additionally, you must have the appropriate level of access to the vehicle in the Tesla app, depending on the specific settings that have been enabled for the car.
How to Enable Sentry Mode on Your Tesla Model
To enable Sentry Mode on your Tesla Model, follow these simple steps:
Step 1: Check Compatibility
Sentry Mode is available on all Tesla Model 3, Model Y, Model S, and Model X vehicles manufactured after October 2016. If your Tesla Model is older than this, then it may not be compatible with Sentry Mode.
Step 2: Access Sentry Features
To enable Sentry Mode, go to your Tesla Model’s settings, and then tap on “Safety & Security.” Next, scroll down until you see “Sentry Mode,” and tap on it to open the Sentry Mode settings.
Step 3: Enable The Mode
In the Sentry Mode settings, toggle the “Sentry Mode” switch to the on position. You can also adjust other settings such as the “Alarm” and “Display” settings.
Step 4: Insert USB Drive
In order to use Sentry Mode, you need to insert a USB drive into your Tesla Model. The USB drive should be at least 32 GB in size and have a minimum of 2 GB of free space. The USB drive will be used to store the Sentry Mode footage.
Step 5: Confirm Functionality
After enabling Sentry Mode and inserting the USB drive, you’re ready to go! The next time you park your Tesla Model and leave the vehicle, Sentry Mode will automatically activate and start recording footage of any detected events.
Sentry Mode works by using the vehicle’s cameras to detect potential threats and record any suspicious activity. If the cameras detect any suspicious behavior, the Tesla’s alarm will activate, and the car’s touchscreen will display a message informing the would-be perpetrator that they are being recorded.
How to Enter and Access the Footage
After you’ve set up Sentry Mode on your Tesla Model, the cameras will automatically start recording whenever the car detects a threat. This footage is saved to the TeslaCam folder on the USB drive you’ve installed in your car. In this section, we’ll show you how to access this footage.
To access your TeslaCam footage, first, you need to remove the USB drive from your car and plug it into your computer. Once you’ve done that, open the TeslaCam folder on the USB drive to access your footage.
Playing the Footage
To play your TeslaCam footage, you’ll need a media player that supports the video format used by the TeslaCam. Most media players should be able to play the footage without any issues.
Footage File Structure
The TeslaCam footage is organized by date and time, with each video file containing a timestamp in its filename. Each clip is saved in a separate folder, with the folder name corresponding to the date and time the clip was recorded.
Understanding File Names
The TeslaCam footage file names consist of a few parts. The first part is the camera name (e.g., front, rear, left repeater, right repeater). The second part is the date and time the clip was recorded, and the third part is a unique identifier for the clip.
Footage Privacy Policy
It’s important to note that the TeslaCam footage may contain sensitive information, and you should be mindful of the privacy implications of sharing or publishing this footage. Make sure you review Tesla’s privacy policy and any applicable laws before sharing or publishing any TeslaCam footage.
Ideal Settings
Tesla Sentry Mode comes with a range of settings that can be adjusted to suit your needs. These sentry mode settings allow you to configure how the system behaves when it detects an intrusion or disturbance near your vehicle.
To adjust these settings, you can access the sentry mode configuration through your Tesla’s touchscreen display. From here, you can select the sentry mode settings that you want to modify.
The sentry mode settings include details such as the level of sensitivity for detecting an intrusion, the type of alarm or notification that you receive, and how long the footage is stored. You can also adjust the volume of the alarm, as well as the type of visual notification that appears on the screen.
It’s important to consider your specific needs when adjusting the sentry mode settings. For instance, if you frequently park your vehicle in a high-crime area, you may want to set a higher sensitivity level and increase the volume of the alarm. On the other hand, if you park in a quiet neighborhood, you may not want the alarm to be too loud, so you can adjust it to a lower level.
Check out these 20 great gift ideas for yourself or a Tesla fanboy.
Contact Us if you have any questions or queries.